Difference between pages "Chi-Nu" and "Chi-He"
m (Domestic Name) |
m (→See also) |
||
| Line 1: | Line 1: | ||
{{About | {{About | ||
| about = Japanese medium tank '''{{PAGENAME}}''' | | about = Japanese medium tank '''{{PAGENAME}}''' | ||
| − | | usage = premium version | + | | usage = the premium version |
| − | | link = Chi- | + | | link = Chi-He (5th Regiment) |
}} | }} | ||
{{Specs-Card | {{Specs-Card | ||
| − | |code= | + | |code=jp_type_1_chi_he |
|images={{Specs-Card-Image|GarageImage_{{PAGENAME}}.jpg|ArtImage_{{PAGENAME}}.png}} | |images={{Specs-Card-Image|GarageImage_{{PAGENAME}}.jpg|ArtImage_{{PAGENAME}}.png}} | ||
}} | }} | ||
| Line 11: | Line 11: | ||
== Description == | == Description == | ||
<!-- ''In the description, the first part should be about the history of the creation and combat usage of the vehicle, as well as its key features. In the second part, tell the reader about the ground vehicle in the game. Insert a screenshot of the vehicle, so that if the novice player does not remember the vehicle by name, he will immediately understand what kind of vehicle the article is talking about.'' --> | <!-- ''In the description, the first part should be about the history of the creation and combat usage of the vehicle, as well as its key features. In the second part, tell the reader about the ground vehicle in the game. Insert a screenshot of the vehicle, so that if the novice player does not remember the vehicle by name, he will immediately understand what kind of vehicle the article is talking about.'' --> | ||
| − | The '''{{Specs|name}}''' ({{Annotation| | + | The '''{{Specs|name}}''' ({{Annotation|一式中戦車 「チへ」|Ichi-Shiki Chū-Sensha [Chi-He]}}) was a tank designed to streamline the design of the [[Chi-Ha Kai|Type 97 Chi-Ha Kai]] and improve on armour and engine power. While the streamlining of the design featured welded armour instead of riveted armour, a 5th crew member and slightly more armour, the final design only weighed 1.5 tons more than the Chi-Ha Kai. Production only caught on in 1943 due to the Navy's priority in raw materials and all Chi-He's were reserved for the defence of the Home Islands. While the Chi-He did improve on the Chi-Ha Kai, it didn't improve enough to compete with the likes of a [[M4 Sherman (Family)|M4 Sherman]], and served its hull to build the [[Chi-Nu|Type 3 Chi-Nu]]. |
| − | + | It was introduced in [[Update 1.65 "Way of the Samurai"]] along with the initial Japanese Ground Forces Tree. Featuring better armour, slightly better mobility with the same [[Type 1 (47 mm)|47 mm Type 1]] gun as its [[Chi-Ha Kai|Chi-Ha Kai]] predecessor, the Chi-He is an enjoyable tank to play in the early ranks of the game. Stick to allies and use mobility to get to the point with other fast vehicles. Use its good gun depression to hide behind hills and snipe enemies. With its good reverse speed, it can easily get out of nasty situations or hide quickly. | |
| − | |||
| − | |||
== General info == | == General info == | ||
| Line 21: | Line 19: | ||
{{Specs-Tank-Armour}} | {{Specs-Tank-Armour}} | ||
<!-- ''Describe armour protection. Note the most well protected and key weak areas. Appreciate the layout of modules as well as the number and location of crew members. Is the level of armour protection sufficient, is the placement of modules helpful for survival in combat? If necessary use a visual template to indicate the most secure and weak zones of the armour.'' --> | <!-- ''Describe armour protection. Note the most well protected and key weak areas. Appreciate the layout of modules as well as the number and location of crew members. Is the level of armour protection sufficient, is the placement of modules helpful for survival in combat? If necessary use a visual template to indicate the most secure and weak zones of the armour.'' --> | ||
| − | '''Armour | + | There is nothing impressive here in terms of armour, the Chi-He features 50 mm, poorly angled, frontal armour. This is not the kind of plate that can take any punishment at the battle rating, it will only bounce poorly aimed shots. The five-man crew inside makes the tank very survivable, leaving some room for mistakes. Side armour is vulnerable to heavy machine gun and autocannon fire, so beware flanking fast tanks. |
| + | |||
| + | '''Armour Type:''' | ||
* Rolled homogeneous armour | * Rolled homogeneous armour | ||
| − | * Cast homogeneous armour (Gun mantlet) | + | * Cast homogeneous armour (Gun mantlet, Machine gun ports) |
{| class="wikitable" | {| class="wikitable" | ||
| Line 32: | Line 32: | ||
| Hull || 50 mm (15°) ''Front plate'' <br> 12 mm (76°) ''Front glacis'' <br> 50 mm (20°) ''Joint plate'' <br> 8.5 mm (65°) ''Lower glacis'' || 20 mm (15-30°) ''Top'' <br> 25 mm ''Bottom'' || 20 mm (0-20°) ''Top'' <br> 8.5 mm (63°) ''Bottom'' || 12 mm | | Hull || 50 mm (15°) ''Front plate'' <br> 12 mm (76°) ''Front glacis'' <br> 50 mm (20°) ''Joint plate'' <br> 8.5 mm (65°) ''Lower glacis'' || 20 mm (15-30°) ''Top'' <br> 25 mm ''Bottom'' || 20 mm (0-20°) ''Top'' <br> 8.5 mm (63°) ''Bottom'' || 12 mm | ||
|- | |- | ||
| − | | Turret || | + | | Turret || 25 + 25 mm (10°) ''Turret front'' <br> 50 mm (0-10°) ''Gun mantlet'' || 25 mm (10°) || 25 mm ''Turret rear'' <br> 50 mm (0-57°) ''Machine gun port'' || 12 mm |
| − | |||
| − | |||
|- | |- | ||
| − | | Cupola || 50 mm || 12 mm | + | | Cupola || 50 mm || 50 mm || 50 mm || 12 mm |
|- | |- | ||
|} | |} | ||
'''Notes:''' | '''Notes:''' | ||
| − | * Suspension wheels | + | * Suspension wheels both 15 mm thick |
| + | * Tracks are 20 mm thick. | ||
| + | * Front of turret has bolted on 25 mm armour to total up to 50 mm thick as the rest of the front. | ||
=== Mobility === | === Mobility === | ||
| Line 48: | Line 48: | ||
{{tankMobility|abMinHp=372|rbMinHp=212}} | {{tankMobility|abMinHp=372|rbMinHp=212}} | ||
| + | |||
| + | This is one of the main feature of the Chi-He, it enables it to do anything a commander want with it. Want to be first on the spot? With some skill/luck, the Chi-He can! Want to flank? follow other light tanks in the move, provide them with enhanced firepower! The enemy team is coming over? Hit the gas (in a rearward position) and fire while retreating. | ||
=== Modifications and economy === | === Modifications and economy === | ||
| Line 57: | Line 59: | ||
{{Specs-Tank-Weapon|1}} | {{Specs-Tank-Weapon|1}} | ||
<!-- ''Give the reader information about the characteristics of the main gun. Assess its effectiveness in a battle based on the reloading speed, ballistics and the power of shells. Do not forget about the flexibility of the fire, that is how quickly the cannon can be aimed at the target, open fire on it and aim at another enemy. Add a link to the main article on the gun: <code><nowiki>{{main|Name of the weapon}}</nowiki></code>. Describe in general terms the ammunition available for the main gun. Give advice on how to use them and how to fill the ammunition storage.'' --> | <!-- ''Give the reader information about the characteristics of the main gun. Assess its effectiveness in a battle based on the reloading speed, ballistics and the power of shells. Do not forget about the flexibility of the fire, that is how quickly the cannon can be aimed at the target, open fire on it and aim at another enemy. Add a link to the main article on the gun: <code><nowiki>{{main|Name of the weapon}}</nowiki></code>. Describe in general terms the ammunition available for the main gun. Give advice on how to use them and how to fill the ammunition storage.'' --> | ||
| − | {{main|Type | + | {{main|Type 1 (47 mm)}} |
| + | |||
| + | Comparatively to other light/medium tanks at this battle rating, the 47 mm Type 1 gun is quite surprising with 77 mm of penetration at point-blank range and has a good reload speed. Plus, this fires APHE shells, which do great post-penetration damage. Comparatively, the [[20-K (45 mm)]] gun on Russian BR 1.0-2.7 tanks has only 62 mm of penetration in similar conditions. Furthermore, a shoulder stabiliser allows for safer advances on enemy positions (although it is important to note that it only works at low speed). A top-mounted MG is really useful when dealing with unarmoured SPG and SPAA one might encounter at the battle rating. | ||
| + | |||
| + | One thing to keep in mind compared to [[Chi-Ha Kai]] is that it still retains the same hand-cranked turret with additional 25 mm plates to improve the frontal armour to a max of 50 mm. This however slows down the turret rotations speeds due the added weight. | ||
{| class="wikitable" style="text-align:center" width="100%" | {| class="wikitable" style="text-align:center" width="100%" | ||
|- | |- | ||
| − | ! colspan="5" | [[Type | + | ! colspan="5" | [[Type 1 (47 mm)|47 mm Type 1]] || colspan="5" | Turret rotation speed (°/s) || colspan="4" | Reloading rate (seconds) |
|- | |- | ||
! Mode !! Capacity !! Vertical !! Horizontal !! Stabilizer | ! Mode !! Capacity !! Vertical !! Horizontal !! Stabilizer | ||
| Line 68: | Line 74: | ||
|- | |- | ||
! ''Arcade'' | ! ''Arcade'' | ||
| − | | rowspan="2" | | + | | rowspan="2" | 120 || rowspan="2" | -15°/+20° || rowspan="2" | ±180° || rowspan="2" | {{Annotation|Shoulder|up to 10 km/h}} || 13.3 || 18.4 || 22.4 || 24.8 || 26.4 || rowspan="2" | 4.29 || rowspan="2" | 3.80 || rowspan="2" | 3.50 || rowspan="2" | 3.30 |
|- | |- | ||
! ''Realistic'' | ! ''Realistic'' | ||
| − | | | + | | 8.3 || 9.8 || 11.9 || 13.2 || 14.0 |
|- | |- | ||
|} | |} | ||
==== Ammunition ==== | ==== Ammunition ==== | ||
| − | { | + | {{:Type 1 (47 mm)/Ammunition|Type 1 APHE, Type 1 HE}} |
| − | |||
| − | |||
| − | |||
| − | |||
| − | |||
| − | |||
| − | |||
| − | |||
| − | | Type 1 APHE | ||
| − | |||
| − | |||
| − | |||
| − | |||
| − | |||
| − | |||
| − | |||
| − | |||
| − | |||
| − | |||
| − | |||
| − | |||
| − | |||
| − | |||
| − | |||
| − | |||
| − | |||
| − | |||
| − | |||
| − | |||
| − | |||
| − | |||
| − | |||
| − | |||
| − | |||
| − | |||
| − | |||
| − | |||
| − | |||
| − | |||
| − | |||
| − | |||
| − | |||
| − | |||
| − | |||
| − | |||
| − | |||
==== [[Ammo racks]] ==== | ==== [[Ammo racks]] ==== | ||
| − | |||
| − | |||
{| class="wikitable" style="text-align:center" | {| class="wikitable" style="text-align:center" | ||
|- | |- | ||
| Line 133: | Line 91: | ||
! 2nd<br>rack empty | ! 2nd<br>rack empty | ||
! 3rd<br>rack empty | ! 3rd<br>rack empty | ||
| + | ! 4th<br>rack empty | ||
| + | ! 5th<br>rack empty | ||
| + | ! 6th<br>rack empty | ||
| + | ! 7th<br>rack empty | ||
| + | ! 8th<br>rack empty | ||
| + | ! 9th<br>rack empty | ||
| + | ! 10th<br>rack empty | ||
| + | ! 11th<br>rack empty | ||
! Visual<br>discrepancy | ! Visual<br>discrepancy | ||
|- | |- | ||
| − | | ''' | + | | '''120''' || 91 ''(+29)'' || 76 ''(+44)'' || 73 ''(+47)'' || 62 ''(+58)'' || 51 ''(+69)'' || 40 ''(+80)'' || 29 ''(+91)'' || 21 ''(+99)'' || 15 ''(+105)'' || 9 ''(+111)'' || 1 ''(+119)'' || No |
|- | |- | ||
|} | |} | ||
| + | [[File:Ammoracks_{{PAGENAME}}.png|right|thumb|x250px|[[Ammo racks]] of the {{PAGENAME}}]] | ||
| + | '''Note''': | ||
| − | Turret empty: | + | * Turret empty: 73 ''(+47)'' shells. |
=== Machine guns === | === Machine guns === | ||
| Line 153: | Line 121: | ||
! Mount !! Capacity (Belt) !! Fire rate !! Vertical !! Horizontal | ! Mount !! Capacity (Belt) !! Fire rate !! Vertical !! Horizontal | ||
|- | |- | ||
| − | | | + | | Hull || 3,000 (20) || 499 || ±10° || ±15° |
|- | |- | ||
| − | | | + | | Pintle || 1,000 (20) || 499 || -10°/+70° || ±60° |
|- | |- | ||
|} | |} | ||
| Line 161: | Line 129: | ||
== Usage in battles == | == Usage in battles == | ||
<!-- ''Describe the tactics of playing in the vehicle, the features of using vehicles in the team and advice on tactics. Refrain from creating a "guide" - do not impose a single point of view but instead give the reader food for thought. Describe the most dangerous enemies and give recommendations on fighting them. If necessary, note the specifics of the game in different modes (AB, RB, SB).'' --> | <!-- ''Describe the tactics of playing in the vehicle, the features of using vehicles in the team and advice on tactics. Refrain from creating a "guide" - do not impose a single point of view but instead give the reader food for thought. Describe the most dangerous enemies and give recommendations on fighting them. If necessary, note the specifics of the game in different modes (AB, RB, SB).'' --> | ||
| − | |||
| − | + | As the successor of the Chi-Ha, the Chi-He has a redesigned hull with thicker armour, a more powerful engine and an up-armoured turret from the Chi-Ha Kai, so the front is overall at 50 mm effective. This will result in a very similar playstyle as the Chi-Ha Kai with the added benefits of being an upgrade. | |
| + | |||
| + | Unlike the [[Chi-Ha Kai|Type 97 Chi-Ha Kai]], the Type 1 Chi-He has some more armour and a stronger engine to rely on and it is able to brawl on its own with the fast rate of fire. But as previously mentioned on [[Chi-He#Main armament|Main armament]], the Chi-He retains the same hand-cranked turret with additional armour, slowing down the already mediocre turning time by a slight amount. | ||
| − | + | Literally on top of armour and engine upgrades, the Chi-He gets an additional pintle point anti-aircraft machine gun, even though the [[Type 97 tank (7.7 mm)|Type 97 7.7 mm]] has a low clip capacity, it can prove useful for pinning enemy units and even getting hits to down enemy planes. | |
| − | + | The best practice for the Chi-He (and other WWII-era Japanese tanks) is to always point forward, the front armour has pre-angled sides, so angling only hurts your pre-angles and weaker side armour. It's not worth trying to get more out of the 50 mm frontal effective protection. | |
| − | + | '''Enemies worth noting:''' | |
| − | + | * B1 bis / ter: the B1 can easily destroy the Chi-Ha when using both of its guns, but when angling only the 47 mm gun is available, meaning that the Chi-Ha can take some more hits. It is very hard to destroy the Char B1 from a distance, so get as close as possible with the ideal range being no more than 300 m. Aim at their flat hull side, turret side, hull cannon mount or the driving compartment (the near-vertical frontal armour right below the turret). Upon penetrating, the Chi-Ha's 47 mm APHE can knock out several crews, and your quick reload allows you to finish the rest off in time. However if the B1 has folded armour plates on their hull sides then it is a B1 ter, avoid shooting at its sides. | |
| + | * [[M4A3 (105)]]: This low-rank Sherman posts a huge threat to every of its opponents due to its superior armour and destructive firepower. Its armour is overall quite tough to penetrate with your small 47 mm gun, but it can be solved by careful aiming. If the M4 is within 200 m, shoot at the vertical part of its gun mantlet or its side if exposed. One penetration might not kill all the crew, however two are generally enough. If it's up close and hull down, try shooting at its gun barrel to disarm it, but one shot is not guaranteed to destroy the barrel. When the M4 is further than 400 m away, all of your shells will perform poorly at penetrating its armour, so disengage or wait until it gets closer. Remember to not get hit by it, its HEAT is able to knock the Chi-He out with ease. | ||
=== Pros and cons === | === Pros and cons === | ||
| Line 178: | Line 148: | ||
'''Pros:''' | '''Pros:''' | ||
| − | * | + | * 47 mm cannon can do some decent damage |
| − | * | + | * Small profile |
| − | * | + | * Gunner supported stabilization, can take accurate shots at low speeds |
| − | * | + | * Top-mounted MG |
| − | * | + | * Fast reverse speed (2 reverse gears) |
| + | * Fast in forward motion | ||
| + | * Frontal transmission | ||
| + | * Awesome gun depression of -15° | ||
| + | * Fast reloading rate | ||
'''Cons:''' | '''Cons:''' | ||
| − | * | + | * Thin side armour means angling front armour could expose weak armour |
| − | * | + | * 47 mm gun is so inaccurate, to the point where it can barely be used past 500 meters. |
| − | * | + | * Packed 5-men crew can lead to an easy knock out if penetrated |
| − | * | + | * 50 mm front armour, poorly angled |
| − | * | + | * Big ammo racks in the turret (carry only half-ammo load) |
| − | * | + | * Long and narrow hull: hard to turn on the spot |
== History == | == History == | ||
<!-- ''Describe the history of the creation and combat usage of the vehicle in more detail than in the introduction. If the historical reference turns out to be too long, take it to a separate article, taking a link to the article about the vehicle and adding a block "/History" (example: <nowiki>https://wiki.warthunder.com/(Vehicle-name)/History</nowiki>) and add a link to it here using the <code>main</code> template. Be sure to reference text and sources by using <code><nowiki><ref></ref></nowiki></code>, as well as adding them at the end of the article with <code><nowiki><references /></nowiki></code>. This section may also include the vehicle's dev blog entry (if applicable) and the in-game encyclopedia description (under <code><nowiki>=== In-game description ===</nowiki></code>, also if applicable).'' --> | <!-- ''Describe the history of the creation and combat usage of the vehicle in more detail than in the introduction. If the historical reference turns out to be too long, take it to a separate article, taking a link to the article about the vehicle and adding a block "/History" (example: <nowiki>https://wiki.warthunder.com/(Vehicle-name)/History</nowiki>) and add a link to it here using the <code>main</code> template. Be sure to reference text and sources by using <code><nowiki><ref></ref></nowiki></code>, as well as adding them at the end of the article with <code><nowiki><references /></nowiki></code>. This section may also include the vehicle's dev blog entry (if applicable) and the in-game encyclopedia description (under <code><nowiki>=== In-game description ===</nowiki></code>, also if applicable).'' --> | ||
| + | {{main|Chi-He (Family)|l1=History of the Type 1 Chi-He}} | ||
===Development=== | ===Development=== | ||
| − | + | The Imperial Japanese Army's main tank, the [[Chi-Ha|Type 97 Chi-Ha]], was becoming rather outdated by the turn of the decade in 1940. The 30 mm front plate armour was vulnerable to standard anti-tank weaponry and the riveted design post a hazard to the tank crew by spalling. In 1941, work began on modernizing the design up to new industrial standards.<ref name="ZalogaJapaneseTank">Zaloga Steven. ''Japanese Tanks 1939-1945'' Great Britain: Osprey Publishing Ltd., 2007</ref> | |
| + | |||
| + | The first step in the modernizing design was to go towards a welded design rather than rivveted. The front glacis plate was also simplified into a large flat 50 mm armour plate rather than the curved one. The increased armour meant an increased weight, so the Japanese added the improved Type 100 diesel engine, capable of pumping out 240 hp to propel the tank. This new tank was accepted as the '''Type 1 Chi-He'''.<ref name="ZalogaJapaneseTank">Zaloga Steven. ''Japanese Tanks 1939-1945'' Great Britain: Osprey Publishing Ltd., 2007</ref> | ||
| − | + | During the tank's preparation for mass-production, a request by the commander of the 7th Tank Regiment calling for an improved armament on the Type 97 Chi-Ha was received by the Mitsubishi factory. With the Type 1 Chi-He still needing time to enter production levels, let alone the resources needed to manufacture completely new tanks, it was placed on hold and priority was placed on improving the Type 97. This lead to the cheaper method of adapting the Type 97 to using the Type 1 turret with the 47 mm cannon, producing to the [[Chi-Ha Kai|Type 97 Chi-Ha Kai]]. This delayed the mass-production of the Type 1 Chi-He until February 1944, resulting in only 170 tanks produced before the end of the war.<ref name="ZalogaChiHavsSherman">Zaloga Steven. ''M4 Sherman vs Type 97 Chi-Ha: The Pacific 1945'' Great Britain: Osprey Publishing Ltd., 2012</ref> | |
===Combat usage=== | ===Combat usage=== | ||
| − | + | Despite its relatively early production life over late-war Japanese tanks and its improved characteristics, the Type 1 Chi-He would see its combat life held in reserves in the Japanese home islands. They would never see use in the battlefield before Japan surrendered in August 1945. | |
== Media == | == Media == | ||
<!-- ''Excellent additions to the article would be video guides, screenshots from the game, and photos.'' --> | <!-- ''Excellent additions to the article would be video guides, screenshots from the game, and photos.'' --> | ||
| − | ; | + | ;Skins |
| − | + | ||
| − | + | * [https://live.warthunder.com/feed/camouflages/?vehicle=jp_type_1_chi_he Skins and camouflages for the {{PAGENAME}} from live.warthunder.com.] | |
| − | + | ||
| + | ;Videos | ||
| + | {{Youtube-gallery|4_cJ1CpEatw|'''Best gun depression''' discusses the {{PAGENAME}} at 1:33 - ''War Thunder Official Channel''}} | ||
== See also == | == See also == | ||
| − | ''Links to the articles on the War Thunder Wiki that you think will be useful for the reader, for example:'' | + | <!-- ''Links to the articles on the War Thunder Wiki that you think will be useful for the reader, for example:'' |
* ''reference to the series of the vehicles;'' | * ''reference to the series of the vehicles;'' | ||
| − | * ''links to approximate analogues of other nations and research trees.'' | + | * ''links to approximate analogues of other nations and research trees.'' --> |
| + | |||
| + | ;Related Development | ||
| + | * [[Chi-Ha (Family)]] - <small>(Predecessor)</small> | ||
| + | ** [[Chi-Ha Kai]] | ||
| + | * [[Chi-He (Family)]] | ||
| + | ** [[Ho-I]] - <small>(Gun tank variant)</small> | ||
| + | * [[Ka-Chi]] - <small>(Inspired navy amphibious variant)</small> | ||
| + | |||
| + | ;Other vehicles of similar configuration and role | ||
| + | * [[File:Czech flag.png|30px|link=]] [[File:Germany flag.png|30px|link=]] [[LT-38 (Family)|Pz.38(t)]] | ||
| + | * [[File:Germany flag.png|30px|link=]] [[Pz.III (Disambiguation)|Pz.III (Family)]] - <small>(Early models)</small> | ||
| + | * [[File:Kingdom Hungary flag.png|30px|link=]] [[Turan I]] | ||
| + | * [[File:Kingdom Italy flag.png|30px|link=]] [[M15/42]] | ||
| + | * [[File:France flag.png|30px|link=]] [[S.35]] | ||
| + | * [[File:Britain flag.png|30px|link=]] [[Crusader (Family)|Crusader]] | ||
| + | * [[File:Sweden flag.png|30px|link=]] [[Lago I]] | ||
== External links == | == External links == | ||
<!-- ''Paste links to sources and external resources, such as:'' | <!-- ''Paste links to sources and external resources, such as:'' | ||
* ''topic on the official game forum;'' | * ''topic on the official game forum;'' | ||
| − | |||
* ''other literature.'' --> | * ''other literature.'' --> | ||
| − | |||
| − | + | * [[wt:en/news/4349-development-type-1-chi-he-an-updated-classic-en/|[Devblog] Type 1 Chi-He – An Updated Classic]] | |
| − | + | * [[wikipedia:Type_1_Chi-He_medium_tank|[Wikipedia] Type 1 Chi-He medium tank]] | |
| − | + | ||
| − | + | ===References=== | |
| − | </ | + | <references /> |
| + | {{TankManufacturer Mitsubishi}} | ||
{{Japan medium tanks}} | {{Japan medium tanks}} | ||
Latest revision as of 10:16, 20 August 2024
| This page is about the Japanese medium tank Chi-He. For the premium version, see Chi-He (5th Regiment). |


Contents
Description
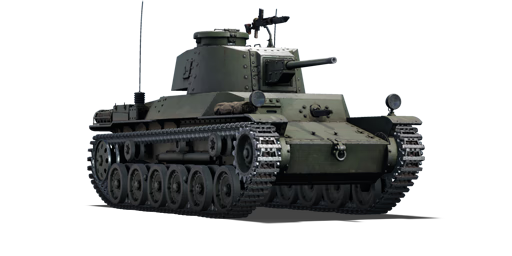
The Type 1 Chi-He (一式中戦車 「チへ」) was a tank designed to streamline the design of the Type 97 Chi-Ha Kai and improve on armour and engine power. While the streamlining of the design featured welded armour instead of riveted armour, a 5th crew member and slightly more armour, the final design only weighed 1.5 tons more than the Chi-Ha Kai. Production only caught on in 1943 due to the Navy's priority in raw materials and all Chi-He's were reserved for the defence of the Home Islands. While the Chi-He did improve on the Chi-Ha Kai, it didn't improve enough to compete with the likes of a M4 Sherman, and served its hull to build the Type 3 Chi-Nu.
It was introduced in Update 1.65 "Way of the Samurai" along with the initial Japanese Ground Forces Tree. Featuring better armour, slightly better mobility with the same 47 mm Type 1 gun as its Chi-Ha Kai predecessor, the Chi-He is an enjoyable tank to play in the early ranks of the game. Stick to allies and use mobility to get to the point with other fast vehicles. Use its good gun depression to hide behind hills and snipe enemies. With its good reverse speed, it can easily get out of nasty situations or hide quickly.
General info
Survivability and armour
There is nothing impressive here in terms of armour, the Chi-He features 50 mm, poorly angled, frontal armour. This is not the kind of plate that can take any punishment at the battle rating, it will only bounce poorly aimed shots. The five-man crew inside makes the tank very survivable, leaving some room for mistakes. Side armour is vulnerable to heavy machine gun and autocannon fire, so beware flanking fast tanks.
Armour Type:
- Rolled homogeneous armour
- Cast homogeneous armour (Gun mantlet, Machine gun ports)
| Armour | Front | Sides | Rear | Roof |
|---|---|---|---|---|
| Hull | 50 mm (15°) Front plate 12 mm (76°) Front glacis 50 mm (20°) Joint plate 8.5 mm (65°) Lower glacis |
20 mm (15-30°) Top 25 mm Bottom |
20 mm (0-20°) Top 8.5 mm (63°) Bottom |
12 mm |
| Turret | 25 + 25 mm (10°) Turret front 50 mm (0-10°) Gun mantlet |
25 mm (10°) | 25 mm Turret rear 50 mm (0-57°) Machine gun port |
12 mm |
| Cupola | 50 mm | 50 mm | 50 mm | 12 mm |
Notes:
- Suspension wheels both 15 mm thick
- Tracks are 20 mm thick.
- Front of turret has bolted on 25 mm armour to total up to 50 mm thick as the rest of the front.
Mobility
| Game Mode | Max Speed (km/h) | Weight (tons) | Engine power (horsepower) | Power-to-weight ratio (hp/ton) | |||
|---|---|---|---|---|---|---|---|
| Forward | Reverse | Stock | Upgraded | Stock | Upgraded | ||
| Arcade | Expression error: Unexpected * operator. | 372 | Expression error: Unexpected round operator. | __.__ | |||
| Realistic | 212 | Expression error: Unexpected round operator. | __.__ | ||||
This is one of the main feature of the Chi-He, it enables it to do anything a commander want with it. Want to be first on the spot? With some skill/luck, the Chi-He can! Want to flank? follow other light tanks in the move, provide them with enhanced firepower! The enemy team is coming over? Hit the gas (in a rearward position) and fire while retreating.
Modifications and economy
Armaments
Main armament
Comparatively to other light/medium tanks at this battle rating, the 47 mm Type 1 gun is quite surprising with 77 mm of penetration at point-blank range and has a good reload speed. Plus, this fires APHE shells, which do great post-penetration damage. Comparatively, the 20-K (45 mm) gun on Russian BR 1.0-2.7 tanks has only 62 mm of penetration in similar conditions. Furthermore, a shoulder stabiliser allows for safer advances on enemy positions (although it is important to note that it only works at low speed). A top-mounted MG is really useful when dealing with unarmoured SPG and SPAA one might encounter at the battle rating.
One thing to keep in mind compared to Chi-Ha Kai is that it still retains the same hand-cranked turret with additional 25 mm plates to improve the frontal armour to a max of 50 mm. This however slows down the turret rotations speeds due the added weight.
| 47 mm Type 1 | Turret rotation speed (°/s) | Reloading rate (seconds) | |||||||||||
|---|---|---|---|---|---|---|---|---|---|---|---|---|---|
| Mode | Capacity | Vertical | Horizontal | Stabilizer | Stock | Upgraded | Full | Expert | Aced | Stock | Full | Expert | Aced |
| Arcade | 120 | -15°/+20° | ±180° | Shoulder | 13.3 | 18.4 | 22.4 | 24.8 | 26.4 | 4.29 | 3.80 | 3.50 | 3.30 |
| Realistic | 8.3 | 9.8 | 11.9 | 13.2 | 14.0 | ||||||||
Ammunition
| Penetration statistics | |||||||
|---|---|---|---|---|---|---|---|
| Ammunition | Type of warhead |
Penetration @ 0° Angle of Attack (mm) | |||||
| 10 m | 100 m | 500 m | 1,000 m | 1,500 m | 2,000 m | ||
| Type 1 APHE | APHE | 77 | 75 | 67 | 58 | 50 | 44 |
| Type 1 HE | HE | 10 | 9 | 8 | 7 | 5 | 5 |
| Shell details | ||||||||||||
|---|---|---|---|---|---|---|---|---|---|---|---|---|
| Ammunition | Type of warhead |
Velocity (m/s) |
Projectile mass (kg) |
Fuse delay (m) |
Fuse sensitivity (mm) |
Explosive mass (TNT equivalent) (g) |
Ricochet | |||||
| 0% | 50% | 100% | ||||||||||
| Type 1 APHE | APHE | 808 | 1.49 | 1.2 | 9 | 22.4 | 47° | 60° | 65° | |||
| Type 1 HE | HE | 822 | 1.4 | 0.1 | 0.1 | 85.26 | 79° | 80° | 81° | |||
Ammo racks
| Full ammo |
1st rack empty |
2nd rack empty |
3rd rack empty |
4th rack empty |
5th rack empty |
6th rack empty |
7th rack empty |
8th rack empty |
9th rack empty |
10th rack empty |
11th rack empty |
Visual discrepancy |
|---|---|---|---|---|---|---|---|---|---|---|---|---|
| 120 | 91 (+29) | 76 (+44) | 73 (+47) | 62 (+58) | 51 (+69) | 40 (+80) | 29 (+91) | 21 (+99) | 15 (+105) | 9 (+111) | 1 (+119) | No |

Note:
- Turret empty: 73 (+47) shells.
Machine guns
| 7.7 mm Type 97 | ||||
|---|---|---|---|---|
| Mount | Capacity (Belt) | Fire rate | Vertical | Horizontal |
| Hull | 3,000 (20) | 499 | ±10° | ±15° |
| Pintle | 1,000 (20) | 499 | -10°/+70° | ±60° |
Usage in battles
As the successor of the Chi-Ha, the Chi-He has a redesigned hull with thicker armour, a more powerful engine and an up-armoured turret from the Chi-Ha Kai, so the front is overall at 50 mm effective. This will result in a very similar playstyle as the Chi-Ha Kai with the added benefits of being an upgrade.
Unlike the Type 97 Chi-Ha Kai, the Type 1 Chi-He has some more armour and a stronger engine to rely on and it is able to brawl on its own with the fast rate of fire. But as previously mentioned on Main armament, the Chi-He retains the same hand-cranked turret with additional armour, slowing down the already mediocre turning time by a slight amount.
Literally on top of armour and engine upgrades, the Chi-He gets an additional pintle point anti-aircraft machine gun, even though the Type 97 7.7 mm has a low clip capacity, it can prove useful for pinning enemy units and even getting hits to down enemy planes.
The best practice for the Chi-He (and other WWII-era Japanese tanks) is to always point forward, the front armour has pre-angled sides, so angling only hurts your pre-angles and weaker side armour. It's not worth trying to get more out of the 50 mm frontal effective protection.
Enemies worth noting:
- B1 bis / ter: the B1 can easily destroy the Chi-Ha when using both of its guns, but when angling only the 47 mm gun is available, meaning that the Chi-Ha can take some more hits. It is very hard to destroy the Char B1 from a distance, so get as close as possible with the ideal range being no more than 300 m. Aim at their flat hull side, turret side, hull cannon mount or the driving compartment (the near-vertical frontal armour right below the turret). Upon penetrating, the Chi-Ha's 47 mm APHE can knock out several crews, and your quick reload allows you to finish the rest off in time. However if the B1 has folded armour plates on their hull sides then it is a B1 ter, avoid shooting at its sides.
- M4A3 (105): This low-rank Sherman posts a huge threat to every of its opponents due to its superior armour and destructive firepower. Its armour is overall quite tough to penetrate with your small 47 mm gun, but it can be solved by careful aiming. If the M4 is within 200 m, shoot at the vertical part of its gun mantlet or its side if exposed. One penetration might not kill all the crew, however two are generally enough. If it's up close and hull down, try shooting at its gun barrel to disarm it, but one shot is not guaranteed to destroy the barrel. When the M4 is further than 400 m away, all of your shells will perform poorly at penetrating its armour, so disengage or wait until it gets closer. Remember to not get hit by it, its HEAT is able to knock the Chi-He out with ease.
Pros and cons
Pros:
- 47 mm cannon can do some decent damage
- Small profile
- Gunner supported stabilization, can take accurate shots at low speeds
- Top-mounted MG
- Fast reverse speed (2 reverse gears)
- Fast in forward motion
- Frontal transmission
- Awesome gun depression of -15°
- Fast reloading rate
Cons:
- Thin side armour means angling front armour could expose weak armour
- 47 mm gun is so inaccurate, to the point where it can barely be used past 500 meters.
- Packed 5-men crew can lead to an easy knock out if penetrated
- 50 mm front armour, poorly angled
- Big ammo racks in the turret (carry only half-ammo load)
- Long and narrow hull: hard to turn on the spot
History
Development
The Imperial Japanese Army's main tank, the Type 97 Chi-Ha, was becoming rather outdated by the turn of the decade in 1940. The 30 mm front plate armour was vulnerable to standard anti-tank weaponry and the riveted design post a hazard to the tank crew by spalling. In 1941, work began on modernizing the design up to new industrial standards.[1]
The first step in the modernizing design was to go towards a welded design rather than rivveted. The front glacis plate was also simplified into a large flat 50 mm armour plate rather than the curved one. The increased armour meant an increased weight, so the Japanese added the improved Type 100 diesel engine, capable of pumping out 240 hp to propel the tank. This new tank was accepted as the Type 1 Chi-He.[1]
During the tank's preparation for mass-production, a request by the commander of the 7th Tank Regiment calling for an improved armament on the Type 97 Chi-Ha was received by the Mitsubishi factory. With the Type 1 Chi-He still needing time to enter production levels, let alone the resources needed to manufacture completely new tanks, it was placed on hold and priority was placed on improving the Type 97. This lead to the cheaper method of adapting the Type 97 to using the Type 1 turret with the 47 mm cannon, producing to the Type 97 Chi-Ha Kai. This delayed the mass-production of the Type 1 Chi-He until February 1944, resulting in only 170 tanks produced before the end of the war.[2]
Combat usage
Despite its relatively early production life over late-war Japanese tanks and its improved characteristics, the Type 1 Chi-He would see its combat life held in reserves in the Japanese home islands. They would never see use in the battlefield before Japan surrendered in August 1945.
Media
- Skins
- Videos
See also
- Related Development
- Chi-Ha (Family) - (Predecessor)
- Chi-He (Family)
- Ho-I - (Gun tank variant)
- Ka-Chi - (Inspired navy amphibious variant)
- Other vehicles of similar configuration and role
External links
References
| Mitsubishi Heavy Industries (三菱重工業株式会社) | |
|---|---|
| Light Tanks | |
| Type 95 | Ha-Go · Ha-Go Commander |
| Medium Tanks | |
| Type 89 | I-Go Ko |
| Type 97 | Chi-Ha · Chi-Ha Kai |
| Type 1 | Chi-He · Chi-He (5th Regiment) |
| Type 3 | Chi-Nu · Chi-Nu II |
| Type 4 | Chi-To · Chi-To Late |
| Type 5 | Chi-Ri II |
| SPGs | |
| Chi-Ha Derived | Ho-Ro |
| Chi-He Derived | Ho-I |
| Chi-Ri Derived | Ho-Ri Prototype · Ho-Ri Production |
| Other | Na-To · Ro-Go Exp. |
| Captured | ␗Chi-Ha · ␗Chi-Ha Kai |
| Note | Most tank designs would be contracted by the Army Technical Bureau to Mitsubishi |
| See also | Mitsubishi Heavy Industries Ltd. (Post-War) |
| Japan medium tanks | |
|---|---|
| Type 97 | Chi-Ha · Chi-Ha Kai · Chi-Ha Kai TD · Chi-Ha Short Gun |
| Type 1 | Chi-He · Chi-He (5th Regiment) · Ho-I |
| Type 3 | Chi-Nu · Chi-Nu II |
| Type 4 | Chi-To · Chi-To Late |
| Type 5 | Chi-Ri II |
| Type 61 MBT | ST-A1* · ST-A2* · ST-A3* · Type 61 |
| Type 74 MBT | ST-B2* · Type 74 (C) · Type 74 (E) · Type 74 (F) · Type 74 (G) |
| Type 90 MBT | Type 90 · Type 90 (B) · Type 90 (B) "Fuji" |
| Type 10 MBT | TKX (P)* · TKX* · Type 10 |
| Other | Ka-Chi |
| USA | ▅M4A3 (76) W · ▅M47 |
| *Prototype | |
