Difference between revisions of "D4Y3 Ko"
(Updated format) |
(→Description) |
||
| (20 intermediate revisions by 5 users not shown) | |||
| Line 1: | Line 1: | ||
{{About | {{About | ||
| about = Japanese dive bomber '''{{PAGENAME}}''' | | about = Japanese dive bomber '''{{PAGENAME}}''' | ||
| − | | usage = other | + | | usage = other versions |
| link = D4Y (Family) | | link = D4Y (Family) | ||
}} | }} | ||
{{Specs-Card | {{Specs-Card | ||
|code=d4y3 | |code=d4y3 | ||
| − | |images={{Specs-Card-Image|GarageImage_{{PAGENAME}}.jpg}} | + | |images={{Specs-Card-Image|GarageImage_{{PAGENAME}}.jpg|ArtImage_{{PAGENAME}}.png}} |
}} | }} | ||
== Description == | == Description == | ||
<!-- ''In the description, the first part should be about the history of and the creation and combat usage of the aircraft, as well as its key features. In the second part, tell the reader about the aircraft in the game. Insert a screenshot of the vehicle, so that if the novice player does not remember the vehicle by name, he will immediately understand what kind of vehicle the article is talking about.'' --> | <!-- ''In the description, the first part should be about the history of and the creation and combat usage of the aircraft, as well as its key features. In the second part, tell the reader about the aircraft in the game. Insert a screenshot of the vehicle, so that if the novice player does not remember the vehicle by name, he will immediately understand what kind of vehicle the article is talking about.'' --> | ||
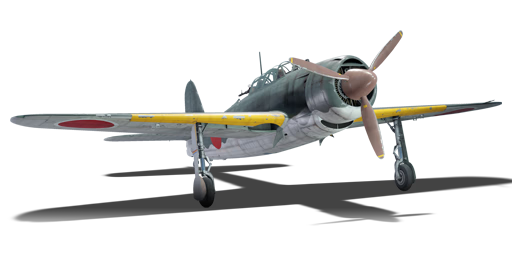
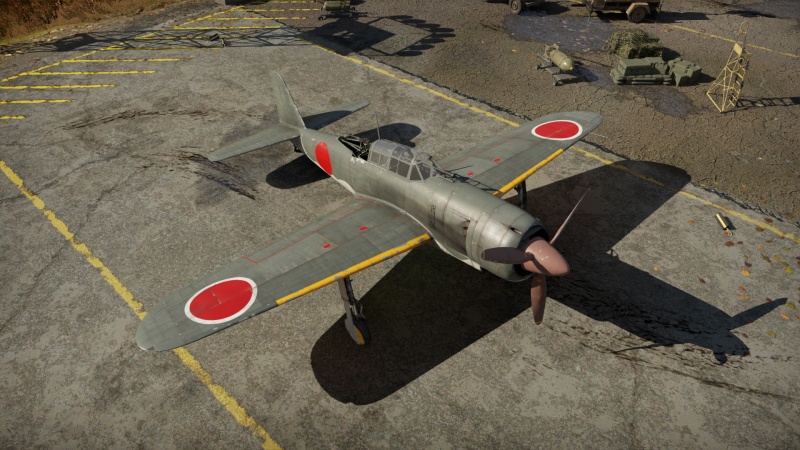
| − | The '''{{ | + | The '''D4Y3 mod. 33 Ko''', designated as the '''Suisei 33A ({{Annotation|彗星三三型甲|Comet, Model 33A}})''', was a stop-gap measure for the piling up [[D4Y2|Suisei 12]]s without engines due to the production shortage of the materially expensive licensed DB601 engine. Instead of going for the high-output Atsuta 32 inline engine, the Suisei 33 was equipped with the Kinsei 62 radial engine which had relatively high output and abundant supply. Simply switching out the engine for a radial of roughly the same output still resulted in a decline of performance due to the aerodynamic characteristics, so the previous Model 12 was kept in parallel production and delivered to high-priority units instead. |
| − | + | It was introduced in [[Update 1.71 "New E.R.A."]]. While the main difference of the D4Y3 compared to the D4Y1 and D4Y2 is the engine, this doesn't result in better performance, on the contrary, due to the remodeled nose and aerial cooled engine, aerodynamics are worse and result in higher drag which put it just behind the D4Y2 in performance, while still performing better than the D4Y1. The main benefit of this Suisei however comes with the "Ko" subvariant, which was present on all standard production D4Ys, which swapped out their rear armament from the factory standard 7.7 mm Type 92 MG to the 13 mm Type 2 HMG which will shred any foe on its tail. | |
| − | |||
| − | |||
| − | [[ | + | ;Nicknames: |
| + | * [[Abbreviations#.28IJN.29_Official_name_designation|Official Designation]]: ''彗星 (Suisei, "Comet")'' | ||
| + | * Allied reporting name: Judy | ||
== General info == | == General info == | ||
=== Flight performance === | === Flight performance === | ||
| + | [[File:D4Y3-Ko6.png|thumb|The D4Y3 in flight]] | ||
{{Specs-Avia-Flight}} | {{Specs-Avia-Flight}} | ||
| − | <!--''Describe how the aircraft behaves in the air. Speed, manoeuvrability, acceleration and allowable loads - these are the most important characteristics of the vehicle.''--> | + | <!-- ''Describe how the aircraft behaves in the air. Speed, manoeuvrability, acceleration and allowable loads - these are the most important characteristics of the vehicle.'' --> |
| − | + | While the D4Y3 switches out the inline ''Atsuta'' engine found on the first two [[D4Y (Family)|D4Y]] aircraft, for a radial ''Kinsei 62'' engine, it performs far better than the base model [[D4Y1]] but about on par with the improved inline ''Atsuta 32'' of the [[D4Y2]]. The radial engine won't overheat in combat conditions and also has a less pronounced radiator, resulting in less drag. | |
{| class="wikitable" style="text-align:center" width="70%" | {| class="wikitable" style="text-align:center" width="70%" | ||
| − | + | ! rowspan="2" | Characteristics | |
| − | ! rowspan="2" |Characteristics | ||
! colspan="2" | Max Speed<br>(km/h at 6,050 m) | ! colspan="2" | Max Speed<br>(km/h at 6,050 m) | ||
| − | ! rowspan="2" | Max altitude<br>( | + | ! rowspan="2" | Max altitude<br>(metres) |
! colspan="2" | Turn time<br>(seconds) | ! colspan="2" | Turn time<br>(seconds) | ||
| − | ! colspan="2" | Rate of climb<br>( | + | ! colspan="2" | Rate of climb<br>(metres/second) |
| − | ! rowspan="2" | Take-off run<br>( | + | ! rowspan="2" | Take-off run<br>(metres) |
|- | |- | ||
! AB !! RB !! AB !! RB !! AB !! RB | ! AB !! RB !! AB !! RB !! AB !! RB | ||
|- | |- | ||
! Stock | ! Stock | ||
| − | | | + | | 547 || 527 || rowspan="2" | {{Specs|ceiling}} || 22.8 || 23.5 || 5.7 || 5.7 || rowspan="2" | 350 |
|- | |- | ||
! Upgraded | ! Upgraded | ||
| Line 45: | Line 45: | ||
==== Details ==== | ==== Details ==== | ||
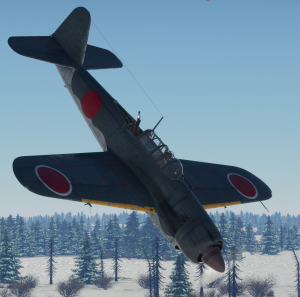
| + | [[File:D4Y3-Ko3.png|thumb|D4Y3 in a dive]] | ||
{| class="wikitable" style="text-align:center" width="50%" | {| class="wikitable" style="text-align:center" width="50%" | ||
|- | |- | ||
| Line 66: | Line 67: | ||
! Combat !! Take-off !! Landing !! + !! - | ! Combat !! Take-off !! Landing !! + !! - | ||
|- | |- | ||
| − | | {{Specs|destruction|body}} || {{Specs|destruction|gear}} || | + | | 750 <!-- {{Specs|destruction|body}} --> || {{Specs|destruction|gear}} || 457 || 428 || 280 || ~16 || ~11 |
|- | |- | ||
|} | |} | ||
| Line 77: | Line 78: | ||
|- | |- | ||
| < 350 || < 400 || < 430 || > 335 | | < 350 || < 400 || < 430 || > 335 | ||
| − | |||
| − | |||
| − | |||
| − | |||
| − | |||
| − | |||
| − | |||
| − | |||
| − | |||
| − | |||
| − | |||
| − | |||
| − | |||
| − | |||
| − | |||
| − | |||
| − | |||
| − | |||
| − | |||
| − | |||
| − | |||
| − | |||
|- | |- | ||
|} | |} | ||
| Line 106: | Line 85: | ||
=== Survivability and armour === | === Survivability and armour === | ||
{{Specs-Avia-Armour}} | {{Specs-Avia-Armour}} | ||
| − | <!--''Examine the survivability of the aircraft. Note how vulnerable the structure is and how secure the pilot is, whether the fuel tanks are armoured, etc. Describe the armour, if there is any, and also mention the vulnerability of other critical aircraft systems.''--> | + | <!-- ''Examine the survivability of the aircraft. Note how vulnerable the structure is and how secure the pilot is, whether the fuel tanks are armoured, etc. Describe the armour, if there is any, and also mention the vulnerability of other critical aircraft systems.'' --> |
| − | The | + | The [[D4Y (Family)]] lacks self-sealing fuel tanks and armour for speed and agility. As such, the D4Y3 should be treated like any other Japanese aircraft, with the utmost caution. |
=== Modifications and economy === | === Modifications and economy === | ||
| Line 123: | Line 102: | ||
The '''''{{PAGENAME}}''''' is armed with: | The '''''{{PAGENAME}}''''' is armed with: | ||
| − | * 2 x 7.7 mm | + | * 2 x 7.7 mm Type 97 navy machine guns, nose-mounted (400 rpg = 800 total) |
[[File:D4Y3-Ko2.png|thumb|D4Y3 in a steep dive]] | [[File:D4Y3-Ko2.png|thumb|D4Y3 in a steep dive]] | ||
| Line 143: | Line 122: | ||
{{Specs-Avia-Defensive}} | {{Specs-Avia-Defensive}} | ||
<!-- ''Defensive armament with turret machine guns or cannons, crewed by gunners. Examine the number of gunners and what belts or drums are better to use. If defensive weaponry is not available, remove this subsection.'' --> | <!-- ''Defensive armament with turret machine guns or cannons, crewed by gunners. Examine the number of gunners and what belts or drums are better to use. If defensive weaponry is not available, remove this subsection.'' --> | ||
| − | {{main|Type 2 | + | {{main|Type 2 (13 mm)}} |
The '''''{{PAGENAME}}''''' is defended by: | The '''''{{PAGENAME}}''''' is defended by: | ||
| − | * 1 x 13 mm Type 2 | + | * 1 x 13 mm Type 2 machine gun, dorsal turret (250 rpg) |
[[File:D4Y3-Ko1.png|thumb|The D4Y3 about to destroy a medium tank]] | [[File:D4Y3-Ko1.png|thumb|The D4Y3 about to destroy a medium tank]] | ||
== Usage in battles == | == Usage in battles == | ||
| − | <!--''Describe the tactics of playing in | + | <!-- ''Describe the tactics of playing in the aircraft, the features of using aircraft in a team and advice on tactics. Refrain from creating a "guide" - do not impose a single point of view, but instead, give the reader food for thought. Examine the most dangerous enemies and give recommendations on fighting them. If necessary, note the specifics of the game in different modes (AB, RB, SB).'' --> |
The D4Y3 is an excellent example of a multirole aircraft, as it is an excellent ground attack aircraft, fighter, and bomber. Since you get a bomber air spawn, you can drop your bomb on a base and then start to engage the many fighters below you. You should have no problems engaging them, as long as you keep your speed up and your energy high. One key thing to note is that you don't need to use your defensive turret to shoo away enemy interceptors. You can easily out-turn any interceptor at that battle rating. Besides the fighter role, the ground attack is the D4Y3's natural method of play. The 500 kg bomb will be excellent for destroying Pillboxes, and you can use your rifle-calibre machine guns to destroy any soft target you please. | The D4Y3 is an excellent example of a multirole aircraft, as it is an excellent ground attack aircraft, fighter, and bomber. Since you get a bomber air spawn, you can drop your bomb on a base and then start to engage the many fighters below you. You should have no problems engaging them, as long as you keep your speed up and your energy high. One key thing to note is that you don't need to use your defensive turret to shoo away enemy interceptors. You can easily out-turn any interceptor at that battle rating. Besides the fighter role, the ground attack is the D4Y3's natural method of play. The 500 kg bomb will be excellent for destroying Pillboxes, and you can use your rifle-calibre machine guns to destroy any soft target you please. | ||
| Line 166: | Line 145: | ||
! rowspan="2" | Turbocharger | ! rowspan="2" | Turbocharger | ||
|- | |- | ||
| − | ! Oil | + | ! Oil !! Water !! Type |
| − | ! Water | ||
| − | ! Type | ||
|- | |- | ||
| − | | Controllable | | + | | Controllable || Controllable<br>Not auto controlled || Controllable<br>Not auto controlled || Controllable<br>Not auto controlled || Separate || Controllable<br>2 gears || Not controllable |
|- | |- | ||
|} | |} | ||
| − | The radiator can be kept at 0% in climbs, the D4Y3 will manage to keep cool. Open the oil radiator and radiator to 10% when levelling off, to avoid overheat after prolonged periods of time. Propeller pitch should be kept at 90-100%, and stage two of the supercharger should only be activated at 3,000 | + | |
| + | The radiator can be kept at 0% in climbs, the D4Y3 will manage to keep cool. Open the oil radiator and radiator to 10% when levelling off, to avoid overheat after prolonged periods of time. Propeller pitch should be kept at 90-100%, and stage two of the supercharger should only be activated at 3,000 m (10,000 ft). | ||
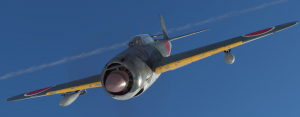
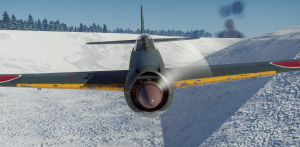
[[File:D4Y3-Ko7RADIAL.png|thumb|The D4Y3 as seen from the front. The radial engine produces less drag, thus making it the fastest variant]] | [[File:D4Y3-Ko7RADIAL.png|thumb|The D4Y3 as seen from the front. The radial engine produces less drag, thus making it the fastest variant]] | ||
=== Pros and cons === | === Pros and cons === | ||
| − | <!--Summarise and briefly evaluate the vehicle in terms of its characteristics and combat effectiveness. Mark its pros and cons in the bulleted list. Try not to use more than 6 points for each of the characteristics. Avoid using categorical definitions such as "bad", "good" and the like - use substitutions with softer forms such as "inadequate" and "effective".--> | + | <!-- ''Summarise and briefly evaluate the vehicle in terms of its characteristics and combat effectiveness. Mark its pros and cons in the bulleted list. Try not to use more than 6 points for each of the characteristics. Avoid using categorical definitions such as "bad", "good" and the like - use substitutions with softer forms such as "inadequate" and "effective".'' --> |
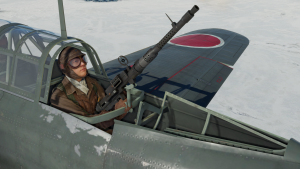
| + | [[File:D4Y3-Ko9TURRETCLOSE.png|thumb|The D4Y3's HMG turret, which is very strong at picking off fighters. However, your primary method of defence is your manoeuvrability, not your turret]] | ||
'''Pros:''' | '''Pros:''' | ||
| + | * '''D'''4Y for Carrier-based dive bomber: | ||
| + | ** Great bomb load-outs, can equip three 250 kg bombs, for a total weight of 750 kg | ||
| + | ** Bomber airspawn, outclimbs anything and can intercept | ||
| + | ** Airbrakes | ||
| + | * Common Navy plane construction: | ||
| + | ** Nose-mounted armament | ||
| + | ** Small radiator drag | ||
| + | ** Excellent manoeuvrability, can outrun early Corsairs, Wildcats, and Spitfires | ||
| + | * '''D4Y''' Specific: | ||
| + | ** Fast, can outrun almost anything, save P-38s | ||
| + | *** Its speed forces the enemy to tail behind your gunner, giving you a chance to shoot at the approaching fighter with your turret | ||
| + | * '''{{PAGENAME}}''' Specific: | ||
| + | ** Improved defensive armament | ||
| + | ** Improved radial engine which won't overheat, and is an improvement from the [[D4Y1]] and [[D4Y2]] | ||
| − | |||
| − | |||
| − | |||
| − | |||
| − | |||
| − | |||
| − | |||
| − | |||
| − | |||
| − | |||
| − | |||
| − | |||
'''Cons:''' | '''Cons:''' | ||
| − | * | + | * '''D'''4Y for Carrier-based dive bomber: |
| − | * | + | ** Has bomb cradle, significant delay in fuselage bomb drop |
| − | * Poor | + | ** Not good for bombing bases |
| − | * | + | * Common Navy plane construction: |
| − | * | + | ** Poor offensive armament: [[Type 97 navy (7.7 mm)|7.7 mm Type 97 MG]] |
| − | * Limited ammo count for both 7.7 mm and 13.2 mm armaments | + | ** Fragile, little armour, and no self-sealing fuel tanks |
| − | + | ** Exposed tail gunner | |
| + | * '''{{PAGENAME}}''' Specific: | ||
| + | ** Has decreased ammo counted compared with the [[D4Y1]] | ||
| + | ** Limited ammo count for both 7.7 mm and 13.2 mm armaments | ||
== History == | == History == | ||
| − | <!--''Describe the history of the creation and combat usage of the aircraft in more detail than in the introduction. If the historical reference turns out to be too long, take it to a separate article, taking a link to the article about the vehicle and adding a block "/ History" (example: <nowiki>https://wiki.warthunder.com/(Vehicle-name)/History</nowiki>) and add a link to it here using the <code>main</code> template. Be sure to reference text and sources by using <code><nowiki><ref></ref></nowiki></code>, as well as adding them at the end of the article with <code><nowiki><references /></nowiki></code>. This section may also include the vehicle's dev blog entry (if applicable) and the in-game encyclopedia description (under <code><nowiki>=== | + | <!-- ''Describe the history of the creation and combat usage of the aircraft in more detail than in the introduction. If the historical reference turns out to be too long, take it to a separate article, taking a link to the article about the vehicle and adding a block "/History" (example: <nowiki>https://wiki.warthunder.com/(Vehicle-name)/History</nowiki>) and add a link to it here using the <code>main</code> template. Be sure to reference text and sources by using <code><nowiki><ref></ref></nowiki></code>, as well as adding them at the end of the article with <code><nowiki><references /></nowiki></code>. This section may also include the vehicle's dev blog entry (if applicable) and the in-game encyclopedia description (under <code><nowiki>=== In-game description ===</nowiki></code>, also if applicable).'' --> |
| + | {{main|D4Y (Family)#History|l1=D4Y History}} | ||
Nicknamed the "Judy" by allied pilots, the D4Y3 was feared by both troops on the ground and ships in the sea. | Nicknamed the "Judy" by allied pilots, the D4Y3 was feared by both troops on the ground and ships in the sea. | ||
| Line 211: | Line 196: | ||
The D4Y3 was converted to be a land based Dive Bomber, while its predecessor the D4Y2 was a carrier based dive bomber. The removal of the tail hook and the addition of the Mitsubishi Kinsei 62 radial engine added 150 horse power while reducing weight. The D4Y3 would see 3 variants, D4Y3 model 33, D4Y3 model 33A, and D4Y3 model 33 night-fighter. | The D4Y3 was converted to be a land based Dive Bomber, while its predecessor the D4Y2 was a carrier based dive bomber. The removal of the tail hook and the addition of the Mitsubishi Kinsei 62 radial engine added 150 horse power while reducing weight. The D4Y3 would see 3 variants, D4Y3 model 33, D4Y3 model 33A, and D4Y3 model 33 night-fighter. | ||
| − | Differences between the Model 33 and the Model 33a was the A variant had the Type 1 | + | Differences between the Model 33 and the Model 33a was the A variant had the 7.92 mm Type 1 rear-firing machine gun replaced with an upgraded 13 mm Type 2 rear-firing machine gun. With the night-fighter variant being equipped with an upwards firing 20 mm cannon. Only 3 night fighters were built as the D4Y2 night fighters were being used with success with fighters already available and assembly lines already making them. |
| − | With a range of 1,400 miles the D4Y3 was perfect for the defense of the Japanese territories. Combined with its extreme accuracy in a dive it saw great success especially in the battles at the end of the war. Notably, crippling the USS Kalinin Bay and the USS Suwannee both escort carriers. Eventually they would convert the D4Y3 into a D4Y4, which was exactly the same as the D4Y3 except it carried an un-removable | + | With a range of 1,400 miles the D4Y3 was perfect for the defense of the Japanese territories. Combined with its extreme accuracy in a dive it saw great success especially in the battles at the end of the war. Notably, crippling the USS Kalinin Bay and the USS Suwannee both escort carriers. Eventually they would convert the D4Y3 into a D4Y4, which was exactly the same as the D4Y3 except it carried an un-removable 800 kg bomb for kamikaze attacks. Some D4Y4s were equipped with rockets to increase the speed at which the aircraft would strike their targets increasing the damage they caused. |
No D4Y3's survived the war, but a D4Y1 was reconstructed with a Pratt and Whitney R-1830 radial engine to represent a D4Y3. This plane can be seen at the Planes of Fame Air Museum in Chino, California. | No D4Y3's survived the war, but a D4Y1 was reconstructed with a Pratt and Whitney R-1830 radial engine to represent a D4Y3. This plane can be seen at the Planes of Fame Air Museum in Chino, California. | ||
== Media == | == Media == | ||
| − | <!--''Excellent additions to the article would be video guides, screenshots from the game, and photos.''--> | + | <!-- ''Excellent additions to the article would be video guides, screenshots from the game, and photos.'' --> |
| + | |||
| + | ;Skins | ||
| + | * [https://live.warthunder.com/feed/camouflages/?vehicle=d4y3 Skins and camouflages for the {{PAGENAME}} from live.warthunder.com.] | ||
| + | |||
| + | ;Videos | ||
{{Youtube-gallery|_FXOCmAXPKY|'''War Thunder - Update 1.71 - D4Y3''' - ''TheEuropeanCanadian''}} | {{Youtube-gallery|_FXOCmAXPKY|'''War Thunder - Update 1.71 - D4Y3''' - ''TheEuropeanCanadian''}} | ||
== See also == | == See also == | ||
| − | <!--''Links to the articles on the War Thunder Wiki that you think will be useful for the reader, for example:'' | + | <!-- ''Links to the articles on the War Thunder Wiki that you think will be useful for the reader, for example:'' |
* ''reference to the series of the aircraft;'' | * ''reference to the series of the aircraft;'' | ||
| − | * ''links to approximate analogues of other nations and research trees.''--> | + | * ''links to approximate analogues of other nations and research trees.'' --> |
| − | |||
| − | |||
| − | |||
| − | |||
| − | |||
| − | |||
| − | + | ;[[D4Y (Family)|Related development]] | |
| − | * [[ | + | * [[D4Y1]] - Base model with a weaker inline engine (Atsuta 21) |
| − | + | * [[D4Y2]] - earlier model with a stronger inline engine (Atsuta 31) and rocket payload | |
| − | * [[ | ||
| − | |||
== External links == | == External links == | ||
| − | <!--''Paste links to sources and external resources, such as:'' | + | <!-- ''Paste links to sources and external resources, such as:'' |
* ''topic on the official game forum;'' | * ''topic on the official game forum;'' | ||
| − | + | * ''other literature.'' --> | |
| − | * ''other literature.''--> | ||
* [https://forum.warthunder.com/index.php?/topic/476272-d4y3-ko-multitask-er/ War Thunder Forum - D4Y3 Ko - Multitasker] | * [https://forum.warthunder.com/index.php?/topic/476272-d4y3-ko-multitask-er/ War Thunder Forum - D4Y3 Ko - Multitasker] | ||
| + | * [https://forum.warthunder.com/index.php?/topic/378379-d4y3/ Official data sheet - more details about the performance] | ||
{{AirManufacturer Yokosuka}} | {{AirManufacturer Yokosuka}} | ||
{{Japan bombers}} | {{Japan bombers}} | ||
Latest revision as of 18:21, 12 April 2024
| This page is about the Japanese dive bomber D4Y3 Ko. For other versions, see D4Y (Family). |
Contents
Description
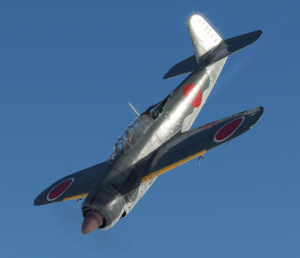
The D4Y3 mod. 33 Ko, designated as the Suisei 33A (彗星三三型甲), was a stop-gap measure for the piling up Suisei 12s without engines due to the production shortage of the materially expensive licensed DB601 engine. Instead of going for the high-output Atsuta 32 inline engine, the Suisei 33 was equipped with the Kinsei 62 radial engine which had relatively high output and abundant supply. Simply switching out the engine for a radial of roughly the same output still resulted in a decline of performance due to the aerodynamic characteristics, so the previous Model 12 was kept in parallel production and delivered to high-priority units instead.
It was introduced in Update 1.71 "New E.R.A.". While the main difference of the D4Y3 compared to the D4Y1 and D4Y2 is the engine, this doesn't result in better performance, on the contrary, due to the remodeled nose and aerial cooled engine, aerodynamics are worse and result in higher drag which put it just behind the D4Y2 in performance, while still performing better than the D4Y1. The main benefit of this Suisei however comes with the "Ko" subvariant, which was present on all standard production D4Ys, which swapped out their rear armament from the factory standard 7.7 mm Type 92 MG to the 13 mm Type 2 HMG which will shred any foe on its tail.
- Nicknames
- Official Designation: 彗星 (Suisei, "Comet")
- Allied reporting name: Judy
General info
Flight performance
While the D4Y3 switches out the inline Atsuta engine found on the first two D4Y aircraft, for a radial Kinsei 62 engine, it performs far better than the base model D4Y1 but about on par with the improved inline Atsuta 32 of the D4Y2. The radial engine won't overheat in combat conditions and also has a less pronounced radiator, resulting in less drag.
| Characteristics | Max Speed (km/h at 6,050 m) |
Max altitude (metres) |
Turn time (seconds) |
Rate of climb (metres/second) |
Take-off run (metres) | |||
|---|---|---|---|---|---|---|---|---|
| AB | RB | AB | RB | AB | RB | |||
| Stock | 547 | 527 | 22.8 | 23.5 | 5.7 | 5.7 | 350 | |
| Upgraded | 610 | 574 | 21.6 | 22.0 | 16.5 | 10.4 | ||
Details
| Features | ||||
|---|---|---|---|---|
| Combat flaps | Take-off flaps | Landing flaps | Air brakes | Arrestor gear |
| ✓ | ✓ | ✓ | ✓ | ✓ |
| Limits | ||||||
|---|---|---|---|---|---|---|
| Wings (km/h) | Gear (km/h) | Flaps (km/h) | Max Static G | |||
| Combat | Take-off | Landing | + | - | ||
| 750 | 457 | 428 | 280 | ~16 | ~11 | |
| Optimal velocities (km/h) | |||
|---|---|---|---|
| Ailerons | Rudder | Elevators | Radiator |
| < 350 | < 400 | < 430 | > 335 |
Survivability and armour
The D4Y (Family) lacks self-sealing fuel tanks and armour for speed and agility. As such, the D4Y3 should be treated like any other Japanese aircraft, with the utmost caution.
Modifications and economy
The bomb load-outs should be a priority for this aircraft, and the frontal machine guns should also be a module of importance. The compressor, Engine, and Injection will prove useful. After researching the engine mods, rush the Suitability modules. Only then should you tackle the turrets. The Wings Repair and Fuselage repair should come last.
Armaments
Offensive armament
The D4Y3 Ko is armed with:
- 2 x 7.7 mm Type 97 navy machine guns, nose-mounted (400 rpg = 800 total)
Suspended armament
The D4Y3 Ko can be outfitted with the following ordnance:
- Without load
- 1 x 250 kg Navy Type Number 25 Model 2 bomb + 2 x 60 kg Navy Type 97 Number 6 bombs (370 kg total)
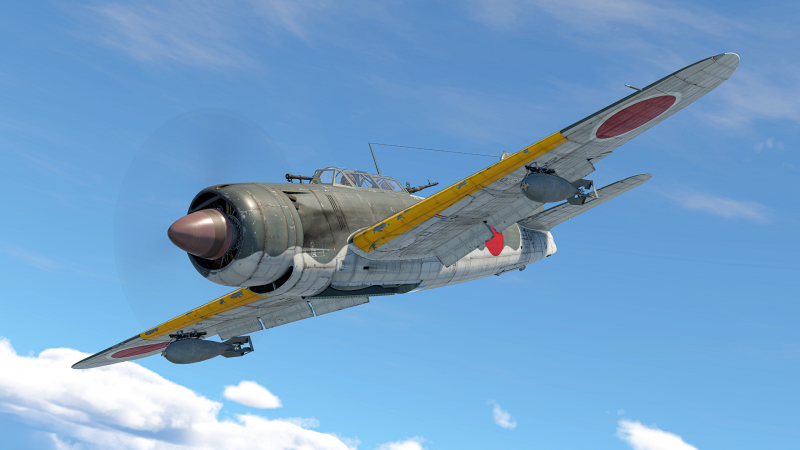
- 3 x 250 kg Navy Type Number 25 Model 2 bombs (750 kg total)
- 1 x 500 kg Number Type 2 50 Model 1 GP(SAP) bomb (500 kg total)
- 1 x 500 kg Number Type 2 50 Model 1 GP(SAP) bomb + 2 x 60 kg Navy Type 97 Number 6 bombs (620 kg total)
Defensive armament
The D4Y3 Ko is defended by:
- 1 x 13 mm Type 2 machine gun, dorsal turret (250 rpg)
Usage in battles
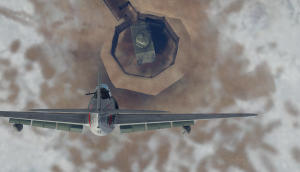
The D4Y3 is an excellent example of a multirole aircraft, as it is an excellent ground attack aircraft, fighter, and bomber. Since you get a bomber air spawn, you can drop your bomb on a base and then start to engage the many fighters below you. You should have no problems engaging them, as long as you keep your speed up and your energy high. One key thing to note is that you don't need to use your defensive turret to shoo away enemy interceptors. You can easily out-turn any interceptor at that battle rating. Besides the fighter role, the ground attack is the D4Y3's natural method of play. The 500 kg bomb will be excellent for destroying Pillboxes, and you can use your rifle-calibre machine guns to destroy any soft target you please.
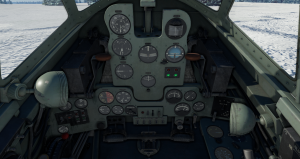
Manual Engine Control
| MEC elements | ||||||
|---|---|---|---|---|---|---|
| Mixer | Pitch | Radiator | Supercharger | Turbocharger | ||
| Oil | Water | Type | ||||
| Controllable | Controllable Not auto controlled |
Controllable Not auto controlled |
Controllable Not auto controlled |
Separate | Controllable 2 gears |
Not controllable |
The radiator can be kept at 0% in climbs, the D4Y3 will manage to keep cool. Open the oil radiator and radiator to 10% when levelling off, to avoid overheat after prolonged periods of time. Propeller pitch should be kept at 90-100%, and stage two of the supercharger should only be activated at 3,000 m (10,000 ft).
Pros and cons
Pros:
- D4Y for Carrier-based dive bomber:
- Great bomb load-outs, can equip three 250 kg bombs, for a total weight of 750 kg
- Bomber airspawn, outclimbs anything and can intercept
- Airbrakes
- Common Navy plane construction:
- Nose-mounted armament
- Small radiator drag
- Excellent manoeuvrability, can outrun early Corsairs, Wildcats, and Spitfires
- D4Y Specific:
- Fast, can outrun almost anything, save P-38s
- Its speed forces the enemy to tail behind your gunner, giving you a chance to shoot at the approaching fighter with your turret
- Fast, can outrun almost anything, save P-38s
- D4Y3 Ko Specific:
Cons:
- D4Y for Carrier-based dive bomber:
- Has bomb cradle, significant delay in fuselage bomb drop
- Not good for bombing bases
- Common Navy plane construction:
- Poor offensive armament: 7.7 mm Type 97 MG
- Fragile, little armour, and no self-sealing fuel tanks
- Exposed tail gunner
- D4Y3 Ko Specific:
- Has decreased ammo counted compared with the D4Y1
- Limited ammo count for both 7.7 mm and 13.2 mm armaments
History
Nicknamed the "Judy" by allied pilots, the D4Y3 was feared by both troops on the ground and ships in the sea.
The D4Y3 was converted to be a land based Dive Bomber, while its predecessor the D4Y2 was a carrier based dive bomber. The removal of the tail hook and the addition of the Mitsubishi Kinsei 62 radial engine added 150 horse power while reducing weight. The D4Y3 would see 3 variants, D4Y3 model 33, D4Y3 model 33A, and D4Y3 model 33 night-fighter.
Differences between the Model 33 and the Model 33a was the A variant had the 7.92 mm Type 1 rear-firing machine gun replaced with an upgraded 13 mm Type 2 rear-firing machine gun. With the night-fighter variant being equipped with an upwards firing 20 mm cannon. Only 3 night fighters were built as the D4Y2 night fighters were being used with success with fighters already available and assembly lines already making them.
With a range of 1,400 miles the D4Y3 was perfect for the defense of the Japanese territories. Combined with its extreme accuracy in a dive it saw great success especially in the battles at the end of the war. Notably, crippling the USS Kalinin Bay and the USS Suwannee both escort carriers. Eventually they would convert the D4Y3 into a D4Y4, which was exactly the same as the D4Y3 except it carried an un-removable 800 kg bomb for kamikaze attacks. Some D4Y4s were equipped with rockets to increase the speed at which the aircraft would strike their targets increasing the damage they caused.
No D4Y3's survived the war, but a D4Y1 was reconstructed with a Pratt and Whitney R-1830 radial engine to represent a D4Y3. This plane can be seen at the Planes of Fame Air Museum in Chino, California.
Media
- Skins
- Videos
See also
- D4Y1 - Base model with a weaker inline engine (Atsuta 21)
- D4Y2 - earlier model with a stronger inline engine (Atsuta 31) and rocket payload
External links
| Yokosuka Naval Air Technical Arsenal (海軍航空技術廠) | |
|---|---|
| Bombers | D4Y1 · D4Y2 · D4Y3 Ko |
| P1Y1 mod. 11 | |
| Jet fighters | R2Y2 Kai V1 · R2Y2 Kai V2 · R2Y2 Kai V3 |
| Captured | ␗P1Y1 mod. 11 |
| While the arsenal was simply known as the Naval Air Technical Arsenal and usually referred to as Kūgi-shō (Kaigun Kōkū Gijutsu-shō). | |
| The name Yokosuka prevailed however, even though it referred to the Arsenal's location. | |
| See also | Yokosuka Naval Arsenal (Shipyard) |
| Japan bombers | |
|---|---|
| Navy | |
| Carrier-based attack bomber | |
| B5N | B5N2 |
| B6N | B6N1 · B6N2 · B6N2a |
| B7A | B7A2 · B7A2 (Homare 23) |
| Carrier-based dive bomber | |
| D3A | D3A1 |
| D4Y | D4Y1 · D4Y2 · D4Y3 Ko |
| Shipboard Observation seaplane | |
| F1M | F1M2 |
| Land-based Attack bomber | |
| G4M | G4M1 |
| G5N | G5N1 |
| G8N | G8N1 |
| Flying boat | |
| H6K | H6K4 |
| H8K | H8K2 · H8K3 |
| Land-based Bomber | |
| P1Y | P1Y1 |
| Army | |
| Light | Ki-32 |
| Ki-48-II otsu | |
| Heavy | Ki-21-Ia · Ki-21-I hei |
| Ki-49-I · Ki-49-IIa · Ki-49-IIb · Ki-49-IIb/L | |
| Ki-67-I Ko · Ki-67-I otsu | |
| Other countries | ▅B-17E |


