Difference between pages "Pz.Bef.Wg.IV J" and "Ostwind II"
(→Media: Removed dead video) |
(→Description) |
||
| Line 1: | Line 1: | ||
{{About | {{About | ||
| − | | about = German | + | | about = German SPAA '''{{PAGENAME}}''' |
| − | | usage = | + | | usage = the single-barelled version |
| − | | link = | + | | link = Ostwind |
}} | }} | ||
{{Specs-Card | {{Specs-Card | ||
| − | |code= | + | |code=germ_flakpanzer_IV_Ostwind_2 |
| − | |images={{Specs-Card-Image|GarageImage_{{PAGENAME}}.jpg|ArtImage_ | + | |images={{Specs-Card-Image|GarageImage_{{PAGENAME}}.jpg|ArtImage_{{PAGENAME}}.png}} |
}} | }} | ||
== Description == | == Description == | ||
<!-- ''In the description, the first part should be about the history of the creation and combat usage of the vehicle, as well as its key features. In the second part, tell the reader about the ground vehicle in the game. Insert a screenshot of the vehicle, so that if the novice player does not remember the vehicle by name, he will immediately understand what kind of vehicle the article is talking about.'' --> | <!-- ''In the description, the first part should be about the history of the creation and combat usage of the vehicle, as well as its key features. In the second part, tell the reader about the ground vehicle in the game. Insert a screenshot of the vehicle, so that if the novice player does not remember the vehicle by name, he will immediately understand what kind of vehicle the article is talking about.'' --> | ||
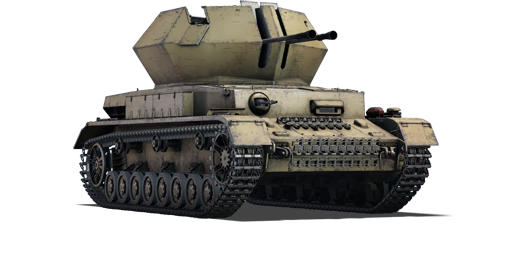
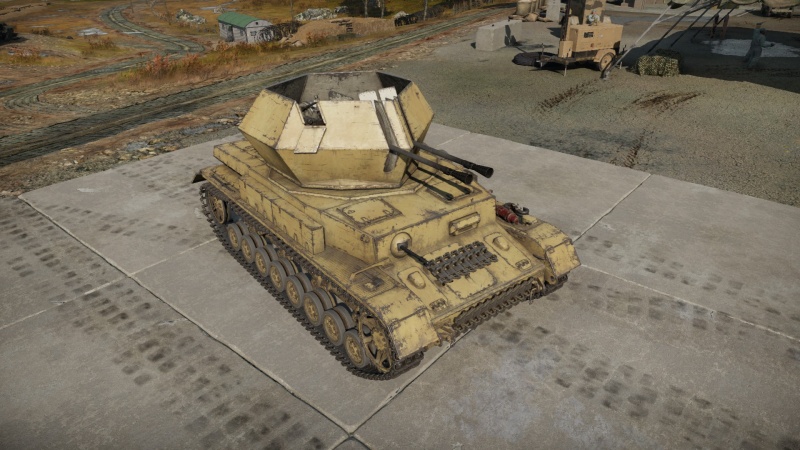
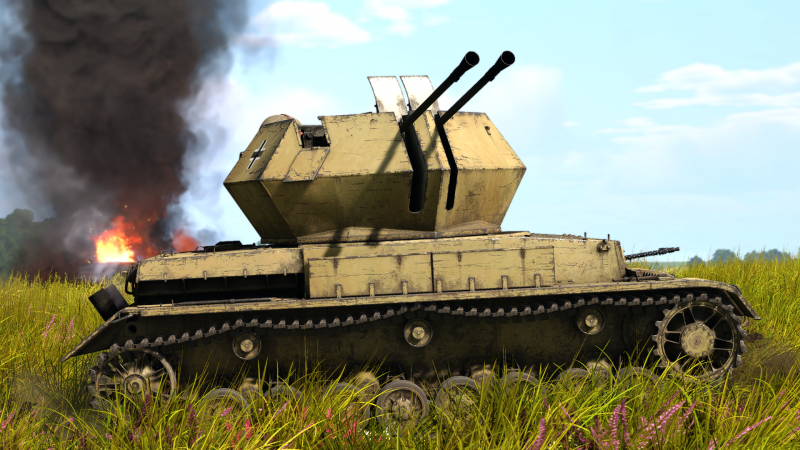
| − | The ''' | + | The '''Flakpanzer IV "Ostwind II"''' is an up-gunned modification of the [[Ostwind|Flakpanzer IV "Ostwind"]], which is the second variant of the [[Flakpanzer IV (Disambiguation)|Flakpanzer IV self-propelled anti-aircraft gun family]]. To increase the firing rate, the Flakpanzer IV "Ostwind" was redesigned with two 37 mm Flugzeugabwehrkanone 43 cannons. A single prototype was built, but World War II ended before it could be fully completed. |
| − | + | Introduced in [[Update 1.91 "Night Vision"]], the Flakpanzer IV "Ostwind II" is an improvement over its predecessors. The increased firepower is useful against aircraft that are much faster in its rank. Due to the sheer destructive power of the ammunition, most enemy aircraft can be brought down with a single hit. The platform, however, remains lightly armoured and should only be used to engage enemy ground units if absolutely necessary. | |
| − | |||
| − | |||
== General info == | == General info == | ||
| Line 21: | Line 19: | ||
{{Specs-Tank-Armour}} | {{Specs-Tank-Armour}} | ||
<!-- ''Describe armour protection. Note the most well protected and key weak areas. Appreciate the layout of modules as well as the number and location of crew members. Is the level of armour protection sufficient, is the placement of modules helpful for survival in combat? If necessary use a visual template to indicate the most secure and weak zones of the armour.'' --> | <!-- ''Describe armour protection. Note the most well protected and key weak areas. Appreciate the layout of modules as well as the number and location of crew members. Is the level of armour protection sufficient, is the placement of modules helpful for survival in combat? If necessary use a visual template to indicate the most secure and weak zones of the armour.'' --> | ||
| − | + | [[File:Ostwind II armour.jpg|alt=Ostwind II armour|right|thumb|x200px]] | |
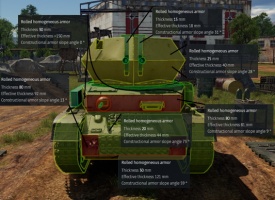
| − | + | The frontal hull armour (80 mm) is quite well protected against small-calibre weapons and [[M2HB (12.7 mm)|.50 cal HMGs]], the sides (30 mm) and rear (20 mm) are not as well protected. | |
| − | |||
| − | + | The turret is open at the top and has a rectangular recess in the right, frontal turret armour, because of the optics. | |
| − | |||
| − | |||
| − | |||
| − | |||
| − | |||
| − | |||
| − | |||
| − | |||
| − | |||
| − | |||
| − | + | In addition, the steel of the turret (25 mm) is very weakly armoured, as well as the hull roof (10-12 mm). | |
| − | |||
| − | |||
| − | |||
| − | |||
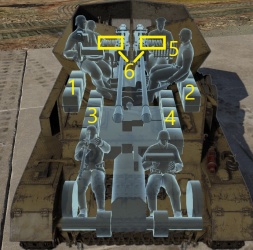
| − | + | Since the vehicle has a crew of six, with the driver and the machine gunner/radio operator in the hull, it usually survives the first attack from enemy aircraft as well as a shot into the turret. | |
| − | |||
| − | |||
| − | |||
| − | |||
| − | |||
| − | |||
=== Mobility === | === Mobility === | ||
| Line 56: | Line 33: | ||
<!-- ''Write about the mobility of the ground vehicle. Estimate the specific power and manoeuvrability, as well as the maximum speed forwards and backwards.'' --> | <!-- ''Write about the mobility of the ground vehicle. Estimate the specific power and manoeuvrability, as well as the maximum speed forwards and backwards.'' --> | ||
| − | {{tankMobility|abMinHp= | + | {{tankMobility|abMinHp=426|rbMinHp=265}} |
| + | |||
| + | The {{PAGENAME}} does not have that great average speed, which means that the 39 km/h will be rare on the battlefield. Forget about trying to turn on the spot as this vehicle does not have neutral steering. Even worse is attempting to use the reverse gear (-7 km/h) which is extremely insufficient presenting an easy target if having to back out of a tight situation. | ||
=== Modifications and economy === | === Modifications and economy === | ||
| Line 66: | Line 45: | ||
{{Specs-Tank-Weapon|1}} | {{Specs-Tank-Weapon|1}} | ||
<!-- ''Give the reader information about the characteristics of the main gun. Assess its effectiveness in a battle based on the reloading speed, ballistics and the power of shells. Do not forget about the flexibility of the fire, that is how quickly the cannon can be aimed at the target, open fire on it and aim at another enemy. Add a link to the main article on the gun: <code><nowiki>{{main|Name of the weapon}}</nowiki></code>. Describe in general terms the ammunition available for the main gun. Give advice on how to use them and how to fill the ammunition storage.'' --> | <!-- ''Give the reader information about the characteristics of the main gun. Assess its effectiveness in a battle based on the reloading speed, ballistics and the power of shells. Do not forget about the flexibility of the fire, that is how quickly the cannon can be aimed at the target, open fire on it and aim at another enemy. Add a link to the main article on the gun: <code><nowiki>{{main|Name of the weapon}}</nowiki></code>. Describe in general terms the ammunition available for the main gun. Give advice on how to use them and how to fill the ammunition storage.'' --> | ||
| − | {{main| | + | {{main|FlaK44 (37 mm)}} |
{| class="wikitable" style="text-align:center" width="100%" | {| class="wikitable" style="text-align:center" width="100%" | ||
|- | |- | ||
| − | ! colspan=" | + | ! colspan="6" | [[FlaK44 (37 mm)|37 mm FlaK44]] (x2) || colspan="5" | Turret rotation speed (°/s) || colspan="4" | Reloading rate (seconds) |
|- | |- | ||
| − | ! Mode !! Capacity !! Vertical !! Horizontal !! Stabilizer | + | ! Mode !! Capacity (Belt) !! Fire rate !! Vertical !! Horizontal !! Stabilizer |
! Stock !! Upgraded !! Full !! Expert !! Aced | ! Stock !! Upgraded !! Full !! Expert !! Aced | ||
! Stock !! Full !! Expert !! Aced | ! Stock !! Full !! Expert !! Aced | ||
|- | |- | ||
! ''Arcade'' | ! ''Arcade'' | ||
| − | | rowspan="2" | | + | | rowspan="2" | 992 (8) || rowspan="2" | 250 || rowspan="2" | -10°/+87° || rowspan="2" | ±180° || rowspan="2" | N/A || 30.82 || 42.66 || 51.80 || 57.28 || 60.94 || rowspan="2" | 0.31 || rowspan="2" | 0.27 || rowspan="2" | 0.25 || rowspan="2" | 0.24 |
|- | |- | ||
! ''Realistic'' | ! ''Realistic'' | ||
| − | | | + | | 20.83 || 24.50 || 29.75 || 32.90 || 35.00 |
|- | |- | ||
|} | |} | ||
| Line 86: | Line 65: | ||
==== Ammunition ==== | ==== Ammunition ==== | ||
| − | *''' | + | * '''Default:''' {{Annotation|APHE|Armour-piercing high-explosive}}{{-}}{{Annotation|FI-T|Fragmentation incendiary tracer}} |
| − | *''' | + | * '''Sprgr. 18:''' {{Annotation|FI-T|Fragmentation incendiary tracer}} |
| − | *'''PzGr | + | * '''PzGr:''' {{Annotation|APHE|Armour-piercing high-explosive}} |
| − | *''' | + | * '''M.Gr.18:''' {{Annotation|HEI-T|High-explosive incendiary tracer}} |
| − | |||
| − | { | + | {{:FlaK44 (37 mm)/Ammunition|FI-T, APHE, HEI-T}} |
| − | |||
| − | |||
| − | |||
| − | |||
| − | |||
| − | |- | ||
| − | |||
| − | |||
| − | |||
| − | |||
| − | |||
| − | |||
| − | |||
| − | |||
| − | |||
| − | |||
| − | |||
| − | |||
| − | |||
| − | |||
| − | |||
| − | |||
| − | |||
| − | |||
| − | |||
| − | |||
| − | |||
| − | |||
| − | |||
| − | |||
| − | |||
| − | |||
| − | |||
| − | |||
| − | |||
| − | |||
| − | |||
| − | |||
| − | |||
| − | |||
| − | |||
| − | |||
| − | |||
| − | |||
| − | |||
| − | |||
| − | |||
| − | |||
| − | |||
| − | |||
| − | |||
| − | |||
| − | |||
| − | |||
==== [[Ammo racks]] ==== | ==== [[Ammo racks]] ==== | ||
| − | <!-- '''Last updated: 1. | + | [[File:Ammoracks_{{PAGENAME}}.jpg|right|thumb|x250px|[[Ammo racks]] of the {{PAGENAME}}]] |
| + | <!-- '''Last updated: 2.1.0.81''' --> | ||
{| class="wikitable" style="text-align:center" | {| class="wikitable" style="text-align:center" | ||
|- | |- | ||
| Line 159: | Line 84: | ||
! 5th<br>rack empty | ! 5th<br>rack empty | ||
! 6th<br>rack empty | ! 6th<br>rack empty | ||
| − | |||
| − | |||
| − | |||
| − | |||
| − | |||
! Visual<br>discrepancy | ! Visual<br>discrepancy | ||
|- | |- | ||
| − | | ''' | + | | '''124''' || 92 ''(+32)'' || 62 ''(+62)'' || 30 ''(+94)'' || 6 ''(+118)'' || 2 ''(+122)'' || 0 ''(+124)'' || Yes |
|- | |- | ||
|} | |} | ||
| − | |||
| − | |||
| − | |||
| − | |||
| − | |||
=== Machine guns === | === Machine guns === | ||
{{Specs-Tank-Weapon|2}} | {{Specs-Tank-Weapon|2}} | ||
| − | |||
<!-- ''Offensive and anti-aircraft machine guns not only allow you to fight some aircraft but also are effective against lightly armoured vehicles. Evaluate machine guns and give recommendations on its use.'' --> | <!-- ''Offensive and anti-aircraft machine guns not only allow you to fight some aircraft but also are effective against lightly armoured vehicles. Evaluate machine guns and give recommendations on its use.'' --> | ||
{{main|MG34 (7.92 mm)}} | {{main|MG34 (7.92 mm)}} | ||
| Line 187: | Line 101: | ||
! Mount !! Capacity (Belt) !! Fire rate !! Vertical !! Horizontal | ! Mount !! Capacity (Belt) !! Fire rate !! Vertical !! Horizontal | ||
|- | |- | ||
| − | | | + | | Hull || 1,800 (150) || 900 || -5°/+7° || ±10° |
| − | |||
| − | |||
|- | |- | ||
|} | |} | ||
| Line 195: | Line 107: | ||
== Usage in battles == | == Usage in battles == | ||
<!-- ''Describe the tactics of playing in the vehicle, the features of using vehicles in the team and advice on tactics. Refrain from creating a "guide" - do not impose a single point of view but instead give the reader food for thought. Describe the most dangerous enemies and give recommendations on fighting them. If necessary, note the specifics of the game in different modes (AB, RB, SB).'' --> | <!-- ''Describe the tactics of playing in the vehicle, the features of using vehicles in the team and advice on tactics. Refrain from creating a "guide" - do not impose a single point of view but instead give the reader food for thought. Describe the most dangerous enemies and give recommendations on fighting them. If necessary, note the specifics of the game in different modes (AB, RB, SB).'' --> | ||
| − | |||
| − | + | ;Realistic Battles | |
| − | + | The {{PAGENAME}} should be held in reserve, for towards the end of the game when there tends to be a significant amount of enemy aircraft flying. It is best to avoid the front lines or beating feet toward the enemy tanks as the {{PAGENAME}} tends to be an easy target for a majority of the other tanks in the game. | |
| − | + | If your own team is about to lose or it gets very exciting towards the end and there are not many enemies left alive, you can place your {{PAGENAME}} inside an allied capture-point to defend it from enemy light tanks. Due to the location, it is more central to the battlefield and presents a difficult challenge for enemy aircraft to attempt to fly over. | |
| − | + | It should also be kept in mind that if impenetrable heavily armoured enemies are encountered and you are left with no other option but to engage them, firing in a sustained manner at their cannon barrel is a semi-viable idea. This is because it is entirely possible that it will result in a damaged cannon barrel for the enemy and a chance to escape for you. Furthermore, you can target the tank tracks as well to leave the enemy both harmless and immobile which may possibly get you a kill assist if a teammate with enough firepower is nearby. Any tank with top mounted machine guns will be sure to ruin the day, as most within the Ostwind's BR range will have plenty of penetrating power to hit anyone inside your turret. Avoidance of most American and Russian armor is highly recommended due to their exterior armaments. | |
| − | |||
| − | |||
| − | |||
| − | |||
=== Pros and cons === | === Pros and cons === | ||
| Line 214: | Line 121: | ||
'''Pros:''' | '''Pros:''' | ||
| − | * | + | * 2 x 3.7 cm FlaK 44 cannons with a high rate of fire |
| − | * | + | * M. Gr. 18 rounds have a high muzzle velocity and explosive mass |
| − | * | + | * Does not need to reload until it is completely out of ammunition |
| − | + | * Enough penetration to destroy enemy light armoured vehicles | |
| − | + | * High number of crew members makes it harder to kill this SPAA by knocking out all crew members | |
| − | |||
| − | |||
'''Cons:''' | '''Cons:''' | ||
| − | * | + | * Poorer-than-average mobility and top speed (Panzer IV chassis) |
| − | + | * Slower turret rotation compared to earlier German SPAAs | |
| − | + | * Open-topped design makes it vulnerable to rockets, artillery strikes, and aircraft machine gun/cannon fire | |
| − | * | ||
| − | |||
| − | * | ||
== History == | == History == | ||
<!-- ''Describe the history of the creation and combat usage of the vehicle in more detail than in the introduction. If the historical reference turns out to be too long, take it to a separate article, taking a link to the article about the vehicle and adding a block "/History" (example: <nowiki>https://wiki.warthunder.com/(Vehicle-name)/History</nowiki>) and add a link to it here using the <code>main</code> template. Be sure to reference text and sources by using <code><nowiki><ref></ref></nowiki></code>, as well as adding them at the end of the article with <code><nowiki><references /></nowiki></code>. This section may also include the vehicle's dev blog entry (if applicable) and the in-game encyclopedia description (under <code><nowiki>=== In-game description ===</nowiki></code>, also if applicable).'' --> | <!-- ''Describe the history of the creation and combat usage of the vehicle in more detail than in the introduction. If the historical reference turns out to be too long, take it to a separate article, taking a link to the article about the vehicle and adding a block "/History" (example: <nowiki>https://wiki.warthunder.com/(Vehicle-name)/History</nowiki>) and add a link to it here using the <code>main</code> template. Be sure to reference text and sources by using <code><nowiki><ref></ref></nowiki></code>, as well as adding them at the end of the article with <code><nowiki><references /></nowiki></code>. This section may also include the vehicle's dev blog entry (if applicable) and the in-game encyclopedia description (under <code><nowiki>=== In-game description ===</nowiki></code>, also if applicable).'' --> | ||
| − | |||
| − | |||
| − | |||
| − | |||
| − | |||
| − | + | The Ostwind II was a development of the [[Ostwind]]. First conceived as early as October 1943, the Ostwind II saw the single 3.7 cm FlaK 43 replaced by a twinned 3.7 cm FlaK Zwilling 44 built by the ''Gustloff-Werke'' in Suhl. One single prototype was delivered to the ''Panzerflak-Ersatz und Ausbildungsabteilung Ohrsdurf/Thühringen'' in January of 1945 for evaluation purposes, but due to the rapid events of the war it was never taken into production. | |
| − | |||
| − | |||
| − | |||
| − | |||
== Media == | == Media == | ||
| Line 250: | Line 143: | ||
;Skins | ;Skins | ||
| − | * [https://live.warthunder.com/feed/camouflages/?vehicle= | + | * [https://live.warthunder.com/feed/camouflages/?vehicle=germ_flakpanzer_IV_Ostwind_2 Skins and camouflages for the {{PAGENAME}} from live.warthunder.com.] |
| − | |||
| − | |||
| − | |||
;Videos | ;Videos | ||
| − | {{Youtube-gallery| | + | {{Youtube-gallery|naeDoEwZ5Pg|'''German SPAAs''' discusses the {{PAGENAME}} at 3:44 - ''War Thunder Official Channel''|Tvf5Z49Tjc4|'''Ostwind II: Same Old Wind But Stock''' - ''Napalmratte''|KHoF40aIeEU|'''The Ostwind II SPAA''' - ''Orangefan''}} |
== See also == | == See also == | ||
| Line 263: | Line 153: | ||
* ''links to approximate analogues of other nations and research trees.'' --> | * ''links to approximate analogues of other nations and research trees.'' --> | ||
| − | ; | + | ;Related development |
| − | * [[ | + | * [[Flakpanzer IV]] |
| − | * [[ | + | ** [[Ostwind]] - Predecessor with a single 37 mm FlaK 43 autocannon. |
| + | |||
| + | ;Other vehicles of similar configuration and role | ||
| + | |||
| + | * [[Flakpanzer 341]] - Gift vehicle that the Ostwind II substituted in the main tech tree. | ||
== External links == | == External links == | ||
| − | ''Paste links to sources and external resources, such as:'' | + | <!-- ''Paste links to sources and external resources, such as:'' |
* ''topic on the official game forum;'' | * ''topic on the official game forum;'' | ||
| − | * ''other literature.'' | + | * ''other literature.'' --> |
| + | |||
| + | * [[wt:en/news/6317-development-changes-and-optimization-in-the-german-tech-tree-en|[Development] Changes and optimization in the German tech-tree]] | ||
| − | {{Germany | + | {{Germany anti-aircraft vehicles}} |
| − | |||
Latest revision as of 10:30, 21 November 2023
| This page is about the German SPAA Ostwind II. For the single-barelled version, see Ostwind. |
Contents
Description
The Flakpanzer IV "Ostwind II" is an up-gunned modification of the Flakpanzer IV "Ostwind", which is the second variant of the Flakpanzer IV self-propelled anti-aircraft gun family. To increase the firing rate, the Flakpanzer IV "Ostwind" was redesigned with two 37 mm Flugzeugabwehrkanone 43 cannons. A single prototype was built, but World War II ended before it could be fully completed.
Introduced in Update 1.91 "Night Vision", the Flakpanzer IV "Ostwind II" is an improvement over its predecessors. The increased firepower is useful against aircraft that are much faster in its rank. Due to the sheer destructive power of the ammunition, most enemy aircraft can be brought down with a single hit. The platform, however, remains lightly armoured and should only be used to engage enemy ground units if absolutely necessary.
General info
Survivability and armour
The frontal hull armour (80 mm) is quite well protected against small-calibre weapons and .50 cal HMGs, the sides (30 mm) and rear (20 mm) are not as well protected.
The turret is open at the top and has a rectangular recess in the right, frontal turret armour, because of the optics.
In addition, the steel of the turret (25 mm) is very weakly armoured, as well as the hull roof (10-12 mm).
Since the vehicle has a crew of six, with the driver and the machine gunner/radio operator in the hull, it usually survives the first attack from enemy aircraft as well as a shot into the turret.
Mobility
| Game Mode | Max Speed (km/h) | Weight (tons) | Engine power (horsepower) | Power-to-weight ratio (hp/ton) | |||
|---|---|---|---|---|---|---|---|
| Forward | Reverse | Stock | Upgraded | Stock | Upgraded | ||
| Arcade | Expression error: Unexpected * operator. | 426 | Expression error: Unexpected round operator. | __.__ | |||
| Realistic | 265 | Expression error: Unexpected round operator. | __.__ | ||||
The Ostwind II does not have that great average speed, which means that the 39 km/h will be rare on the battlefield. Forget about trying to turn on the spot as this vehicle does not have neutral steering. Even worse is attempting to use the reverse gear (-7 km/h) which is extremely insufficient presenting an easy target if having to back out of a tight situation.
Modifications and economy
Armaments
Main armament
| 37 mm FlaK44 (x2) | Turret rotation speed (°/s) | Reloading rate (seconds) | ||||||||||||
|---|---|---|---|---|---|---|---|---|---|---|---|---|---|---|
| Mode | Capacity (Belt) | Fire rate | Vertical | Horizontal | Stabilizer | Stock | Upgraded | Full | Expert | Aced | Stock | Full | Expert | Aced |
| Arcade | 992 (8) | 250 | -10°/+87° | ±180° | N/A | 30.82 | 42.66 | 51.80 | 57.28 | 60.94 | 0.31 | 0.27 | 0.25 | 0.24 |
| Realistic | 20.83 | 24.50 | 29.75 | 32.90 | 35.00 | |||||||||
Ammunition
- Default: APHE · FI-T
- Sprgr. 18: FI-T
- PzGr: APHE
- M.Gr.18: HEI-T
| Penetration statistics | |||||||
|---|---|---|---|---|---|---|---|
| Ammunition | Penetration @ 0° Angle of Attack (mm) | ||||||
| 10 m | 100 m | 500 m | 1,000 m | 1,500 m | 2,000 m | ||
| FI-T | 7 | 7 | 5 | 4 | 3 | 3 | |
| APHE | 49 | 46 | 33 | 22 | 14 | 10 | |
| HEI-T | 7 | 7 | 6 | 4 | 4 | 4 | |
| Shell details | ||||||||||||
|---|---|---|---|---|---|---|---|---|---|---|---|---|
| Ammunition | Velocity (m/s) |
Projectile mass (kg) |
Fuse delay (m) |
Fuse sensitivity (mm) |
Explosive mass (TNT equivalent) (g) |
Ricochet | ||||||
| 0% | 50% | 100% | ||||||||||
| FI-T | 820 | 0.62 | 0.1 | 0.1 | 49.3 | 79° | 80° | 81° | ||||
| APHE | 770 | 0.69 | 1.2 | 9 | 22.1 | 47° | 60° | 65° | ||||
| HEI-T | 914 | 0.55 | 0.1 | 0.1 | 108 | 79° | 80° | 81° | ||||
Ammo racks
| Full ammo |
1st rack empty |
2nd rack empty |
3rd rack empty |
4th rack empty |
5th rack empty |
6th rack empty |
Visual discrepancy |
|---|---|---|---|---|---|---|---|
| 124 | 92 (+32) | 62 (+62) | 30 (+94) | 6 (+118) | 2 (+122) | 0 (+124) | Yes |
Machine guns
| 7.92 mm MG34 | ||||
|---|---|---|---|---|
| Mount | Capacity (Belt) | Fire rate | Vertical | Horizontal |
| Hull | 1,800 (150) | 900 | -5°/+7° | ±10° |
Usage in battles
- Realistic Battles
The Ostwind II should be held in reserve, for towards the end of the game when there tends to be a significant amount of enemy aircraft flying. It is best to avoid the front lines or beating feet toward the enemy tanks as the Ostwind II tends to be an easy target for a majority of the other tanks in the game.
If your own team is about to lose or it gets very exciting towards the end and there are not many enemies left alive, you can place your Ostwind II inside an allied capture-point to defend it from enemy light tanks. Due to the location, it is more central to the battlefield and presents a difficult challenge for enemy aircraft to attempt to fly over.
It should also be kept in mind that if impenetrable heavily armoured enemies are encountered and you are left with no other option but to engage them, firing in a sustained manner at their cannon barrel is a semi-viable idea. This is because it is entirely possible that it will result in a damaged cannon barrel for the enemy and a chance to escape for you. Furthermore, you can target the tank tracks as well to leave the enemy both harmless and immobile which may possibly get you a kill assist if a teammate with enough firepower is nearby. Any tank with top mounted machine guns will be sure to ruin the day, as most within the Ostwind's BR range will have plenty of penetrating power to hit anyone inside your turret. Avoidance of most American and Russian armor is highly recommended due to their exterior armaments.
Pros and cons
Pros:
- 2 x 3.7 cm FlaK 44 cannons with a high rate of fire
- M. Gr. 18 rounds have a high muzzle velocity and explosive mass
- Does not need to reload until it is completely out of ammunition
- Enough penetration to destroy enemy light armoured vehicles
- High number of crew members makes it harder to kill this SPAA by knocking out all crew members
Cons:
- Poorer-than-average mobility and top speed (Panzer IV chassis)
- Slower turret rotation compared to earlier German SPAAs
- Open-topped design makes it vulnerable to rockets, artillery strikes, and aircraft machine gun/cannon fire
History
The Ostwind II was a development of the Ostwind. First conceived as early as October 1943, the Ostwind II saw the single 3.7 cm FlaK 43 replaced by a twinned 3.7 cm FlaK Zwilling 44 built by the Gustloff-Werke in Suhl. One single prototype was delivered to the Panzerflak-Ersatz und Ausbildungsabteilung Ohrsdurf/Thühringen in January of 1945 for evaluation purposes, but due to the rapid events of the war it was never taken into production.
Media
- Skins
- Videos
See also
- Related development
- Flakpanzer IV
- Ostwind - Predecessor with a single 37 mm FlaK 43 autocannon.
- Other vehicles of similar configuration and role
- Flakpanzer 341 - Gift vehicle that the Ostwind II substituted in the main tech tree.
External links
| Germany anti-aircraft vehicles | |
|---|---|
| Wheeled | Sd.Kfz.222 |
| Half-track | Sd.Kfz.251/21 · Sd.Kfz. 6/2 |
| Flakpanzer IV | Wirbelwind · Ostwind · Ostwind II · Kugelblitz · Zerstörer 45 |
| Other Flakpanzers | Flakpanzer I · Flakpanzer 38 · Flakpanzer 341 |
| Wiesel AWC | Wiesel 1A4 · Ozelot |
| Radar SPAAG | Gepard · Gepard 1A2 |
| Missile SPAA | FlaRakPz 1 · FlaRakRad |


