Difference between revisions of "B3C"
(→Description) |
|||
| (32 intermediate revisions by 16 users not shown) | |||
| Line 1: | Line 1: | ||
| − | {{Specs-Card|code=saab_b3c}} | + | {{Specs-Card |
| + | |code=saab_b3c | ||
| + | |images={{Specs-Card-Image|GarageImage_{{PAGENAME}}.jpg}} | ||
| + | }} | ||
== Description == | == Description == | ||
| − | <!--''In the description, the first part should be about the history of and the creation and combat usage of the aircraft, as well as its key features. In the second part, tell the reader about the aircraft in the game. Insert a screenshot of the vehicle, so that if the novice player does not remember the vehicle by name, he will immediately understand what kind of vehicle the article is talking about.''--> | + | <!-- ''In the description, the first part should be about the history of and the creation and combat usage of the aircraft, as well as its key features. In the second part, tell the reader about the aircraft in the game. Insert a screenshot of the vehicle, so that if the novice player does not remember the vehicle by name, he will immediately understand what kind of vehicle the article is talking about.'' --> |
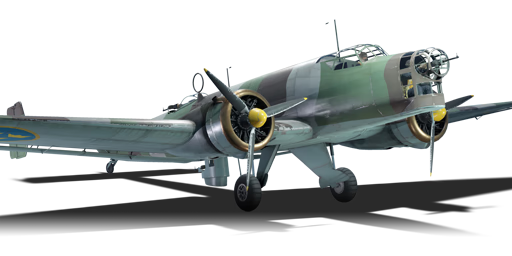
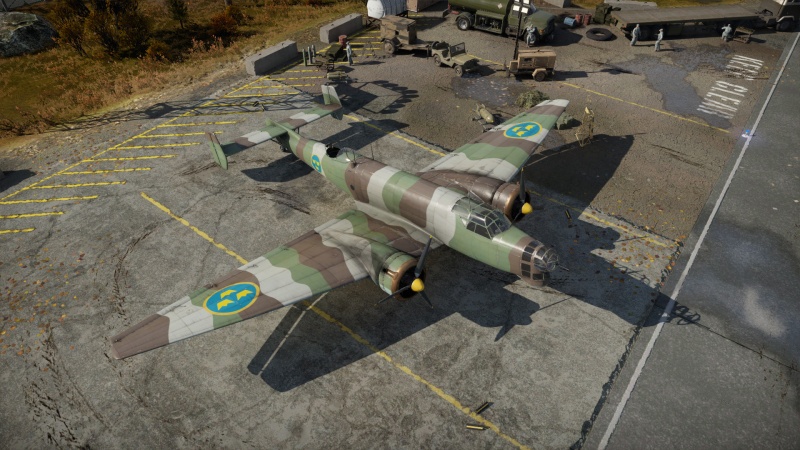
| − | + | The '''{{Specs|name}}''', originally built by the German aircraft firm Junkers as the '''Ju 86''', was developed in the mid-1930s alongside rival Heinkel's [[He 111 (Family)|He 111]]. Since the Luftwaffe were not officially allowed to build bomber aircraft at the time, the main purpose of the aircraft was to be a ten-person airliner which could, with minimal effort, be converted into a medium bomber. The Ju 86 was developed in the mid-1930s with diesel engines, but they proved unreliable in combat during the Spanish Civil War. The Luftwaffe replaced them with BMW 123 radial engines, and also exported the Ju 86K to Sweden and Hungary. Sweden used British Bristol Mercury engines instead, which were later license-built in Sweden and Poland. | |
| − | |||
| − | The '''{{Specs|name}}''' | ||
| − | + | It was introduced in [[Update 1.95 "Northern Wind"]]. The {{PAGENAME}} though an early war bomber is not without a box of tricks. While relegated to a medium bomber function, options in its suspended armament give it the option to carpet bomb smaller and lighter targets or to bomb heavier protected targets and bases. Externally outfitting an 853 kg torpedo gives the bomber the option to strike fear in fleet captains eyes, especially when a crew member announces "Fish in the water". Though for the most part considered an average bomber when it comes to manoeuvrability, rate of climb and level speed, the {{PAGENAME}} has what it takes to deliver its ordnance to the target and has several critically placed defensive turrets to protect the bomber against any interlopers, intent on downing the bomber before it gets to its target. | |
| − | |||
| − | |||
| − | |||
| − | The {{PAGENAME}} though an early war bomber is not without a box of tricks. While relegated to a medium bomber function, options in its suspended armament give it the option to carpet bomb smaller and lighter targets or to bomb heavier protected targets and bases. Externally outfitting an 853 kg torpedo gives the bomber the option to strike fear in fleet captains eyes especially when a crew member announces | ||
== General info == | == General info == | ||
=== Flight performance === | === Flight performance === | ||
| − | <!--''Describe how the aircraft behaves in the air. Speed, manoeuvrability, acceleration and allowable loads - these are the most important characteristics of the vehicle.''--> | + | {{Specs-Avia-Flight}} |
| − | + | <!-- ''Describe how the aircraft behaves in the air. Speed, manoeuvrability, acceleration and allowable loads - these are the most important characteristics of the vehicle.'' --> | |
| − | The {{PAGENAME}} is an average aircraft when it comes to flight characteristics, nothing really impressive, but nothing which hinders the bombers ability to do its job. Acceleration, rate of climb and level speed are good enough | + | The {{PAGENAME}} is an average aircraft when it comes to flight characteristics, nothing really impressive, but nothing which hinders the bombers ability to do its job either. Acceleration, rate of climb and level flight speed are good enough. However, if caught in a low energy state with nowhere to dive, it will be relatively easy to catch, even by the most sluggish fighters or attackers. The large surface area of the wings enable this aircraft to have a comparatively low stall speed and the dual vertical stabilizers detract from the rudder capabilities of this aircraft, compared to aircraft with single vertical stabilizer (see [[B-24D-25-CO|B-24]] vs [[PB4Y-2|PB4Y]] for comparison of vertical stabilizer types). |
| − | The {{PAGENAME}} was | + | The {{PAGENAME}} was designed for mid- to high-altitude bombing, where it remains safe from a majority of the fighters found flying against it in a match. Dropping to lower altitudes enables even the slowest of biplanes ([[Po-2]] and [[Hs 123 A-1]]) to take pot-shots at the bomber. There is one situation, which will require the {{PAGENAME}} to fly low and slow, and that is when setting up for a torpedo run. The bomber will not only be vulnerable to fighters and attackers at the extremely low altitude, but also to anti-aircraft fire from the ships, which should not have much difficulty hitting such a large and slow target. |
| − | {| class="wikitable" style="text-align:center" | + | {| class="wikitable" style="text-align:center" width="70%" |
| − | + | ! rowspan="2" | Characteristics | |
| − | + | ! colspan="2" | Max Speed<br>(km/h at 5,600 m) | |
| − | + | ! rowspan="2" | Max altitude<br>(metres) | |
| − | ! | ||
| − | |||
| − | ! colspan="2" | Max Speed<br>(km/h at | ||
| − | ! rowspan="2" | Max altitude<br>( | ||
! colspan="2" | Turn time<br>(seconds) | ! colspan="2" | Turn time<br>(seconds) | ||
| − | ! colspan="2" | Rate of climb<br>( | + | ! colspan="2" | Rate of climb<br>(metres/second) |
| − | ! rowspan="2" | Take-off run<br>( | + | ! rowspan="2" | Take-off run<br>(metres) |
|- | |- | ||
| − | ! AB | + | ! AB !! RB !! AB !! RB !! AB !! RB |
| − | ! RB | ||
| − | ! AB | ||
| − | ! | ||
| − | |||
| − | ! RB | ||
| − | |||
| − | |||
| − | |||
| − | ! | ||
| − | |||
| − | ! | ||
| − | ! | ||
| − | ! | ||
| − | |||
| − | |||
|- | |- | ||
| − | ! | + | ! Stock |
| − | + | | 372 || 363 || rowspan="2" | {{Specs|ceiling}} || 17.8 || 18.4 || 5.5 || 5.5 || rowspan="2" | 530 | |
| − | |||
| − | |||
| − | |||
| − | |||
|- | |- | ||
| − | | | + | ! Upgraded |
| + | | 421 || 395 || 16.3 || 17.0 || 10.5 || 7.7 | ||
|- | |- | ||
|} | |} | ||
==== Details ==== | ==== Details ==== | ||
| − | {| class="wikitable" style="text-align:center" | + | {| class="wikitable" style="text-align:center" width="50%" |
|- | |- | ||
! colspan="5" | Features | ! colspan="5" | Features | ||
|- | |- | ||
| − | ! Combat flaps | + | ! Combat flaps !! Take-off flaps !! Landing flaps !! Air brakes !! Arrestor gear |
| − | ! Take-off flaps | ||
| − | ! Landing flaps | ||
| − | ! Air brakes | ||
| − | ! Arrestor gear | ||
|- | |- | ||
| − | | | + | | ✓ || ✓ || ✓ || X || X <!-- ✓ --> |
|- | |- | ||
|} | |} | ||
| − | {| class="wikitable" style="text-align:center" | + | {| class="wikitable" style="text-align:center" width="50%" |
|- | |- | ||
| − | ! colspan=" | + | ! colspan="7" | Limits |
|- | |- | ||
| − | ! rowspan="2" | | + | ! rowspan="2" | Wings (km/h) |
| − | ! rowspan="2" | Gear | + | ! rowspan="2" | Gear (km/h) |
| − | ! | + | ! colspan="3" | Flaps (km/h) |
! colspan="2" | Max Static G | ! colspan="2" | Max Static G | ||
|- | |- | ||
| − | ! + | + | ! Combat !! Take-off !! Landing !! + !! - |
| − | ! - | ||
|- | |- | ||
| − | | {{Specs|destruction| | + | | {{Specs|destruction|body}} || {{Specs|destruction|gear}} || 310 || 297 || 240 || ~7 || ~3 |
|- | |- | ||
|} | |} | ||
| Line 94: | Line 64: | ||
{| class="wikitable" style="text-align:center" | {| class="wikitable" style="text-align:center" | ||
|- | |- | ||
| − | ! colspan="4" | Optimal velocities | + | ! colspan="4" | Optimal velocities (km/h) |
|- | |- | ||
| − | ! Ailerons | + | ! Ailerons !! Rudder !! Elevators !! Radiator |
| − | ! Rudder | ||
| − | ! Elevators | ||
| − | ! Radiator | ||
|- | |- | ||
| − | | < | + | | < 200 || < 200 || < 250 || > 324 |
|- | |- | ||
|} | |} | ||
| − | + | === Survivability and armour === | |
| − | + | {{Specs-Avia-Armour}} | |
| − | ! | + | <!-- ''Examine the survivability of the aircraft. Note how vulnerable the structure is and how secure the pilot is, whether the fuel tanks are armoured, etc. Describe the armour, if there is any, and also mention the vulnerability of other critical aircraft systems.'' --> |
| − | + | ||
| − | + | * No armour | |
| − | + | * Self-sealing fuel tanks (4 in each wing) | |
| − | |||
| − | |||
| − | |||
| − | |||
| − | |||
| − | |||
| − | |||
| − | === | + | === Modifications and economy === |
| − | + | {{Specs-Economy}} | |
== Armaments == | == Armaments == | ||
| + | {{Specs-Avia-Armaments}} | ||
=== Suspended armament === | === Suspended armament === | ||
| − | <!--''Describe the aircraft's suspended armament: additional cannons under the wings, bombs, rockets and torpedoes. This section is especially important for bombers and attackers. If there is no suspended weaponry remove this subsection.''--> | + | {{Specs-Avia-Suspended}} |
| − | {{main|m/42 (50 kg)|m/40 ( | + | <!-- ''Describe the aircraft's suspended armament: additional cannons under the wings, bombs, rockets and torpedoes. This section is especially important for bombers and attackers. If there is no suspended weaponry remove this subsection.'' --> |
| + | {{main|sb m/42 (50 kg)|mb m/40 (250 kg)|m/41 (450 mm)}} | ||
| − | * 16 x 50 kg bombs (800 kg total) | + | The '''''{{PAGENAME}}''''' can be outfitted with the following ordnance: |
| − | * | + | |
| − | * | + | * 16 x 50 kg sb m/42 bombs (800 kg total) |
| + | * 1 x 450 mm m/41 torpedo (853 kg total) | ||
| + | * 4 x 250 kg mb m/40 bombs (1,000 kg total) | ||
=== Defensive armament === | === Defensive armament === | ||
| − | <!--''Defensive armament with turret machine guns or cannons, crewed by gunners. Examine the number of gunners and what belts or drums are better to use. If defensive weaponry is not available, remove this subsection.''--> | + | {{Specs-Avia-Defensive}} |
| + | <!-- ''Defensive armament with turret machine guns or cannons, crewed by gunners. Examine the number of gunners and what belts or drums are better to use. If defensive weaponry is not available, remove this subsection.'' --> | ||
{{main|Ksp m/22-37 R (8 mm)}} | {{main|Ksp m/22-37 R (8 mm)}} | ||
| − | The '''''{{PAGENAME}}''''' is | + | The '''''{{PAGENAME}}''''' is defended by: |
| − | * 1 x 8 mm Ksp m/22-37 R nose turret | + | * 1 x 8 mm Ksp m/22-37 R machine gun, nose turret (675 rpg) |
| − | * 1 x 8 mm Ksp m/22-37 R dorsal turret | + | * 1 x 8 mm Ksp m/22-37 R machine gun, dorsal turret (1,050 rpg) |
| − | * 1 x 8 mm Ksp m/22-37 R ventral turret | + | * 1 x 8 mm Ksp m/22-37 R machine gun, ventral turret (825 rpg) |
== Usage in battles == | == Usage in battles == | ||
| − | <!--''Describe the tactics of playing in | + | <!-- ''Describe the tactics of playing in the aircraft, the features of using aircraft in a team and advice on tactics. Refrain from creating a "guide" - do not impose a single point of view, but instead, give the reader food for thought. Examine the most dangerous enemies and give recommendations on fighting them. If necessary, note the specifics of the game in different modes (AB, RB, SB).'' --> |
| − | + | While many aircraft found in War Thunder are considered multi-role capable (fighter and interceptor, attacker and bomber, etc.), some aircraft sit within just one role, but have several subset capabilities within that role. The {{PAGENAME}} is no exception as its sole role in the game is that of a medium bomber, however, it is capable of defining its mission objective, depending on the type of suspended ordnance outfitted. | |
| − | While many aircraft found in War Thunder are considered multi-role capable (fighter | ||
;Small target bomber | ;Small target bomber | ||
| − | As an early rank bomber, the {{PAGENAME}} has access to | + | As an early rank bomber, the {{PAGENAME}} has access to several of the smaller bombs found in the game. Loading up with the 50 kg bombs allows the bomber to take out many of the lightly protect vehicles found on the map, such as trucks, light tanks, anti-aircraft artillery, light pillboxes/bunkers and aircraft parked on a runway. Vehicles travelling in columns make for an especially tempting target as when lined up properly, the {{PAGENAME}} can come in at a lower altitude and drop individual bombs per target, being more judicious with the suspended ordnance, especially in realistic and simulator battles, where reloads require heading back to base. Heavy pillboxes, medium and heavy tanks, along with bases, should be avoided, as these smaller bombs will be less effective against them. |
;Large/protected target bomber | ;Large/protected target bomber | ||
| − | When it comes to attacking a base or targets such as reinforced pillboxes, large ships, medium and heavy tanks, the 250 kg and | + | When it comes to attacking a base or targets, such as reinforced pillboxes, large ships, medium and heavy tanks, the 250 kg bomb and 450 mm torpedo will come in handy. With a harder punch, they will make short work of the vehicles, which the 50 kg bombs will realistically just bounce off of. Base bombing will be more effective, specifically if the {{PAGENAME}} is flying at 4,000 m and above, where it is less likely to run into enemy fighters, and if it does, the defensive turrets can make it that much more difficult for them to get sights on you. |
;Torpedo bomber | ;Torpedo bomber | ||
| − | The {{PAGENAME}} can outfit | + | The {{PAGENAME}} can outfit a 450 mm torpedo to the external side of the aircraft's bomb bay. This big fish (853 kg) can make a big explosion, however, to get the torpedo into the water, the bomber must approach the intended target at a low altitude and slow speed. Typically, ships don't sit there and just watch the torpedo approach and will open up their anti-aircraft fire. The bomber pilot must remain calm to ensure a precise drop of the torpedo. Once released, the bomber must power back up to full speed and vacate the area to avoid further anti-aircraft fire and any potential enemy fighters, which may be in the area. |
=== Manual Engine Control === | === Manual Engine Control === | ||
| Line 169: | Line 133: | ||
! rowspan="2" | Turbocharger | ! rowspan="2" | Turbocharger | ||
|- | |- | ||
| − | ! Oil | + | ! Oil !! Water !! Type |
| − | ! Water | ||
| − | ! Type | ||
|- | |- | ||
| − | | | + | | Controllable || Controllable<br>Not auto controlled || Controllable<br>Not auto controlled || Controllable<br>Not auto controlled || Separate || Not controllable<br>1 gear || Not controllable |
|- | |- | ||
|} | |} | ||
| − | === | + | === Pros and cons === |
| − | + | <!-- ''Summarise and briefly evaluate the vehicle in terms of its characteristics and combat effectiveness. Mark its pros and cons in the bulleted list. Try not to use more than 6 points for each of the characteristics. Avoid using categorical definitions such as "bad", "good" and the like - use substitutions with softer forms such as "inadequate" and "effective".'' --> | |
| − | ! | ||
| − | |||
| − | |||
| − | |||
| − | |||
| − | |||
| − | |||
| − | |||
| − | |||
| − | |||
| − | |||
| − | |||
| − | |||
| − | |||
| − | |||
| − | |||
| − | |||
| − | |||
| − | |||
| − | |||
| − | |||
| − | |||
| − | |||
| − | |||
| − | |||
| − | |||
| − | |||
| − | |||
| − | |||
| − | |||
| − | |||
| − | |||
| − | |||
| − | |||
| − | |||
| − | |||
'''Pros:''' | '''Pros:''' | ||
| − | * | + | |
| − | * | + | * 8 mm defensive guns can ward off most enemy fighters at its BR |
| + | |||
| + | * Can carry a torpedo, unlike contemporary bombers at this BR | ||
| + | * Both bomb loads can destroy a base | ||
| + | * Defensive turrets have a high rate of fire | ||
| + | * Large amounts of tracers can scare off beginning players | ||
| + | * Turn time is better than some fighters | ||
| + | * The 3 x 250 kg mb m/40 bombs are enough to destroy a single base, so in most cases you can destroy 1 and 1/3 of the enemy bases. | ||
'''Cons:''' | '''Cons:''' | ||
| + | |||
* Average flight characteristics | * Average flight characteristics | ||
* Large wing profile, an easy target for attacking fighters | * Large wing profile, an easy target for attacking fighters | ||
* Significant defensive blind spots from the side, above and below | * Significant defensive blind spots from the side, above and below | ||
| + | * Gear retraction and lowering is painfully slow; you will have to start lowering the gear long before you make it to the runway | ||
| + | * Average speed: it will not be outrunning any fighters | ||
| + | * Below average defensive turrets | ||
| + | * The 50 kg bombs have weak explosive mass, making difficult to attack light targets without direct hits | ||
== History == | == History == | ||
| − | <!--''Describe the history of the creation and combat usage of the aircraft in more detail than in the introduction. If the historical reference turns out to be too long, take it to a separate article, taking a link to the article about the vehicle and adding a block "/ History" (example: <nowiki>https://wiki.warthunder.com/(Vehicle-name)/History</nowiki>) and add a link to it here using the <code>main</code> template. Be sure to reference text and sources by using <code><nowiki><ref></nowiki></code>, as well as adding them at the end of the article. This section may also include the vehicle's dev blog entry (if applicable) and the in-game encyclopedia description (under <code><nowiki>=== In-game description ===</nowiki></code>, also if applicable).''--> | + | <!-- ''Describe the history of the creation and combat usage of the aircraft in more detail than in the introduction. If the historical reference turns out to be too long, take it to a separate article, taking a link to the article about the vehicle and adding a block "/History" (example: <nowiki>https://wiki.warthunder.com/(Vehicle-name)/History</nowiki>) and add a link to it here using the <code>main</code> template. Be sure to reference text and sources by using <code><nowiki><ref></ref></nowiki></code>, as well as adding them at the end of the article with <code><nowiki><references /></nowiki></code>. This section may also include the vehicle's dev blog entry (if applicable) and the in-game encyclopedia description (under <code><nowiki>=== In-game description ===</nowiki></code>, also if applicable).'' --> |
| + | The SAAB B3C began its life in the mid-1930s in Germany as the Junkers Ju 86. The purpose of this aircraft was to operate first as a high-speed passenger airliner but also function as a medium bomber with minimal conversion. Conversion from airliner required the removal of ten passenger seats and replaced with four bomb cells which carried each bomb in an upright position. Fuel tanks for the bomber version were located in the fuselage while the airliner moved them to the wings. Originally this bomber was outfitted with Junkers Jumo 205 diesel engines, their drawback was their weight, however, they were more fuel-efficient than standard petrol engines. Unfortunately during the Spanish Civil War, it was determined that the Ju 86 under-performed compared to the He 111, mainly because the diesel engines could not handle the rough treatment endured during combat situations. With this knowledge, the Ju 86 was converted to the BMW 132 radial engines which drastically improved the reliability of this bomber. | ||
| + | |||
| + | The Junkers model Ju 86K was the export version of the Ju 86 which allowed Sweden's aircraft manufacture SAAB to license build these medium bombers and designated them as the B 3. Instead of utilising BMW132 engines, SAAB opted to go with the Bristol Mercury XIX radial engines which had an output of 905 horsepower. The Swedes maintained their B 3 bombers throughout the war and continued to use them for another thirteen years with several being converted to maritime patrol and signal intelligence (SIGINT) aerial platforms to keep apprised of Soviet and Eastern Europe activity. | ||
| − | + | === [[wt:en/news/6492-development-saab-b3c-bomber-to-start-from-en|Devblog]] === | |
| + | In 1934, a set of requirements was issued to both Heinkel and Junkers to develop a new twin engine aircraft, capable of acting as both a high-speed civilian airliner as well as a medium bomber for the German Luftwaffe. While Heinkel would go on to develop the far more successful He 111, Junkers developed the Ju 86, the first test flights of which occurred already in late 1934 and extending in early 1935. | ||
| − | + | Early production of the type commenced in late 1935 for military versions, while civilian variants entered service in 1936. Despite being seen as inferior to the He 111, especially in military service, the Ju 86 nonetheless remained a relatively popular aircraft on the export market, being purchased by various operators from around the globe, ranging from South America, over Europe and going all the way to Asia and Oceania. | |
| + | |||
| + | Among its many operators was also Sweden, which not only purchased a number of Ju 86s directly from Junkers, but also acquired a licence to manufacture the type domestically in the late 1930s. Both imported and built under licence by the SAAB company, the aircraft received its new designation B3, and unlike the German original, the Swedish counterpart received different engines (namely licence-built versions of the Bristol Pegasus radial engines) as well as Swedish weaponry. | ||
| + | |||
| + | As with other countries, Sweden employed their Ju 86s in both military as well as civilian roles for many years before, during and after WWII, with the last of the Ju 86s being decommissioned during the late 1950s. In total, only about 15 B3C and one B3D were built for the Swedish Air Force by SAAB between 1939 - 1940 out of the original 40 aircraft planned. | ||
== Media == | == Media == | ||
| − | <!--''Excellent additions to the article would be video guides, screenshots from the game, and photos.''--> | + | <!-- ''Excellent additions to the article would be video guides, screenshots from the game, and photos.'' --> |
| + | |||
| + | ;Skins | ||
| + | |||
| + | * [https://live.warthunder.com/feed/camouflages/?vehicle=saab_b3c Skins and camouflages for the {{PAGENAME}} from live.warthunder.com.] | ||
| + | |||
;Images | ;Images | ||
| − | <div>< | + | <div><gallery mode="packed" heights="150"> |
| − | + | File:SAAB B3C WTWallpaper 001.jpg| | |
| − | + | File:SAAB B3C WTWallpaper 002.jpg| | |
| − | + | File:SAAB B3C WTWallpaper 003.jpg| | |
| − | + | File:SAAB B3C WTWallpaper 004.jpg| | |
| − | + | File:SAAB B3C WTWallpaper 005.jpg| | |
| − | + | File:SAAB B3C WTWallpaper 006.jpg| | |
| − | + | File:SAAB B3C WTWallpaper 007.jpg| | |
| − | </ | + | </gallery> |
== See also == | == See also == | ||
| − | <!--''Links to the articles on the War Thunder Wiki that you think will be useful for the reader, for example:'' | + | <!-- ''Links to the articles on the War Thunder Wiki that you think will be useful for the reader, for example:'' |
* ''reference to the series of the aircraft;'' | * ''reference to the series of the aircraft;'' | ||
| − | * ''links to approximate analogues of other nations and research trees.''--> | + | * ''links to approximate analogues of other nations and research trees.'' --> |
| + | |||
;Aircraft of comparable role, configuration and era | ;Aircraft of comparable role, configuration and era | ||
| + | |||
* Heinkel [[He 111 H-6|He 111]] | * Heinkel [[He 111 H-6|He 111]] | ||
* Dornier [[Do 17 (Family)|Do 17]] | * Dornier [[Do 17 (Family)|Do 17]] | ||
| Line 255: | Line 208: | ||
== External links == | == External links == | ||
| − | <!--''Paste links to sources and external resources, such as:'' | + | <!-- ''Paste links to sources and external resources, such as:'' |
* ''topic on the official game forum;'' | * ''topic on the official game forum;'' | ||
| − | + | * ''other literature.'' --> | |
| − | * ''other literature.''--> | ||
| − | |||
| − | + | * [[wt:en/news/6492-development-saab-b3c-bomber-to-start-from-en|[Devblog] SAAB B3C: Bomber to Start From]] | |
| + | * [https://forum.warthunder.com/index.php?/topic/474729-saab-b3c/ Official data sheet - more details about the performance] | ||
| − | + | {{AirManufacturer Saab}} | |
| + | {{Sweden bombers}} | ||
Latest revision as of 10:22, 28 October 2023
Contents
Description
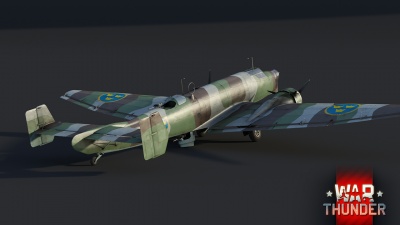
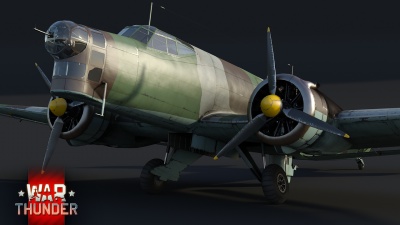
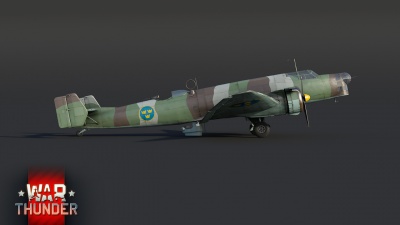
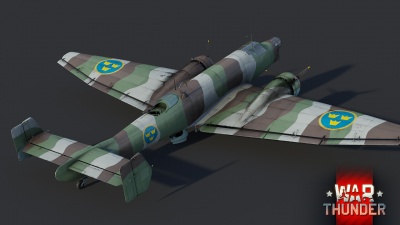
The B3C, originally built by the German aircraft firm Junkers as the Ju 86, was developed in the mid-1930s alongside rival Heinkel's He 111. Since the Luftwaffe were not officially allowed to build bomber aircraft at the time, the main purpose of the aircraft was to be a ten-person airliner which could, with minimal effort, be converted into a medium bomber. The Ju 86 was developed in the mid-1930s with diesel engines, but they proved unreliable in combat during the Spanish Civil War. The Luftwaffe replaced them with BMW 123 radial engines, and also exported the Ju 86K to Sweden and Hungary. Sweden used British Bristol Mercury engines instead, which were later license-built in Sweden and Poland.
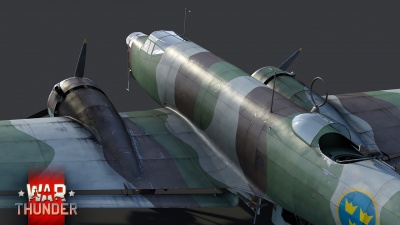
It was introduced in Update 1.95 "Northern Wind". The B3C though an early war bomber is not without a box of tricks. While relegated to a medium bomber function, options in its suspended armament give it the option to carpet bomb smaller and lighter targets or to bomb heavier protected targets and bases. Externally outfitting an 853 kg torpedo gives the bomber the option to strike fear in fleet captains eyes, especially when a crew member announces "Fish in the water". Though for the most part considered an average bomber when it comes to manoeuvrability, rate of climb and level speed, the B3C has what it takes to deliver its ordnance to the target and has several critically placed defensive turrets to protect the bomber against any interlopers, intent on downing the bomber before it gets to its target.
General info
Flight performance
The B3C is an average aircraft when it comes to flight characteristics, nothing really impressive, but nothing which hinders the bombers ability to do its job either. Acceleration, rate of climb and level flight speed are good enough. However, if caught in a low energy state with nowhere to dive, it will be relatively easy to catch, even by the most sluggish fighters or attackers. The large surface area of the wings enable this aircraft to have a comparatively low stall speed and the dual vertical stabilizers detract from the rudder capabilities of this aircraft, compared to aircraft with single vertical stabilizer (see B-24 vs PB4Y for comparison of vertical stabilizer types).
The B3C was designed for mid- to high-altitude bombing, where it remains safe from a majority of the fighters found flying against it in a match. Dropping to lower altitudes enables even the slowest of biplanes (Po-2 and Hs 123 A-1) to take pot-shots at the bomber. There is one situation, which will require the B3C to fly low and slow, and that is when setting up for a torpedo run. The bomber will not only be vulnerable to fighters and attackers at the extremely low altitude, but also to anti-aircraft fire from the ships, which should not have much difficulty hitting such a large and slow target.
| Characteristics | Max Speed (km/h at 5,600 m) |
Max altitude (metres) |
Turn time (seconds) |
Rate of climb (metres/second) |
Take-off run (metres) | |||
|---|---|---|---|---|---|---|---|---|
| AB | RB | AB | RB | AB | RB | |||
| Stock | 372 | 363 | 17.8 | 18.4 | 5.5 | 5.5 | 530 | |
| Upgraded | 421 | 395 | 16.3 | 17.0 | 10.5 | 7.7 | ||
Details
| Features | ||||
|---|---|---|---|---|
| Combat flaps | Take-off flaps | Landing flaps | Air brakes | Arrestor gear |
| ✓ | ✓ | ✓ | X | X |
| Limits | ||||||
|---|---|---|---|---|---|---|
| Wings (km/h) | Gear (km/h) | Flaps (km/h) | Max Static G | |||
| Combat | Take-off | Landing | + | - | ||
| 310 | 297 | 240 | ~7 | ~3 | ||
| Optimal velocities (km/h) | |||
|---|---|---|---|
| Ailerons | Rudder | Elevators | Radiator |
| < 200 | < 200 | < 250 | > 324 |
Survivability and armour
- No armour
- Self-sealing fuel tanks (4 in each wing)
Modifications and economy
Armaments
Suspended armament
The B3C can be outfitted with the following ordnance:
- 16 x 50 kg sb m/42 bombs (800 kg total)
- 1 x 450 mm m/41 torpedo (853 kg total)
- 4 x 250 kg mb m/40 bombs (1,000 kg total)
Defensive armament
The B3C is defended by:
- 1 x 8 mm Ksp m/22-37 R machine gun, nose turret (675 rpg)
- 1 x 8 mm Ksp m/22-37 R machine gun, dorsal turret (1,050 rpg)
- 1 x 8 mm Ksp m/22-37 R machine gun, ventral turret (825 rpg)
Usage in battles
While many aircraft found in War Thunder are considered multi-role capable (fighter and interceptor, attacker and bomber, etc.), some aircraft sit within just one role, but have several subset capabilities within that role. The B3C is no exception as its sole role in the game is that of a medium bomber, however, it is capable of defining its mission objective, depending on the type of suspended ordnance outfitted.
- Small target bomber
As an early rank bomber, the B3C has access to several of the smaller bombs found in the game. Loading up with the 50 kg bombs allows the bomber to take out many of the lightly protect vehicles found on the map, such as trucks, light tanks, anti-aircraft artillery, light pillboxes/bunkers and aircraft parked on a runway. Vehicles travelling in columns make for an especially tempting target as when lined up properly, the B3C can come in at a lower altitude and drop individual bombs per target, being more judicious with the suspended ordnance, especially in realistic and simulator battles, where reloads require heading back to base. Heavy pillboxes, medium and heavy tanks, along with bases, should be avoided, as these smaller bombs will be less effective against them.
- Large/protected target bomber
When it comes to attacking a base or targets, such as reinforced pillboxes, large ships, medium and heavy tanks, the 250 kg bomb and 450 mm torpedo will come in handy. With a harder punch, they will make short work of the vehicles, which the 50 kg bombs will realistically just bounce off of. Base bombing will be more effective, specifically if the B3C is flying at 4,000 m and above, where it is less likely to run into enemy fighters, and if it does, the defensive turrets can make it that much more difficult for them to get sights on you.
- Torpedo bomber
The B3C can outfit a 450 mm torpedo to the external side of the aircraft's bomb bay. This big fish (853 kg) can make a big explosion, however, to get the torpedo into the water, the bomber must approach the intended target at a low altitude and slow speed. Typically, ships don't sit there and just watch the torpedo approach and will open up their anti-aircraft fire. The bomber pilot must remain calm to ensure a precise drop of the torpedo. Once released, the bomber must power back up to full speed and vacate the area to avoid further anti-aircraft fire and any potential enemy fighters, which may be in the area.
Manual Engine Control
| MEC elements | ||||||
|---|---|---|---|---|---|---|
| Mixer | Pitch | Radiator | Supercharger | Turbocharger | ||
| Oil | Water | Type | ||||
| Controllable | Controllable Not auto controlled |
Controllable Not auto controlled |
Controllable Not auto controlled |
Separate | Not controllable 1 gear |
Not controllable |
Pros and cons
Pros:
- 8 mm defensive guns can ward off most enemy fighters at its BR
- Can carry a torpedo, unlike contemporary bombers at this BR
- Both bomb loads can destroy a base
- Defensive turrets have a high rate of fire
- Large amounts of tracers can scare off beginning players
- Turn time is better than some fighters
- The 3 x 250 kg mb m/40 bombs are enough to destroy a single base, so in most cases you can destroy 1 and 1/3 of the enemy bases.
Cons:
- Average flight characteristics
- Large wing profile, an easy target for attacking fighters
- Significant defensive blind spots from the side, above and below
- Gear retraction and lowering is painfully slow; you will have to start lowering the gear long before you make it to the runway
- Average speed: it will not be outrunning any fighters
- Below average defensive turrets
- The 50 kg bombs have weak explosive mass, making difficult to attack light targets without direct hits
History
The SAAB B3C began its life in the mid-1930s in Germany as the Junkers Ju 86. The purpose of this aircraft was to operate first as a high-speed passenger airliner but also function as a medium bomber with minimal conversion. Conversion from airliner required the removal of ten passenger seats and replaced with four bomb cells which carried each bomb in an upright position. Fuel tanks for the bomber version were located in the fuselage while the airliner moved them to the wings. Originally this bomber was outfitted with Junkers Jumo 205 diesel engines, their drawback was their weight, however, they were more fuel-efficient than standard petrol engines. Unfortunately during the Spanish Civil War, it was determined that the Ju 86 under-performed compared to the He 111, mainly because the diesel engines could not handle the rough treatment endured during combat situations. With this knowledge, the Ju 86 was converted to the BMW 132 radial engines which drastically improved the reliability of this bomber.
The Junkers model Ju 86K was the export version of the Ju 86 which allowed Sweden's aircraft manufacture SAAB to license build these medium bombers and designated them as the B 3. Instead of utilising BMW132 engines, SAAB opted to go with the Bristol Mercury XIX radial engines which had an output of 905 horsepower. The Swedes maintained their B 3 bombers throughout the war and continued to use them for another thirteen years with several being converted to maritime patrol and signal intelligence (SIGINT) aerial platforms to keep apprised of Soviet and Eastern Europe activity.
Devblog
In 1934, a set of requirements was issued to both Heinkel and Junkers to develop a new twin engine aircraft, capable of acting as both a high-speed civilian airliner as well as a medium bomber for the German Luftwaffe. While Heinkel would go on to develop the far more successful He 111, Junkers developed the Ju 86, the first test flights of which occurred already in late 1934 and extending in early 1935.
Early production of the type commenced in late 1935 for military versions, while civilian variants entered service in 1936. Despite being seen as inferior to the He 111, especially in military service, the Ju 86 nonetheless remained a relatively popular aircraft on the export market, being purchased by various operators from around the globe, ranging from South America, over Europe and going all the way to Asia and Oceania.
Among its many operators was also Sweden, which not only purchased a number of Ju 86s directly from Junkers, but also acquired a licence to manufacture the type domestically in the late 1930s. Both imported and built under licence by the SAAB company, the aircraft received its new designation B3, and unlike the German original, the Swedish counterpart received different engines (namely licence-built versions of the Bristol Pegasus radial engines) as well as Swedish weaponry.
As with other countries, Sweden employed their Ju 86s in both military as well as civilian roles for many years before, during and after WWII, with the last of the Ju 86s being decommissioned during the late 1950s. In total, only about 15 B3C and one B3D were built for the Swedish Air Force by SAAB between 1939 - 1940 out of the original 40 aircraft planned.
Media
- Skins
- Images
See also
- Aircraft of comparable role, configuration and era
External links
| Swedish Aeroplane Company Ltd. (SAAB) | |
|---|---|
| Pre-SAAB: SA / ASJA | |
| SA 'Jaktfalken' | J6B |
| SAAB 17 | B17A · B17B · S17BS |
| SAAB 18 | B18A · B18B · T18B · T18B (57) |
| SAAB 21 | J21A-1 · J21A-2 · A21A-3 · J21RA · A21RB |
| SAAB 29 'Tunnan' | J29A · A29B · J29D · J29F |
| SAAB 32 'Lansen' | J32B · A32A · A32A Röd Adam |
| SAAB 35 'Draken' | J35A · J35D |
| SAAB 37 'Viggen' | JA37C · JA37D · JA37DI · JA37DI F21 · AJ37 · AJS37 |
| SAAB 39 'Gripen' | JAS39A · JAS39C |
| SAAB 105 | SK60B · SAAB-105G |
| License Production | B3C (Ju 86K) |
| Export | SAAB-105OE · J35XS · ▄JAS39C · ◔JAS39EBS HU C |
| Sweden bombers | |
|---|---|
| B3 | B3C |
| B17 | B17A · B17B · S17BS |
| SAAB 18 | B18A · B18B · T18B · T18B (57) |
| T 2 | T 2 |
| Finland | ▄Ar 196 A-5 · ▄Ju 88 A-4 |


