Difference between pages "Yak-15P" and "Yak-4"
(→Details) |
|||
| Line 1: | Line 1: | ||
| − | {{Specs-Card|code=yak- | + | {{Specs-Card |
| − | {{ | + | |code=yak-4 |
| − | | | + | |images={{Specs-Card-Image|GarageImage_{{PAGENAME}}.jpg}} |
| − | |||
| − | |||
}} | }} | ||
== Description == | == Description == | ||
<!-- ''In the description, the first part should be about the history of and the creation and combat usage of the aircraft, as well as its key features. In the second part, tell the reader about the aircraft in the game. Insert a screenshot of the vehicle, so that if the novice player does not remember the vehicle by name, he will immediately understand what kind of vehicle the article is talking about.'' --> | <!-- ''In the description, the first part should be about the history of and the creation and combat usage of the aircraft, as well as its key features. In the second part, tell the reader about the aircraft in the game. Insert a screenshot of the vehicle, so that if the novice player does not remember the vehicle by name, he will immediately understand what kind of vehicle the article is talking about.'' --> | ||
| − | + | The '''{{Specs|name}}''' is a rank {{Specs|rank}} Soviet bomber {{Battle-rating}}. It was introduced in [[Update 1.75 "La Résistance"]]. | |
| − | |||
| − | The '''{{Specs|name}}''' is a rank {{Specs|rank}} | ||
| − | + | == General info == | |
| − | + | === Flight performance === | |
| − | The Yak- | + | {{Specs-Avia-Flight}} |
| + | <!-- ''Describe how the aircraft behaves in the air. Speed, manoeuvrability, acceleration and allowable loads - these are the most important characteristics of the vehicle.'' --> | ||
| + | The Yak-4 has relatively unsurprising flight characteristics given its size and rank. It has a lacklustre climb rate and acceleration, and as with most Soviet-engined aircraft, it suffocates above 4,000 m in altitude. Thus, the aircraft should stay at lower altitudes, as the engines will drastically lose thrust above the 4,000 m threshold. As well, the engines will overheat rapidly when applying WEP, so it is advised to keep the engine throttles at 100%. | ||
| − | + | The Yak-4 isn't that manoeuvrable, though it can outfly larger twin-engine bombers such as the [[Wellington (Family)|Wellington]] or [[He 111 (Family)|He 111]]. Its control surfaces are rather stiff, and thus the aircraft doesn't roll or turn particularly quickly. Top speed is also rather mediocre, reaching ~450 km/h when flying at lower altitudes. Though the aircraft has decent dive performance, keep in mind that the aircraft's wings will break off at 680 km/h. | |
| − | |||
| − | ' | ||
| − | {| class="wikitable" style="text-align:center" | + | {| class="wikitable" style="text-align:center" width="70%" |
| − | + | ! rowspan="2" | Characteristics | |
| − | + | ! colspan="2" | Max Speed<br>(km/h at 4,800 m) | |
| − | + | ! rowspan="2" | Max altitude<br>(metres) | |
| − | ! | ||
| − | |||
| − | ! colspan="2" | Max Speed<br>(km/h at 4, | ||
| − | ! rowspan="2" | Max altitude<br>( | ||
! colspan="2" | Turn time<br>(seconds) | ! colspan="2" | Turn time<br>(seconds) | ||
| − | ! colspan="2" | Rate of climb<br>( | + | ! colspan="2" | Rate of climb<br>(metres/second) |
| − | ! rowspan="2" | Take-off run<br>( | + | ! rowspan="2" | Take-off run<br>(metres) |
|- | |- | ||
| − | ! AB | + | ! AB !! RB !! AB !! RB !! AB !! RB |
| − | ! RB | ||
| − | ! AB | ||
| − | ! RB | ||
| − | ! AB | ||
| − | ! RB | ||
|- | |- | ||
| − | | | + | ! Stock |
| + | | 513 || 496 || rowspan="2" | {{Specs|ceiling}} || 25.1 || 26.1 || 7.8 || 7.8 || rowspan="2" | 550 | ||
|- | |- | ||
| − | ! | + | ! Upgraded |
| − | + | | 555 || 533 || 22.9 || 24.0 || 13.4 || 10.4 | |
| − | |||
| − | |||
| − | |||
| − | |||
| − | |||
| − | | | ||
| − | |||
| − | |||
| − | |||
| − | |||
| − | |||
| − | |||
| − | |||
| − | |||
|- | |- | ||
|} | |} | ||
| − | ====Details==== | + | ==== Details ==== |
| − | {| class="wikitable" style="text-align:center" | + | {| class="wikitable" style="text-align:center" width="50%" |
|- | |- | ||
! colspan="5" | Features | ! colspan="5" | Features | ||
|- | |- | ||
| − | ! Combat flaps | + | ! Combat flaps !! Take-off flaps !! Landing flaps !! Air brakes !! Arrestor gear |
| − | ! Take-off flaps | ||
| − | ! Landing flaps | ||
| − | ! Air brakes | ||
| − | ! Arrestor gear | ||
|- | |- | ||
| X || X || ✓ || X || X <!-- ✓ --> | | X || X || ✓ || X || X <!-- ✓ --> | ||
| Line 75: | Line 45: | ||
|} | |} | ||
| − | {| class="wikitable" style="text-align:center" | + | {| class="wikitable" style="text-align:center" width="50%" |
|- | |- | ||
| − | ! colspan=" | + | ! colspan="7" | Limits |
|- | |- | ||
| − | ! rowspan="2" | | + | ! rowspan="2" | Wings (km/h) |
| − | ! rowspan="2" | Gear | + | ! rowspan="2" | Gear (km/h) |
| − | ! | + | ! colspan="3" | Flaps (km/h) |
! colspan="2" | Max Static G | ! colspan="2" | Max Static G | ||
|- | |- | ||
| − | ! + | + | ! Combat !! Take-off !! Landing !! + !! - |
| − | ! - | ||
|- | |- | ||
| − | | {{Specs|destruction| | + | | 680 <!-- {{Specs|destruction|body}} --> || {{Specs|destruction|gear}} || - || - || 280 || ~15 || ~7 |
|- | |- | ||
|} | |} | ||
| Line 93: | Line 62: | ||
{| class="wikitable" style="text-align:center" | {| class="wikitable" style="text-align:center" | ||
|- | |- | ||
| − | ! colspan="4" | Optimal velocities | + | ! colspan="4" | Optimal velocities (km/h) |
|- | |- | ||
| − | ! Ailerons | + | ! Ailerons !! Rudder !! Elevators !! Radiator |
| − | ! Rudder | ||
| − | ! Elevators | ||
| − | ! Radiator | ||
|- | |- | ||
| − | | < | + | | < 360 || < 360 || < 450 || > 340 |
|- | |- | ||
| − | |||
| − | |||
| − | |||
| − | |||
| − | |||
| − | |||
| − | |||
| − | |||
| − | |||
| − | |||
| − | |||
| − | |||
| − | |||
| − | |||
| − | |||
| − | |||
| − | |||
| − | |||
| − | |||
| − | |||
| − | |||
| − | |||
| − | |||
| − | |||
| − | |||
| − | |||
| − | |||
| − | |||
| − | |||
| − | |||
|} | |} | ||
=== Survivability and armour === | === Survivability and armour === | ||
| + | {{Specs-Avia-Armour}} | ||
<!-- ''Examine the survivability of the aircraft. Note how vulnerable the structure is and how secure the pilot is, whether the fuel tanks are armoured, etc. Describe the armour, if there is any, and also mention the vulnerability of other critical aircraft systems.'' --> | <!-- ''Examine the survivability of the aircraft. Note how vulnerable the structure is and how secure the pilot is, whether the fuel tanks are armoured, etc. Describe the armour, if there is any, and also mention the vulnerability of other critical aircraft systems.'' --> | ||
| − | * 8 | + | |
| + | * 8 mm Steel plate in the pilot's seat | ||
| + | * 8 mm Steel plate under the pilot | ||
| + | * Self-sealing fuel tanks (2 in each wing) | ||
| + | |||
| + | === Modifications and economy === | ||
| + | {{Specs-Economy}} | ||
== Armaments == | == Armaments == | ||
| + | {{Specs-Avia-Armaments}} | ||
=== Offensive armament === | === Offensive armament === | ||
| + | {{Specs-Avia-Offensive}} | ||
<!-- ''Describe the offensive armament of the aircraft, if any. Describe how effective the cannons and machine guns are in a battle, and also what belts or drums are better to use. If there is no offensive weaponry, delete this subsection.'' --> | <!-- ''Describe the offensive armament of the aircraft, if any. Describe how effective the cannons and machine guns are in a battle, and also what belts or drums are better to use. If there is no offensive weaponry, delete this subsection.'' --> | ||
| − | {{main| | + | {{main|ShKAS (7.62 mm)}} |
The '''''{{PAGENAME}}''''' is armed with: | The '''''{{PAGENAME}}''''' is armed with: | ||
| − | |||
| − | == | + | * 1 x 7.62 mm ShKAS machine gun, nose-mounted (500 rpg) |
| − | <!-- ''Describe the | + | |
| + | === Suspended armament === | ||
| + | {{Specs-Avia-Suspended}} | ||
| + | <!-- ''Describe the aircraft's suspended armament: additional cannons under the wings, bombs, rockets and torpedoes. This section is especially important for bombers and attackers. If there is no suspended weaponry remove this subsection.'' --> | ||
| + | {{main|FAB-100sv (100 kg)}} | ||
| + | |||
| + | The '''''{{PAGENAME}}''''' can be outfitted with the following ordnance: | ||
| − | + | * 8 x 100 kg FAB-100sv bombs (800 kg total) | |
| − | + | === Defensive armament === | |
| + | {{Specs-Avia-Defensive}} | ||
| + | <!-- ''Defensive armament with turret machine guns or cannons, crewed by gunners. Examine the number of gunners and what belts or drums are better to use. If defensive weaponry is not available, remove this subsection.'' --> | ||
| + | {{main|ShKAS (7.62 mm)}} | ||
| − | + | The '''''{{PAGENAME}}''''' is defended by: | |
| − | + | * 1 x 7.62 mm ShKAS machine gun, dorsal turret (1,000 rpg) | |
| − | + | == Usage in battles == | |
| + | <!-- ''Describe the tactics of playing in the aircraft, the features of using aircraft in a team and advice on tactics. Refrain from creating a "guide" - do not impose a single point of view, but instead, give the reader food for thought. Examine the most dangerous enemies and give recommendations on fighting them. If necessary, note the specifics of the game in different modes (AB, RB, SB).'' --> | ||
| + | The Yak-4 can be used primarily as a ground attack aircraft, as its small bomb load prevents it from being an effective bomber. Pilots can utilize the aircraft's airspawn and 100 kg bomb load to destroy softer targets, then return to base to rearm. The aircraft is fitted with a single frontal 7.62 mm ShKAS machine gun and a similar weapon at the rear of the cockpit; though effective, these machine guns are no match for the armament typically carried on fighters the Yak-4 will face in battle. Thus, avoid getting into any dogfights, and if being chased, use the dorsal turret to light up any pursuing aircraft. | ||
| − | ===Manual Engine Control=== | + | At the start of the battle, locate and fly towards any targets located at the sides of the map, as you are less likely to be intercepted and attacked by any approaching fighters. The 100 kg bombs can be used to destroy any harder targets (like light pillboxes or light tanks), while the ShKAS can be used against softer targets such as anti-aircraft guns and vehicles. Keep in mind that the Yak-4 has access to a bomb sight - this can make precision bombing a much easier task. However, it may be more effective to use the 100 kg bombs against "light" targets, as medium tanks and pillboxes will require direct hits to destroy. |
| + | |||
| + | If you see an enemy fighter approaching, the best strategy is to simply run towards your own side and request fighter cover. This is because the Yak-4 is completely uncompetitive against the fighters it usually faces, including [[Spitfire (Family)|Spitfires]], [[Hurricane (Family)|Hurricanes]], and [[Bf 109 (Family)|Bf 109s]]. You're less agile than them, and also have a slower speed. If there is no option at all, simply fly away from the pursuing fighter - force them to come in from behind, where your ShKAS is able to fire at them. Though the ShKAS is only of 7.62 mm calibre, it can still do significant damage and potentially set an engine on fire, if used right. Though it may be tempting to head-on, don't do it - you have no frontal armour and a significantly weaker frontal armament, which is the perfect recipe for a quick pilot-snipe. | ||
| + | |||
| + | === Manual Engine Control === | ||
{| class="wikitable" style="text-align:center" | {| class="wikitable" style="text-align:center" | ||
|- | |- | ||
| Line 170: | Line 129: | ||
! rowspan="2" | Turbocharger | ! rowspan="2" | Turbocharger | ||
|- | |- | ||
| − | ! Oil | + | ! Oil !! Water !! Type |
| − | ! Water | ||
| − | ! Type | ||
|- | |- | ||
| − | | | + | | Controllable || Controllable<br>Not auto controlled || Controllable<br>Not auto controlled || Controllable<br>Not auto controlled || Separate || Controllable<br>2 gears || Not controllable |
|- | |- | ||
|} | |} | ||
| − | |||
| − | |||
| − | |||
| − | |||
| − | |||
| − | |||
| − | |||
| − | |||
| − | |||
| − | |||
| − | |||
| − | |||
| − | |||
| − | |||
| − | |||
| − | |||
| − | |||
| − | |||
| − | |||
| − | |||
| − | |||
| − | |||
| − | |||
| − | |||
| − | |||
| − | |||
| − | |||
| − | |||
| − | |||
| − | |||
| − | |||
| − | |||
| − | |||
| − | |||
| − | |||
=== Pros and cons === | === Pros and cons === | ||
| − | <!-- '' | + | <!-- ''Summarise and briefly evaluate the vehicle in terms of its characteristics and combat effectiveness. Mark its pros and cons in the bulleted list. Try not to use more than 6 points for each of the characteristics. Avoid using categorical definitions such as "bad", "good" and the like - use substitutions with softer forms such as "inadequate" and "effective".'' --> |
'''Pros:''' | '''Pros:''' | ||
| − | * Excellent | + | |
| − | * Good | + | * Excellent speed |
| − | * | + | * Good climb rate |
| − | * | + | * Decent manoeuvrability for a bomber |
| + | * Possesses offensive armament, one centrally mounted ShKAS (7.62 mm) gun, coupling great accuracy with a superb rate of fire | ||
'''Cons:''' | '''Cons:''' | ||
| − | + | ||
| − | * | + | * Very poor bomb load, will struggle at taking out armoured targets (medium tanks, pillboxes, etc.), ineffective at base bombing |
| − | * | + | * Bleeds speed in turns |
| − | * | + | * Vulnerable engines tend to overheat quickly at 100% throttle |
| − | * | + | * Rear gunner cannot aim below 0°, rendering you harmless to any enemies under the plane |
| − | * | + | * Similar to the Yak-2, pilot has no frontal protection and can be knocked out easily |
| − | |||
== History == | == History == | ||
| − | ''Describe the history of the creation and combat usage of the aircraft in more detail than in the introduction. If the historical reference turns out to be too | + | <!-- ''Describe the history of the creation and combat usage of the aircraft in more detail than in the introduction. If the historical reference turns out to be too long, take it to a separate article, taking a link to the article about the vehicle and adding a block "/History" (example: <nowiki>https://wiki.warthunder.com/(Vehicle-name)/History</nowiki>) and add a link to it here using the <code>main</code> template. Be sure to reference text and sources by using <code><nowiki><ref></ref></nowiki></code>, as well as adding them at the end of the article with <code><nowiki><references /></nowiki></code>. This section may also include the vehicle's dev blog entry (if applicable) and the in-game encyclopedia description (under <code><nowiki>=== In-game description ===</nowiki></code>, also if applicable).'' --> |
| − | + | The Yakovlev Yak-4 was a light bomber developed from the Yak-2 light bomber (not to be confused with the Yak-2 KABB attacker), the result of a series of improvements implemented to rectify the issues of its predecessor, which included inadequate speed, an unsatisfactory cooling system, and a weak/troublesome undercarriage. To increase speed, the drag of engine doors and cowlings was reduced, the fuselage upper decking was cut down, and the aircraft was refitted with Klimov M-105 engines. Such improvements increased the speed by 10-20 km/h. To reduce overheating, the oil coolers were relocated to the chin of the engine compartments. To fix problems with the undercarriage, the single wheeled landing gear was replaced with a double wheeled one. The Yak-4 first flew on February 20, 1940, was put into service in 1941, and had its production terminated that same year. A majority of the aircraft were sent to the 316th Reconnaissance Regiment in the Kiev Military District. Although officially retired in 1945, it is not believed that their usage extended much past Operation Barbarossa as the German forces destroyed most of them in its opening days, in large part due to the inexperience of soviet aircrews. However, a few remaining Yak-4s may have found use later in the war as glider tugs or suppliers. A total of around 90 were produced. | |
| − | |||
| − | + | == Media == | |
| − | + | <!-- ''Excellent additions to the article would be video guides, screenshots from the game, and photos.'' --> | |
| − | |||
| − | |||
| − | |||
| − | |||
| − | |||
| − | |||
| − | |||
| − | + | ;Skins | |
| + | * [https://live.warthunder.com/feed/camouflages/?vehicle=yak-4 Skins and camouflages for the {{PAGENAME}} from live.warthunder.com.] | ||
| − | + | ;Videos | |
| − | '' | + | {{Youtube-gallery|G3SpLyslNTs|'''Realistic: Yak-4 [Lean Mean Bombing Machine]''' - ''Jengar''}} |
== See also == | == See also == | ||
| Line 258: | Line 173: | ||
== External links == | == External links == | ||
| − | ''Paste links to sources and external resources, such as:'' | + | <!--''Paste links to sources and external resources, such as:'' |
* ''topic on the official game forum;'' | * ''topic on the official game forum;'' | ||
| − | * '' | + | * ''other literature.''--> |
| − | * | + | |
| + | * [https://forum.warthunder.com/index.php?/topic/392575-yak-4/ Official data sheet - more details about the performance] | ||
{{AirManufacturer Yakovlev}} | {{AirManufacturer Yakovlev}} | ||
| − | {{USSR | + | {{USSR bombers}} |
Latest revision as of 11:55, 27 May 2023

Contents
Description
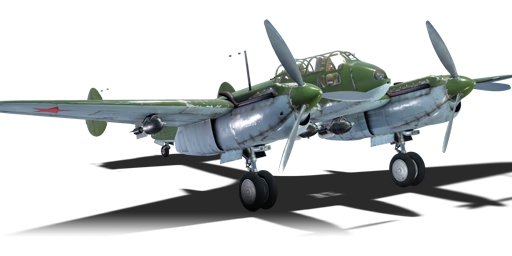
The Yak-4 is a rank Soviet bomber with a battle rating of (AB), (RB), and (SB). It was introduced in Update 1.75 "La Résistance".
General info
Flight performance
The Yak-4 has relatively unsurprising flight characteristics given its size and rank. It has a lacklustre climb rate and acceleration, and as with most Soviet-engined aircraft, it suffocates above 4,000 m in altitude. Thus, the aircraft should stay at lower altitudes, as the engines will drastically lose thrust above the 4,000 m threshold. As well, the engines will overheat rapidly when applying WEP, so it is advised to keep the engine throttles at 100%.
The Yak-4 isn't that manoeuvrable, though it can outfly larger twin-engine bombers such as the Wellington or He 111. Its control surfaces are rather stiff, and thus the aircraft doesn't roll or turn particularly quickly. Top speed is also rather mediocre, reaching ~450 km/h when flying at lower altitudes. Though the aircraft has decent dive performance, keep in mind that the aircraft's wings will break off at 680 km/h.
| Characteristics | Max Speed (km/h at 4,800 m) |
Max altitude (metres) |
Turn time (seconds) |
Rate of climb (metres/second) |
Take-off run (metres) | |||
|---|---|---|---|---|---|---|---|---|
| AB | RB | AB | RB | AB | RB | |||
| Stock | 513 | 496 | 25.1 | 26.1 | 7.8 | 7.8 | 550 | |
| Upgraded | 555 | 533 | 22.9 | 24.0 | 13.4 | 10.4 | ||
Details
| Features | ||||
|---|---|---|---|---|
| Combat flaps | Take-off flaps | Landing flaps | Air brakes | Arrestor gear |
| X | X | ✓ | X | X |
| Limits | ||||||
|---|---|---|---|---|---|---|
| Wings (km/h) | Gear (km/h) | Flaps (km/h) | Max Static G | |||
| Combat | Take-off | Landing | + | - | ||
| 680 | - | - | 280 | ~15 | ~7 | |
| Optimal velocities (km/h) | |||
|---|---|---|---|
| Ailerons | Rudder | Elevators | Radiator |
| < 360 | < 360 | < 450 | > 340 |
Survivability and armour
- 8 mm Steel plate in the pilot's seat
- 8 mm Steel plate under the pilot
- Self-sealing fuel tanks (2 in each wing)
Modifications and economy
Armaments
Offensive armament
The Yak-4 is armed with:
- 1 x 7.62 mm ShKAS machine gun, nose-mounted (500 rpg)
Suspended armament
The Yak-4 can be outfitted with the following ordnance:
- 8 x 100 kg FAB-100sv bombs (800 kg total)
Defensive armament
The Yak-4 is defended by:
- 1 x 7.62 mm ShKAS machine gun, dorsal turret (1,000 rpg)
Usage in battles
The Yak-4 can be used primarily as a ground attack aircraft, as its small bomb load prevents it from being an effective bomber. Pilots can utilize the aircraft's airspawn and 100 kg bomb load to destroy softer targets, then return to base to rearm. The aircraft is fitted with a single frontal 7.62 mm ShKAS machine gun and a similar weapon at the rear of the cockpit; though effective, these machine guns are no match for the armament typically carried on fighters the Yak-4 will face in battle. Thus, avoid getting into any dogfights, and if being chased, use the dorsal turret to light up any pursuing aircraft.
At the start of the battle, locate and fly towards any targets located at the sides of the map, as you are less likely to be intercepted and attacked by any approaching fighters. The 100 kg bombs can be used to destroy any harder targets (like light pillboxes or light tanks), while the ShKAS can be used against softer targets such as anti-aircraft guns and vehicles. Keep in mind that the Yak-4 has access to a bomb sight - this can make precision bombing a much easier task. However, it may be more effective to use the 100 kg bombs against "light" targets, as medium tanks and pillboxes will require direct hits to destroy.
If you see an enemy fighter approaching, the best strategy is to simply run towards your own side and request fighter cover. This is because the Yak-4 is completely uncompetitive against the fighters it usually faces, including Spitfires, Hurricanes, and Bf 109s. You're less agile than them, and also have a slower speed. If there is no option at all, simply fly away from the pursuing fighter - force them to come in from behind, where your ShKAS is able to fire at them. Though the ShKAS is only of 7.62 mm calibre, it can still do significant damage and potentially set an engine on fire, if used right. Though it may be tempting to head-on, don't do it - you have no frontal armour and a significantly weaker frontal armament, which is the perfect recipe for a quick pilot-snipe.
Manual Engine Control
| MEC elements | ||||||
|---|---|---|---|---|---|---|
| Mixer | Pitch | Radiator | Supercharger | Turbocharger | ||
| Oil | Water | Type | ||||
| Controllable | Controllable Not auto controlled |
Controllable Not auto controlled |
Controllable Not auto controlled |
Separate | Controllable 2 gears |
Not controllable |
Pros and cons
Pros:
- Excellent speed
- Good climb rate
- Decent manoeuvrability for a bomber
- Possesses offensive armament, one centrally mounted ShKAS (7.62 mm) gun, coupling great accuracy with a superb rate of fire
Cons:
- Very poor bomb load, will struggle at taking out armoured targets (medium tanks, pillboxes, etc.), ineffective at base bombing
- Bleeds speed in turns
- Vulnerable engines tend to overheat quickly at 100% throttle
- Rear gunner cannot aim below 0°, rendering you harmless to any enemies under the plane
- Similar to the Yak-2, pilot has no frontal protection and can be knocked out easily
History
The Yakovlev Yak-4 was a light bomber developed from the Yak-2 light bomber (not to be confused with the Yak-2 KABB attacker), the result of a series of improvements implemented to rectify the issues of its predecessor, which included inadequate speed, an unsatisfactory cooling system, and a weak/troublesome undercarriage. To increase speed, the drag of engine doors and cowlings was reduced, the fuselage upper decking was cut down, and the aircraft was refitted with Klimov M-105 engines. Such improvements increased the speed by 10-20 km/h. To reduce overheating, the oil coolers were relocated to the chin of the engine compartments. To fix problems with the undercarriage, the single wheeled landing gear was replaced with a double wheeled one. The Yak-4 first flew on February 20, 1940, was put into service in 1941, and had its production terminated that same year. A majority of the aircraft were sent to the 316th Reconnaissance Regiment in the Kiev Military District. Although officially retired in 1945, it is not believed that their usage extended much past Operation Barbarossa as the German forces destroyed most of them in its opening days, in large part due to the inexperience of soviet aircrews. However, a few remaining Yak-4s may have found use later in the war as glider tugs or suppliers. A total of around 90 were produced.
Media
- Skins
- Videos
See also
Links to the articles on the War Thunder Wiki that you think will be useful for the reader, for example:
- reference to the series of the aircraft;
- links to approximate analogues of other nations and research trees.
External links
| A.S. Yakovlev Design Bureau (Яковлев Опытное конструкторское бюро) | |
|---|---|
| Fighters | |
| Yak-1 | Yak-1 · Yak-1B |
| Yak-3 | Yak-3 · Eremin's Yak-3(e) · Yak-3 (VK-107) · Yak-3P · Yak-3T · Yak-3U |
| Yak-7 | Yak-7B |
| Yak-9 | Yak-9 · Yak-9B · Yak-9K · Golovachev's Yak-9M · Yak-9P · Yak-9T · Yak-9U · Yak-9UT |
| Twin-engine fighters | I-29 |
| Jet fighters | |
| Yak-15 | Yak-15P · Yak-15 |
| Yak-17 | Yak-17 |
| Yak-23 | Yak-23 |
| Yak-30 | Yak-30D |
| Yak-141 | Yak-141 |
| Strike aircraft | |
| Yak-2 | Yak-2 KABB |
| Yak-38 | Yak-38 · Yak-38M |
| Bombers | Yak-4 |
| Jet bombers | Yak-28B |
| Foreign use | ▄Yak-3 · Challe's ▄Yak-9T · ◔Yak-9P |
| Captured | ▀Yak-1B |
| USSR bombers | |
|---|---|
| SB and Ar | SB 2M-100 · SB 2M-103 · SB 2M-103 MV-3 · SB 2M-103U · SB 2M-103U MV-3 · SB 2M-105 · Ar-2 |
| Yer-2 (petrol) | Yer-2 (M-105) · Yer-2 (M-105) TAT · Yer-2 (M-105R) TAT · Yer-2 (M-105R) LU |
| Yer-2 (diesel) | Yer-2 (ACh-30B) (e) · Yer-2 (ACh-30B) (l) |
| Tu | Tu-2 · Tu-2S · Tu-2S-44 · Tu-2S-59 · Tu-4 |
| Pe | Pe-2-1 · Pe-2-31 · Pe-2-83 · Pe-2-110 · Pe-2-205 · Pe-2-359 · Pe-8 |
| IL | DB-3B · IL-4 |
| Po | Po-2 · Po-2M |
| Other | MBR-2-M-34 · TB-3M-17-32 · Yak-4 · Be-6 |
| Lend-Lease | ▂PBY-5A Catalina · ▂Hampden TB Mk I · ▂A-20G-30 · ▂B-25J-30 |
