Difference between revisions of "Gepard 1A2"
(→See also) |
(→See also) (Tag: Visual edit) |
||
| (21 intermediate revisions by 9 users not shown) | |||
| Line 6: | Line 6: | ||
{{Specs-Card | {{Specs-Card | ||
|code=germ_flakpz_1a2_Gepard | |code=germ_flakpz_1a2_Gepard | ||
| − | |images={{Specs-Card-Image|GarageImage_{{PAGENAME}}.jpg | + | |images={{Specs-Card-Image|GarageImage_{{PAGENAME}}.jpg}} |
}} | }} | ||
== Description == | == Description == | ||
<!-- ''In the description, the first part should be about the history of the creation and combat usage of the vehicle, as well as its key features. In the second part, tell the reader about the ground vehicle in the game. Insert a screenshot of the vehicle, so that if the novice player does not remember the vehicle by name, he will immediately understand what kind of vehicle the article is talking about.'' --> | <!-- ''In the description, the first part should be about the history of the creation and combat usage of the vehicle, as well as its key features. In the second part, tell the reader about the ground vehicle in the game. Insert a screenshot of the vehicle, so that if the novice player does not remember the vehicle by name, he will immediately understand what kind of vehicle the article is talking about.'' --> | ||
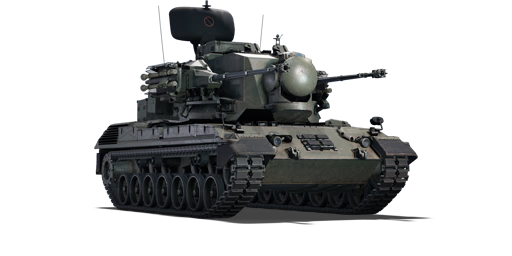
| − | The ''' | + | The '''{{Specs|name}}''' is a rank {{Specs|rank}} German SPAA {{Battle-rating}}. It was introduced in [[Update "Apex Predators"]]. |
| − | |||
| − | |||
== General info == | == General info == | ||
| Line 54: | Line 52: | ||
<!-- ''Give the reader information about the characteristics of the main gun. Assess its effectiveness in a battle based on the reloading speed, ballistics and the power of shells. Do not forget about the flexibility of the fire, that is how quickly the cannon can be aimed at the target, open fire on it and aim at another enemy. Add a link to the main article on the gun: <code><nowiki>{{main|Name of the weapon}}</nowiki></code>. Describe in general terms the ammunition available for the main gun. Give advice on how to use them and how to fill the ammunition storage.'' --> | <!-- ''Give the reader information about the characteristics of the main gun. Assess its effectiveness in a battle based on the reloading speed, ballistics and the power of shells. Do not forget about the flexibility of the fire, that is how quickly the cannon can be aimed at the target, open fire on it and aim at another enemy. Add a link to the main article on the gun: <code><nowiki>{{main|Name of the weapon}}</nowiki></code>. Describe in general terms the ammunition available for the main gun. Give advice on how to use them and how to fill the ammunition storage.'' --> | ||
{{main|Oerlikon KDA (35 mm)}} | {{main|Oerlikon KDA (35 mm)}} | ||
| + | |||
| + | ''Give the reader information about the characteristics of the main gun. Assess its effectiveness in a battle based on the reloading speed, ballistics and the power of shells. Do not forget about the flexibility of the fire, that is how quickly the cannon can be aimed at the target, open fire on it and aim at another enemy. Add a link to the main article on the gun: <code><nowiki>{{main|Name of the weapon}}</nowiki></code>. Describe in general terms the ammunition available for the main gun. Give advice on how to use them and how to fill the ammunition storage.'' | ||
{| class="wikitable" style="text-align:center" width="100%" | {| class="wikitable" style="text-align:center" width="100%" | ||
| Line 64: | Line 64: | ||
|- | |- | ||
! ''Arcade'' | ! ''Arcade'' | ||
| − | | rowspan="2" | 680 (320) || rowspan="2" | 550 || rowspan="2" | -10°/+85° || rowspan="2" | ±180° || rowspan="2" | Two-plane || 79.3 || 109.7 || 133.2 || 147.3 || 156.7 || rowspan="2" | 1.30 || rowspan="2" | 1.15 || rowspan="2" | 1.06 || rowspan="2" | 1.00 | + | | rowspan="2" | 680 (320) || rowspan="2" | 550 || rowspan="2" | -10°/+85° || rowspan="2" | ±180° || rowspan="2" | Two-plane ||79.3||109.7||133.2||147.3||156.7|| rowspan="2" |1.30|| rowspan="2" |1.15|| rowspan="2" |1.06|| rowspan="2" |1.00 |
|- | |- | ||
! ''Realistic'' | ! ''Realistic'' | ||
| − | | 53.5 || 63.0 || 76.5 || 84.6 || 90.0 | + | |53.5||63.0||76.5||84.6||90.0 |
|- | |- | ||
|} | |} | ||
| Line 78: | Line 78: | ||
* '''DM23:''' {{Annotation|APDS|Armour-piercing discarding sabot}} | * '''DM23:''' {{Annotation|APDS|Armour-piercing discarding sabot}} | ||
| − | { | + | {| class="wikitable sortable" style="text-align:center" width="100%" |
| − | + | ! colspan="7" | Penetration statistics | |
| − | + | |- | |
| − | + | ! rowspan="2" data-sort-type="text" | Belt | |
| − | + | ! colspan="6" | Penetration @ 0° Angle of Attack (mm) | |
| − | {| class="wikitable" style="text-align:center" | + | |- |
| + | ! 10 m !! 100 m !! 500 m !! 1,000 m !! 1,500 m !! 2,000 m | ||
| + | |- | ||
| + | | Default || 68 || 66 || 57 || 47 || 39 || 32 | ||
| + | |- | ||
| + | | DM11A1 || 68 || 66 || 57 || 47 || 39 || 32 | ||
| + | |- | ||
| + | | DM13 || 68 || 66 || 57 || 47 || 39 || 32 | ||
| + | |- | ||
| + | | DM23 || 127 || 125 || 118 || 110 || 102 || 95 | ||
| + | |- | ||
| + | |} | ||
| + | {| class="wikitable sortable" style="text-align:center" width="100%" | ||
| + | ! colspan="10" | Shell details | ||
| + | |- | ||
| + | ! rowspan="2" data-sort-type="text" | Ammunition | ||
| + | ! rowspan="2" | Type of<br>warhead | ||
| + | ! rowspan="2" | Velocity<br>(m/s) | ||
| + | ! rowspan="2" | Projectile<br>mass (kg) | ||
| + | ! rowspan="2" | Fuse delay<br>(m) | ||
| + | ! rowspan="2" | Fuse sensitivity<br>(mm) | ||
| + | ! rowspan="2" | Explosive mass<br>(TNT equivalent) (g) | ||
| + | ! colspan="3" | Ricochet | ||
| + | |- | ||
| + | ! 0% !! 50% !! 100% | ||
| + | |- | ||
| + | | 35 mm HEI-T || HEI-T* || 1,175 || 0.55 || 0 || 0.1 || 204 || 79° || 80° || 81° | ||
|- | |- | ||
| − | + | | 35 mm API-T || API-T || 1,175 || 0.55 || 1.2 || 9 || 37.4 || 47° || 60° || 65° | |
| − | |||
| − | |||
| − | |||
|- | |- | ||
| − | | | + | | 35 mm APDS || APDS || 1,400 || 0.38 || N/A || N/A || N/A || 75° || 78° || 80° |
|- | |- | ||
|} | |} | ||
| − | |||
| − | + | ==== [[Ammo racks]] ==== | |
| − | + | <!-- [[File:Ammoracks_{{PAGENAME}}.png|right|thumb|x250px|[[Ammo racks]] of the {{PAGENAME}}]] --> | |
| + | <!-- '''Last updated:''' -->{| class="wikitable" | ||
| + | !Full | ||
| + | ammo | ||
| + | !1st | ||
| + | rack empty | ||
| + | !Visual | ||
| + | discrepancy | ||
| + | |- | ||
| + | |'''680''' | ||
| + | |0 ''(+680)'' | ||
| + | |No | ||
| + | |} | ||
=== Additional armament === | === Additional armament === | ||
| Line 111: | Line 145: | ||
! Capacity (Belt) !! Vertical !! Horizontal !! Stabilizer | ! Capacity (Belt) !! Vertical !! Horizontal !! Stabilizer | ||
|- | |- | ||
| − | | 4 (4) || | + | | 4 (4) ||±180°|| -10°/+85° ||mount with gun |
|- | |- | ||
|} | |} | ||
==== Ammunition ==== | ==== Ammunition ==== | ||
| − | { | + | {| class="wikitable sortable" style="text-align:center" width="100%" |
| − | + | ! colspan="12" | Missile details | |
| − | ==== | + | |- |
| − | <! | + | ! rowspan="2" data-sort-type="text" | Ammunition |
| − | < | + | ! rowspan="2" | Type of<br>warhead |
| − | + | ! rowspan="2" | Velocity<br>(m/s) | |
| + | ! rowspan="2" | Range<br>(m) | ||
| + | ! rowspan="2" | Projectile<br>mass (kg) | ||
| + | ! rowspan="2" | Fuse delay<br>(m) | ||
| + | ! rowspan="2" | Fuse sensitivity<br>(mm) | ||
| + | ! rowspan="2" | Trigger radius<br>(m) | ||
| + | ! rowspan="2" | Explosive mass<br>(TNT equivalent) (g) | ||
| + | ! colspan="3" | Ricochet | ||
| + | |- | ||
| + | ! 0% !! 50% !! 100% | ||
|- | |- | ||
| − | + | | FIM-92E || SAM || 680 || 5,000 || 10.1 || 1 || 0.1 || N/A || 540 || 79° || 80° || 81° | |
| − | |||
| − | |||
| − | |||
| − | |||
| − | |||
| − | |||
| − | |||
|- | |- | ||
| − | | | + | | FIM-92K || SAM || 680 || 5,000 || 10.1 || 1 || 0.1 || 1 || 540 || 79° || 80° || 81° |
|- | |- | ||
|} | |} | ||
| + | The FIM-92E detonates on impact while the FIM-92K has a proximity fuse.(FIM-92K unuseable now-some bug here) | ||
== Usage in battles == | == Usage in battles == | ||
<!-- ''Describe the tactics of playing in the vehicle, the features of using vehicles in the team and advice on tactics. Refrain from creating a "guide" - do not impose a single point of view but instead give the reader food for thought. Describe the most dangerous enemies and give recommendations on fighting them. If necessary, note the specifics of the game in different modes (AB, RB, SB).'' --> | <!-- ''Describe the tactics of playing in the vehicle, the features of using vehicles in the team and advice on tactics. Refrain from creating a "guide" - do not impose a single point of view but instead give the reader food for thought. Describe the most dangerous enemies and give recommendations on fighting them. If necessary, note the specifics of the game in different modes (AB, RB, SB).'' --> | ||
| − | The Gepard performs best when stalking enemy aircraft, scanning the sky for a target and waiting until it gets in range of the radar, and only attacking when the radar can provide a lead estimation, thus preserving ammunition which is critical since the cannons will expend it quickly in combat situations. Helicopters will more than often chose to keep a reasonable distance, usually outside your radar's range but this can be countered by using the API-T rounds in short burst until the range of the enemy has been | + | ''The Gepard performs best when stalking enemy aircraft, scanning the sky for a target and waiting until it gets in range of the radar, and only attacking when the radar can provide a lead estimation, thus preserving ammunition which is critical since the cannons will expend it quickly in combat situations. Helicopters will more than often chose to keep a reasonable distance, usually outside your radar's range but this can be countered by using the API-T rounds in short burst until the range of the enemy has been deduced, it only takes a few rounds to destroy an enemy aircraft.'' |
| − | Engaging ground vehicles comes with the risk of being destroyed without doing any significant damage so weigh | + | ''Engaging ground vehicles comes with the risk of being destroyed without doing any significant damage so weigh your options carefully, unsuspecting light tanks are fair game but most tanks will pose a threat even when attacking their side without the appropriate ammunition belts.'' |
| − | Capturing points is also an option thanks to the good mobility of the vehicle, although you will have to make sure the capture point is clear and there is no risk of being attacked by an enemy tank. | + | ''Capturing points is also an option thanks to the good mobility of the vehicle, although you will have to make sure the capture point is clear and there is no risk of being attacked by an enemy tank.'' |
| + | |||
| + | it base gepard only different is 4x FIM-92 missile。 | ||
| + | |||
| + | Shouldn't be looking for any firefights with non-light vehicles due to the 9.7 MBT's increased protection compared to around 8.0 | ||
=== Pros and cons === | === Pros and cons === | ||
<!-- ''Summarise and briefly evaluate the vehicle in terms of its characteristics and combat effectiveness. Mark its pros and cons in a bulleted list. Try not to use more than 6 points for each of the characteristics. Avoid using categorical definitions such as "bad", "good" and the like - use substitutions with softer forms such as "inadequate" and "effective".'' --> | <!-- ''Summarise and briefly evaluate the vehicle in terms of its characteristics and combat effectiveness. Mark its pros and cons in a bulleted list. Try not to use more than 6 points for each of the characteristics. Avoid using categorical definitions such as "bad", "good" and the like - use substitutions with softer forms such as "inadequate" and "effective".'' --> | ||
| − | '''Pros:''' | + | '''Pros:''' |
| − | * Has | + | * Has IR-guided anti-air missiles mounted on the sides of the turret |
| − | |||
| − | |||
'''Cons:''' | '''Cons:''' | ||
| − | * Missiles can be easily countered by | + | * Missiles can be easily countered by flares (FIM-92 is the worst IR-guided anti-air missile in game ) |
| − | * | + | * no Thermal Imager (in this br most spaa have it) |
| − | * | + | * no optical lock only radar lock(if radar get hit then it off and enemy will know you are locking) |
| − | * | + | * ammo not very much |
| − | * | + | * cant shot back (blocked by box) |
== History == | == History == | ||
| Line 167: | Line 206: | ||
== Media == | == Media == | ||
<!-- ''Excellent additions to the article would be video guides, screenshots from the game, and photos.'' --> | <!-- ''Excellent additions to the article would be video guides, screenshots from the game, and photos.'' --> | ||
| − | + | ''Excellent additions to the article would be video guides, screenshots from the game, and photos.'' | |
| − | |||
| − | |||
| − | |||
== See also == | == See also == | ||
| Line 176: | Line 212: | ||
* ''reference to the series of the vehicles;'' | * ''reference to the series of the vehicles;'' | ||
* ''links to approximate analogues of other nations and research trees.'' --> | * ''links to approximate analogues of other nations and research trees.'' --> | ||
| + | ''Links to the articles on the War Thunder Wiki that you think will be useful for the reader, for example:'' | ||
| − | + | * [[LAV-AD]] | |
| − | * [[ | + | * [[PGZ04A]] |
| − | + | * [[Machbet]] | |
| − | + | * [[SIDAM 25 (Mistral)]] | |
| − | * | ||
| − | * [[ | ||
| − | * | ||
| − | |||
| − | |||
== External links == | == External links == | ||
Revision as of 07:18, 8 January 2023
| This page is about the German SPAA Gepard 1A2. For the other version, see Gepard. |

Contents
Description
The Flakpanzer I Gepard 1A2 is a rank German SPAA with a battle rating of (AB), (RB), and (SB). It was introduced in Update "Apex Predators".
General info
Survivability and armour
Describe armour protection. Note the most well protected and key weak areas. Appreciate the layout of modules as well as the number and location of crew members. Is the level of armour protection sufficient, is the placement of modules helpful for survival in combat? If necessary use a visual template to indicate the most secure and weak zones of the armour.
Armour type:
- Rolled homogeneous armour
| Armour | Front (Slope angle) | Sides | Rear | Roof |
|---|---|---|---|---|
| Hull | 30 mm (57°) Front glacis 30 mm (50°) Lower glacis |
25 mm (40-41°) Upper hull 20 mm Lower hull |
20 mm (4-47°) | 30 mm Forward hull 15 mm Everywhere else |
| Turret | 25 mm (1-21°) | 20 mm Turret sides 10 mm Cannon mounts |
20 mm (5-7°) | 15 mm |
Notes:
Mobility
Write about the mobility of the ground vehicle. Estimate the specific power and manoeuvrability, as well as the maximum speed forwards and backwards.
| Game Mode | Max Speed (km/h) | Weight (tons) | Engine power (horsepower) | Power-to-weight ratio (hp/ton) | |||
|---|---|---|---|---|---|---|---|
| Forward | Reverse | Stock | Upgraded | Stock | Upgraded | ||
| Arcade | Expression error: Unexpected * operator. | 1,179 | Expression error: Unexpected round operator. | __.__ | |||
| Realistic | 734 | Expression error: Unexpected round operator. | __.__ | ||||
Modifications and economy
Armaments
Main armament
Give the reader information about the characteristics of the main gun. Assess its effectiveness in a battle based on the reloading speed, ballistics and the power of shells. Do not forget about the flexibility of the fire, that is how quickly the cannon can be aimed at the target, open fire on it and aim at another enemy. Add a link to the main article on the gun: {{main|Name of the weapon}}. Describe in general terms the ammunition available for the main gun. Give advice on how to use them and how to fill the ammunition storage.
| 35 mm Oerlikon KDA (x2) | Turret rotation speed (°/s) | Reloading rate (seconds) | ||||||||||||
|---|---|---|---|---|---|---|---|---|---|---|---|---|---|---|
| Mode | Capacity (Belt) | Fire rate | Vertical | Horizontal | Stabilizer | Stock | Upgraded | Full | Expert | Aced | Stock | Full | Expert | Aced |
| Arcade | 680 (320) | 550 | -10°/+85° | ±180° | Two-plane | 79.3 | 109.7 | 133.2 | 147.3 | 156.7 | 1.30 | 1.15 | 1.06 | 1.00 |
| Realistic | 53.5 | 63.0 | 76.5 | 84.6 | 90.0 | |||||||||
Ammunition
- Default: API-T* · HEI-T*
- DM11A1: HEI-T* · HEI-T* · HEI-T* · API-T*
- DM13: API-T* · API-T* · API-T* · HEI-T*
- DM23: APDS
| Penetration statistics | ||||||
|---|---|---|---|---|---|---|
| Belt | Penetration @ 0° Angle of Attack (mm) | |||||
| 10 m | 100 m | 500 m | 1,000 m | 1,500 m | 2,000 m | |
| Default | 68 | 66 | 57 | 47 | 39 | 32 |
| DM11A1 | 68 | 66 | 57 | 47 | 39 | 32 |
| DM13 | 68 | 66 | 57 | 47 | 39 | 32 |
| DM23 | 127 | 125 | 118 | 110 | 102 | 95 |
| Shell details | |||||||||
|---|---|---|---|---|---|---|---|---|---|
| Ammunition | Type of warhead |
Velocity (m/s) |
Projectile mass (kg) |
Fuse delay (m) |
Fuse sensitivity (mm) |
Explosive mass (TNT equivalent) (g) |
Ricochet | ||
| 0% | 50% | 100% | |||||||
| 35 mm HEI-T | HEI-T* | 1,175 | 0.55 | 0 | 0.1 | 204 | 79° | 80° | 81° |
| 35 mm API-T | API-T | 1,175 | 0.55 | 1.2 | 9 | 37.4 | 47° | 60° | 65° |
| 35 mm APDS | APDS | 1,400 | 0.38 | N/A | N/A | N/A | 75° | 78° | 80° |
Ammo racks
| Full
ammo |
1st
rack empty |
Visual
discrepancy |
|---|---|---|
| 680 | 0 (+680) | No |
Additional armament
Some tanks are armed with several guns in one or more turrets. Evaluate the additional weaponry and give advice on its use. Describe the ammunition available for additional weaponry. Give advice on about how to use them and how to fill the ammunition storage. If there is no additional weaponry remove this subsection.
| Fliegerfaust 2 Stinger missile | |||
|---|---|---|---|
| Capacity (Belt) | Vertical | Horizontal | Stabilizer |
| 4 (4) | ±180° | -10°/+85° | mount with gun |
Ammunition
| Missile details | |||||||||||
|---|---|---|---|---|---|---|---|---|---|---|---|
| Ammunition | Type of warhead |
Velocity (m/s) |
Range (m) |
Projectile mass (kg) |
Fuse delay (m) |
Fuse sensitivity (mm) |
Trigger radius (m) |
Explosive mass (TNT equivalent) (g) |
Ricochet | ||
| 0% | 50% | 100% | |||||||||
| FIM-92E | SAM | 680 | 5,000 | 10.1 | 1 | 0.1 | N/A | 540 | 79° | 80° | 81° |
| FIM-92K | SAM | 680 | 5,000 | 10.1 | 1 | 0.1 | 1 | 540 | 79° | 80° | 81° |
The FIM-92E detonates on impact while the FIM-92K has a proximity fuse.(FIM-92K unuseable now-some bug here)
Usage in battles
The Gepard performs best when stalking enemy aircraft, scanning the sky for a target and waiting until it gets in range of the radar, and only attacking when the radar can provide a lead estimation, thus preserving ammunition which is critical since the cannons will expend it quickly in combat situations. Helicopters will more than often chose to keep a reasonable distance, usually outside your radar's range but this can be countered by using the API-T rounds in short burst until the range of the enemy has been deduced, it only takes a few rounds to destroy an enemy aircraft.
Engaging ground vehicles comes with the risk of being destroyed without doing any significant damage so weigh your options carefully, unsuspecting light tanks are fair game but most tanks will pose a threat even when attacking their side without the appropriate ammunition belts.
Capturing points is also an option thanks to the good mobility of the vehicle, although you will have to make sure the capture point is clear and there is no risk of being attacked by an enemy tank.
it base gepard only different is 4x FIM-92 missile。
Shouldn't be looking for any firefights with non-light vehicles due to the 9.7 MBT's increased protection compared to around 8.0
Pros and cons
Pros:
- Has IR-guided anti-air missiles mounted on the sides of the turret
Cons:
- Missiles can be easily countered by flares (FIM-92 is the worst IR-guided anti-air missile in game )
- no Thermal Imager (in this br most spaa have it)
- no optical lock only radar lock(if radar get hit then it off and enemy will know you are locking)
- ammo not very much
- cant shot back (blocked by box)
History
Describe the history of the creation and combat usage of the vehicle in more detail than in the introduction. If the historical reference turns out to be too long, take it to a separate article, taking a link to the article about the vehicle and adding a block "/History" (example: https://wiki.warthunder.com/(Vehicle-name)/History) and add a link to it here using the main template. Be sure to reference text and sources by using <ref></ref>, as well as adding them at the end of the article with <references />. This section may also include the vehicle's dev blog entry (if applicable) and the in-game encyclopedia description (under === In-game description ===, also if applicable).
Media
Excellent additions to the article would be video guides, screenshots from the game, and photos.
See also
Links to the articles on the War Thunder Wiki that you think will be useful for the reader, for example:
External links
Paste links to sources and external resources, such as:
- topic on the official game forum;
- other literature.
| Germany anti-aircraft vehicles | |
|---|---|
| Wheeled | Sd.Kfz.222 |
| Half-track | Sd.Kfz.251/21 · Sd.Kfz. 6/2 |
| Flakpanzer IV | Wirbelwind · Ostwind · Ostwind II · Kugelblitz · Zerstörer 45 |
| Other Flakpanzers | Flakpanzer I · Flakpanzer 38 · Flakpanzer 341 |
| Wiesel AWC | Wiesel 1A4 · Ozelot |
| Radar SPAAG | Gepard · Gepard 1A2 |
| Missile SPAA | FlaRakPz 1 · FlaRakRad |
