Difference between revisions of "Magach 6"
U120313908 (talk | contribs) (→Description: Expanded) (Tag: Visual edit) |
(Added usage in battles and pros and cons) (Tag: Visual edit) |
||
| (7 intermediate revisions by 3 users not shown) | |||
| Line 11: | Line 11: | ||
== Description == | == Description == | ||
<!-- ''In the description, the first part should be about the history of the creation and combat usage of the vehicle, as well as its key features. In the second part, tell the reader about the ground vehicle in the game. Insert a screenshot of the vehicle, so that if the novice player does not remember the vehicle by name, he will immediately understand what kind of vehicle the article is talking about.'' --> | <!-- ''In the description, the first part should be about the history of the creation and combat usage of the vehicle, as well as its key features. In the second part, tell the reader about the ground vehicle in the game. Insert a screenshot of the vehicle, so that if the novice player does not remember the vehicle by name, he will immediately understand what kind of vehicle the article is talking about.'' --> | ||
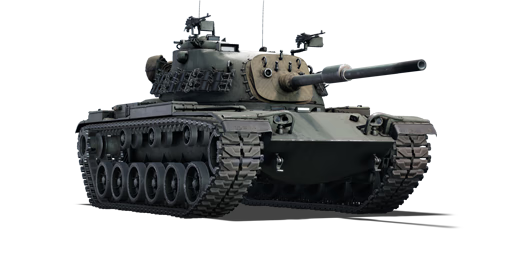
| − | The | + | The '''{{Specs|name}}''' is a rank {{Specs|rank}} Israeli medium tank {{Battle-rating}}. It was introduced in [[Update "Wind of Change"]]. |
| − | |||
| − | It was introduced in [[Update "Wind of Change"]] | ||
== General info == | == General info == | ||
=== Survivability and armour === | === Survivability and armour === | ||
| − | {{Specs-Tank-Armour}} | + | {{Specs-Tank-Armour}} <!-- ''Describe armour protection. Note the most well protected and key weak areas. Appreciate the layout of modules as well as the number and location of crew members. Is the level of armour protection sufficient, is the placement of modules helpful for survival in combat? If necessary use a visual template to indicate the most secure and weak zones of the armour.'' --> |
| − | <!-- ''Describe armour protection. Note the most well protected and key weak areas. Appreciate the layout of modules as well as the number and location of crew members. Is the level of armour protection sufficient, is the placement of modules helpful for survival in combat? If necessary use a visual template to indicate the most secure and weak zones of the armour.'' --> | ||
'''Armour type:''' | '''Armour type:''' | ||
| − | * Cast homogeneous armour | + | *Cast homogeneous armour |
| − | * Rolled homogeneous armour ( | + | *Rolled homogeneous armour (Rear roof, Rear) |
{| class="wikitable" | {| class="wikitable" | ||
|- | |- | ||
| − | ! Armour !! Front (Slope Angle) !! Sides !! Rear !! Roof | + | !Armour!!Front (Slope Angle)!!Sides!!Rear!!Roof |
|- | |- | ||
| − | | Hull || 93 mm (65°) '' | + | |Hull||93 mm (65°) ''Front Glacis'' |
| + | 143 mm (55°) ''Lower Glacis'' | ||
| + | |74 mm||41 mm||20 mm | ||
|- | |- | ||
| − | | Turret || 127 mm | + | |Turret||127 mm ''Turret front'' |
| + | 152 mm ''Gun Mantlet'' | ||
| + | |100 mm - 50.8 mm||50.8 mm||24 mm | ||
|- | |- | ||
| − | | Cupola || | + | |Cupola||35 mm||25.4 mm||25.4 mm||25.4 mm |
|- | |- | ||
| − | |} | + | |}'''Notes:''' |
| − | '''Notes:''' | ||
| − | * Suspension wheels, tracks, and torsion bars are | + | '''Notes:''' <!-- Any additional notes which the user needs to be aware of --> |
| − | + | <!-- Example: * Suspension wheels are 20 mm thick, tracks are 30 mm thick, and torsion bars are 60 mm thick. --> | |
=== Mobility === | === Mobility === | ||
| Line 57: | Line 57: | ||
<!-- ''Give the reader information about the characteristics of the main gun. Assess its effectiveness in a battle based on the reloading speed, ballistics and the power of shells. Do not forget about the flexibility of the fire, that is how quickly the cannon can be aimed at the target, open fire on it and aim at another enemy. Add a link to the main article on the gun: <code><nowiki>{{main|Name of the weapon}}</nowiki></code>. Describe in general terms the ammunition available for the main gun. Give advice on how to use them and how to fill the ammunition storage.'' --> | <!-- ''Give the reader information about the characteristics of the main gun. Assess its effectiveness in a battle based on the reloading speed, ballistics and the power of shells. Do not forget about the flexibility of the fire, that is how quickly the cannon can be aimed at the target, open fire on it and aim at another enemy. Add a link to the main article on the gun: <code><nowiki>{{main|Name of the weapon}}</nowiki></code>. Describe in general terms the ammunition available for the main gun. Give advice on how to use them and how to fill the ammunition storage.'' --> | ||
{{main|M68 (105 mm)}} | {{main|M68 (105 mm)}} | ||
| + | |||
| + | ''Give the reader information about the characteristics of the main gun. Assess its effectiveness in a battle based on the reloading speed, ballistics and the power of shells. Do not forget about the flexibility of the fire, that is how quickly the cannon can be aimed at the target, open fire on it and aim at another enemy. Add a link to the main article on the gun: <code><nowiki>{{main|Name of the weapon}}</nowiki></code>. Describe in general terms the ammunition available for the main gun. Give advice on how to use them and how to fill the ammunition storage.'' | ||
{| class="wikitable" style="text-align:center" width="100%" | {| class="wikitable" style="text-align:center" width="100%" | ||
| Line 67: | Line 69: | ||
|- | |- | ||
! ''Arcade'' | ! ''Arcade'' | ||
| − | | rowspan="2" | 57 || rowspan="2" | -9°/+19° || rowspan="2" | ±180° || rowspan="2" | N/A || | + | | rowspan="2" | 57 || rowspan="2" | -9°/+19° || rowspan="2" | ±180° || rowspan="2" | N/A || __._ || __._ || __._ || __._ || __._ || rowspan="2" | _.__ || rowspan="2" | _.__ || rowspan="2" | _.__ || rowspan="2" | _.__ |
|- | |- | ||
! ''Realistic'' | ! ''Realistic'' | ||
| − | | | + | | __._ || __._ || __._ || __._ || __._ |
|- | |- | ||
|} | |} | ||
==== Ammunition ==== | ==== Ammunition ==== | ||
| − | {{: | + | {| class="wikitable sortable" style="text-align:center" width="100%" |
| + | ! colspan="8" | Penetration statistics | ||
| + | |- | ||
| + | ! rowspan="2" data-sort-type="text" | Ammunition | ||
| + | ! rowspan="2" | Type of<br>warhead | ||
| + | ! colspan="6" | Penetration @ 0° Angle of Attack (mm) | ||
| + | |- | ||
| + | ! 10 m !! 100 m !! 500 m !! 1,000 m !! 1,500 m !! 2,000 m | ||
| + | |- | ||
| + | | M392A2 || APDS || 303 || 302 || 296 || 277 || 257 || 252 | ||
| + | |- | ||
| + | | M156 || HESH || 127 || 127 || 127 || 127 || 127 || 127 | ||
| + | |- | ||
| + | | M152 || HEATFS || 400 || 400 || 400 || 400 || 400 || 400 | ||
| + | |- | ||
| + | |} | ||
| + | {| class="wikitable sortable" style="text-align:center" width="100%" | ||
| + | ! colspan="10" | Shell details | ||
| + | |- | ||
| + | ! rowspan="2" data-sort-type="text" | Ammunition | ||
| + | ! rowspan="2" | Type of<br>warhead | ||
| + | ! rowspan="2" | Velocity<br>(m/s) | ||
| + | ! rowspan="2" | Projectile<br>Mass (kg) | ||
| + | ! rowspan="2" | Fuse delay<br>(m) | ||
| + | ! rowspan="2" | Fuse sensitivity<br>(mm) | ||
| + | ! rowspan="2" | Explosive Mass<br>(TNT equivalent) (g) | ||
| + | ! colspan="3" | Ricochet | ||
| + | |- | ||
| + | ! 0% !! 50% !! 100% | ||
| + | |- | ||
| + | | M392A2 || APDS || 1,478 || 4 || N/A || N/A || N/A || 75° || 78° || 80° | ||
| + | |- | ||
| + | | M156 || HESH || 732 || 14.85 || 0.1 || 4 || 4,310 || 73° || 77° || 80° | ||
| + | |- | ||
| + | | M152 || HEATFS || 1,173 || 10.5 || 0.05 || 0.1 || 1,270 || 65° || 72° || 77° | ||
| + | |- | ||
| + | |} | ||
| + | {| class="wikitable" style="text-align:center" | ||
| + | ! colspan="7" | Smoke shell characteristics | ||
| + | |- | ||
| + | ! Ammunition | ||
| + | ! Velocity<br>(m/s) | ||
| + | ! Projectile<br>Mass (kg) | ||
| + | ! Screen radius<br>(m) | ||
| + | ! Screen deploy time<br>(s) | ||
| + | ! Screen hold time<br>(s) | ||
| + | ! Explosive Mass<br>(TNT equivalent) (g) | ||
| + | |- | ||
| + | | M416 || 730 || 11.4 || 20 || 5 || 25 || 50 | ||
| + | |- | ||
| + | |} | ||
==== [[Ammo racks]] ==== | ==== [[Ammo racks]] ==== | ||
| − | [[File: | + | <!-- [[File:Ammoracks_{{PAGENAME}}.png|right|thumb|x250px|[[Ammo racks]] of the {{PAGENAME}}]] --> |
| − | <!-- '''Last updated: | + | <!-- '''Last updated:''' --> |
{| class="wikitable" style="text-align:center" | {| class="wikitable" style="text-align:center" | ||
|- | |- | ||
| Line 88: | Line 140: | ||
! 4th<br>rack empty | ! 4th<br>rack empty | ||
! 5th<br>rack empty | ! 5th<br>rack empty | ||
| + | ! 6th<br>rack empty | ||
! Visual<br>discrepancy | ! Visual<br>discrepancy | ||
|- | |- | ||
| − | | '''57''' || | + | | '''57''' || __ ''(+__)'' || __ ''(+__)'' || __ ''(+__)'' || __ ''(+__)'' || __ ''(+__)'' || __ ''(+__)'' || __ |
|- | |- | ||
|} | |} | ||
| − | |||
| − | |||
| − | |||
| − | |||
=== Machine guns === | === Machine guns === | ||
| Line 103: | Line 152: | ||
<!-- ''Offensive and anti-aircraft machine guns not only allow you to fight some aircraft but also are effective against lightly armoured vehicles. Evaluate machine guns and give recommendations on its use.'' --> | <!-- ''Offensive and anti-aircraft machine guns not only allow you to fight some aircraft but also are effective against lightly armoured vehicles. Evaluate machine guns and give recommendations on its use.'' --> | ||
{{main|FN MAG 60-40 (7.62 mm)|M73 (7.62 mm)}} | {{main|FN MAG 60-40 (7.62 mm)|M73 (7.62 mm)}} | ||
| + | |||
| + | ''Offensive and anti-aircraft machine guns not only allow you to fight some aircraft but also are effective against lightly armoured vehicles. Evaluate machine guns and give recommendations on its use.'' | ||
{| class="wikitable" style="text-align:center" width="50%" | {| class="wikitable" style="text-align:center" width="50%" | ||
|- | |- | ||
| − | ! colspan="5" | [[ | + | ! colspan="5" | [[FN MAG 60-40 (7.62 mm)|7.62 mm FN MAG 60-40]] |
|- | |- | ||
! Mount !! Capacity (Belt) !! Fire rate !! Vertical !! Horizontal | ! Mount !! Capacity (Belt) !! Fire rate !! Vertical !! Horizontal | ||
|- | |- | ||
| − | | | + | |Commander's Hatch|| 1750 (200) || 600 || -10°/+50° || ±120° |
| + | |- | ||
| + | | Pintle Mount | ||
| + | |||
| + | (Loader Side) | ||
| + | | 1750 (200) || 600 || -10°/+50° || ±120° | ||
|- | |- | ||
|} | |} | ||
{| class="wikitable" style="text-align:center" width="50%" | {| class="wikitable" style="text-align:center" width="50%" | ||
|- | |- | ||
| − | ! colspan="5" | [[ | + | ! colspan="5" | [[M73 (7.62 mm)|7.62 mm M73]] |
|- | |- | ||
! Mount !! Capacity (Belt) !! Fire rate !! Vertical !! Horizontal | ! Mount !! Capacity (Belt) !! Fire rate !! Vertical !! Horizontal | ||
|- | |- | ||
| − | | | + | | Coaxial |
| − | | | + | | ___ (___) || ___ || __° || __° |
| − | |||
|- | |- | ||
|} | |} | ||
| Line 127: | Line 182: | ||
== Usage in battles == | == Usage in battles == | ||
<!-- ''Describe the tactics of playing in the vehicle, the features of using vehicles in the team and advice on tactics. Refrain from creating a "guide" - do not impose a single point of view but instead give the reader food for thought. Describe the most dangerous enemies and give recommendations on fighting them. If necessary, note the specifics of the game in different modes (AB, RB, SB).'' --> | <!-- ''Describe the tactics of playing in the vehicle, the features of using vehicles in the team and advice on tactics. Refrain from creating a "guide" - do not impose a single point of view but instead give the reader food for thought. Describe the most dangerous enemies and give recommendations on fighting them. If necessary, note the specifics of the game in different modes (AB, RB, SB).'' --> | ||
| + | The Magach 6 plays as the same as the M60, with a slight modifications for the Israeli. If you played the M60 before, then you will feel at home playing the Magach 6 | ||
| − | + | Playing the Magach 6, try not to be at the frontlines of the battle too often and instead, stay a bit farther back, supporting your friendlies that are on the frontlines or provide flanking cover, where the enemy will least expect you to be. Make sure to stay cover to cover if possible, and hide behind hills to reduce the likelihood of being shot. The Magach 6 is quite a tall tank and can be easily spotted moving across terrain. Equipped with the M68 105mm cannon, the Magach 6 can make work of any tank. Usually your main shell will be APDS, as it offers the best overall performance, though HEAT-FS does offer more penetration but has its own set of disadvantages. | |
| − | If on a map with close quarters battles/urban environments, try to stay | + | If on a map with close quarters battles/urban environments, such as Poland, try to go around and stay outside of the city, and on the flanks to find a position where ambushing enemies are possible. Be aware that most light tanks and certain medium tanks/MBTs can get to a position before you as they have better mobility than you. If you prefer being near the center of the battle, or a map such as Breslau, hang back a bit and support your teammates from the rear, and guard their flanks if needed. Armor at very close range is usually negated, and while you can shrug off a few AP rounds, medium and heavy tanks can still aim at your weak spots and render you out of combat. Try to have a battle buddy if aiming for an objective to reduce the chances of you being surprised/flank. Be aware of lighty armored vehicles such as BMPs or the R3 T106, as the Magach 6 does not have a 50. Caliber HMG unlike its American brother to gun them down, and will require you to time your shot correctly, if they start rushing you, but most likely they will try to play smart as at a quick glance at the Magach 6 will make the players think you are in an M60, where most American vehicles have 50. Caliber HMG on their medium tanks. |
| − | With the Magach 6 lacking a HMG, it will be | + | With the Magach 6 lacking a 50. Caliber HMG, it will be harder to shoot down air targets without the 50. cal and only having 3 7.62mm machine guns, though it's still better than nothing. With light tanks mentioned above, your main cannon is the only option to kill light tanks. HEAT-FS or HESH would be the best to knock out these light tanks, especially with HESH being able to overpressure tanks. |
=== Pros and cons === | === Pros and cons === | ||
| − | <!-- ''Summarise and briefly evaluate the vehicle in terms of its characteristics and combat effectiveness. Mark its pros and cons in a bulleted list. Try not to use more than 6 points for each of the characteristics. Avoid using categorical definitions such as "bad", "good" and the like - use substitutions with softer forms such as "inadequate" and "effective".'' --> | + | <!-- ''Summarise and briefly evaluate the vehicle in terms of its characteristics and combat effectiveness. Mark its pros and cons in a bulleted list. Try not to use more than 6 points for each of the characteristics. Avoid using categorical definitions such as "bad", "good" and the like - use substitutions with softer forms such as "inadequate" and "effective".'' -->'''Pros:''' |
| − | |||
| − | '''Pros:''' | ||
* Great protection from the front hull against most solid AP rounds. | * Great protection from the front hull against most solid AP rounds. | ||
| − | * Good mobility | + | * Good mobility |
| − | * Great handling and turning | + | * Great handling and turning maneuvers |
* Good gun handling | * Good gun handling | ||
* Great gun at its tier | * Great gun at its tier | ||
| + | * Slightly smaller cupola than the normal M60 | ||
| + | ** Keep in mind this is still a weak spot and APHE can KO your turret. | ||
| + | |||
| + | * | ||
'''Cons:''' | '''Cons:''' | ||
| − | * | + | * 12.7mm M85 HMG was removed |
| − | * Turret mantlet isn't heavily | + | ** Your 105mm cannon is the only option to kill lightly armored vehicles now, such as the R3 T106 |
| + | ** Air targets, will be much harder to kill, though they can still be damaged. | ||
| + | * Turret mantlet isn't heavily armored can be penned easily, even by late WW2 Vehicles. | ||
* Turret ring is a noticeable weak spot | * Turret ring is a noticeable weak spot | ||
| − | * | + | * Weak to HEAT-FS, APDS, and certain AP rounds (Maus, T-10M, IS-7 etc.) |
| − | * | + | |
| + | * | ||
== History == | == History == | ||
<!-- ''Describe the history of the creation and combat usage of the vehicle in more detail than in the introduction. If the historical reference turns out to be too long, take it to a separate article, taking a link to the article about the vehicle and adding a block "/History" (example: <nowiki>https://wiki.warthunder.com/(Vehicle-name)/History</nowiki>) and add a link to it here using the <code>main</code> template. Be sure to reference text and sources by using <code><nowiki><ref></ref></nowiki></code>, as well as adding them at the end of the article with <code><nowiki><references /></nowiki></code>. This section may also include the vehicle's dev blog entry (if applicable) and the in-game encyclopedia description (under <code><nowiki>=== In-game description ===</nowiki></code>, also if applicable).'' --> | <!-- ''Describe the history of the creation and combat usage of the vehicle in more detail than in the introduction. If the historical reference turns out to be too long, take it to a separate article, taking a link to the article about the vehicle and adding a block "/History" (example: <nowiki>https://wiki.warthunder.com/(Vehicle-name)/History</nowiki>) and add a link to it here using the <code>main</code> template. Be sure to reference text and sources by using <code><nowiki><ref></ref></nowiki></code>, as well as adding them at the end of the article with <code><nowiki><references /></nowiki></code>. This section may also include the vehicle's dev blog entry (if applicable) and the in-game encyclopedia description (under <code><nowiki>=== In-game description ===</nowiki></code>, also if applicable).'' --> | ||
| − | + | ''Describe the history of the creation and combat usage of the vehicle in more detail than in the introduction. If the historical reference turns out to be too long, take it to a separate article, taking a link to the article about the vehicle and adding a block "/History" (example: <nowiki>https://wiki.warthunder.com/(Vehicle-name)/History</nowiki>) and add a link to it here using the <code>main</code> template. Be sure to reference text and sources by using <code><nowiki><ref></ref></nowiki></code>, as well as adding them at the end of the article with <code><nowiki><references /></nowiki></code>. This section may also include the vehicle's dev blog entry (if applicable) and the in-game encyclopedia description (under <code><nowiki>=== In-game description ===</nowiki></code>, also if applicable).'' | |
| − | |||
| − | |||
| − | |||
| − | |||
| − | |||
| − | |||
== Media == | == Media == | ||
<!-- ''Excellent additions to the article would be video guides, screenshots from the game, and photos.'' --> | <!-- ''Excellent additions to the article would be video guides, screenshots from the game, and photos.'' --> | ||
| − | + | ''Excellent additions to the article would be video guides, screenshots from the game, and photos.'' | |
| − | |||
| − | |||
| − | |||
== See also == | == See also == | ||
Revision as of 03:42, 6 June 2022
| This page is about the Israeli medium tank Magach 6. For other versions, see Magach (Family). |

Contents
Description
The Magach 6 is a rank Israeli medium tank with a battle rating of (AB), (RB), and (SB). It was introduced in Update "Wind of Change".
General info
Survivability and armour
Armour type:
- Cast homogeneous armour
- Rolled homogeneous armour (Rear roof, Rear)
| Armour | Front (Slope Angle) | Sides | Rear | Roof |
|---|---|---|---|---|
| Hull | 93 mm (65°) Front Glacis
143 mm (55°) Lower Glacis |
74 mm | 41 mm | 20 mm |
| Turret | 127 mm Turret front
152 mm Gun Mantlet |
100 mm - 50.8 mm | 50.8 mm | 24 mm |
| Cupola | 35 mm | 25.4 mm | 25.4 mm | 25.4 mm |
Notes:
Mobility
Write about the mobility of the ground vehicle. Estimate the specific power and manoeuvrability, as well as the maximum speed forwards and backwards.
| Game Mode | Max Speed (km/h) | Weight (tons) | Engine power (horsepower) | Power-to-weight ratio (hp/ton) | |||
|---|---|---|---|---|---|---|---|
| Forward | Reverse | Stock | Upgraded | Stock | Upgraded | ||
| Arcade | Expression error: Unexpected * operator. | 1,162 | Expression error: Unexpected round operator. | __.__ | |||
| Realistic | 663 | Expression error: Unexpected round operator. | __.__ | ||||
Modifications and economy
Armaments
Main armament
Give the reader information about the characteristics of the main gun. Assess its effectiveness in a battle based on the reloading speed, ballistics and the power of shells. Do not forget about the flexibility of the fire, that is how quickly the cannon can be aimed at the target, open fire on it and aim at another enemy. Add a link to the main article on the gun: {{main|Name of the weapon}}. Describe in general terms the ammunition available for the main gun. Give advice on how to use them and how to fill the ammunition storage.
| 105 mm M68 | Turret rotation speed (°/s) | Reloading rate (seconds) | |||||||||||
|---|---|---|---|---|---|---|---|---|---|---|---|---|---|
| Mode | Capacity | Vertical | Horizontal | Stabilizer | Stock | Upgraded | Full | Expert | Aced | Stock | Full | Expert | Aced |
| Arcade | 57 | -9°/+19° | ±180° | N/A | __._ | __._ | __._ | __._ | __._ | _.__ | _.__ | _.__ | _.__ |
| Realistic | __._ | __._ | __._ | __._ | __._ | ||||||||
Ammunition
| Penetration statistics | |||||||
|---|---|---|---|---|---|---|---|
| Ammunition | Type of warhead |
Penetration @ 0° Angle of Attack (mm) | |||||
| 10 m | 100 m | 500 m | 1,000 m | 1,500 m | 2,000 m | ||
| M392A2 | APDS | 303 | 302 | 296 | 277 | 257 | 252 |
| M156 | HESH | 127 | 127 | 127 | 127 | 127 | 127 |
| M152 | HEATFS | 400 | 400 | 400 | 400 | 400 | 400 |
| Shell details | |||||||||
|---|---|---|---|---|---|---|---|---|---|
| Ammunition | Type of warhead |
Velocity (m/s) |
Projectile Mass (kg) |
Fuse delay (m) |
Fuse sensitivity (mm) |
Explosive Mass (TNT equivalent) (g) |
Ricochet | ||
| 0% | 50% | 100% | |||||||
| M392A2 | APDS | 1,478 | 4 | N/A | N/A | N/A | 75° | 78° | 80° |
| M156 | HESH | 732 | 14.85 | 0.1 | 4 | 4,310 | 73° | 77° | 80° |
| M152 | HEATFS | 1,173 | 10.5 | 0.05 | 0.1 | 1,270 | 65° | 72° | 77° |
| Smoke shell characteristics | ||||||
|---|---|---|---|---|---|---|
| Ammunition | Velocity (m/s) |
Projectile Mass (kg) |
Screen radius (m) |
Screen deploy time (s) |
Screen hold time (s) |
Explosive Mass (TNT equivalent) (g) |
| M416 | 730 | 11.4 | 20 | 5 | 25 | 50 |
Ammo racks
| Full ammo |
1st rack empty |
2nd rack empty |
3rd rack empty |
4th rack empty |
5th rack empty |
6th rack empty |
Visual discrepancy |
|---|---|---|---|---|---|---|---|
| 57 | __ (+__) | __ (+__) | __ (+__) | __ (+__) | __ (+__) | __ (+__) | __ |
Machine guns
Offensive and anti-aircraft machine guns not only allow you to fight some aircraft but also are effective against lightly armoured vehicles. Evaluate machine guns and give recommendations on its use.
| 7.62 mm FN MAG 60-40 | ||||
|---|---|---|---|---|
| Mount | Capacity (Belt) | Fire rate | Vertical | Horizontal |
| Commander's Hatch | 1750 (200) | 600 | -10°/+50° | ±120° |
| Pintle Mount
(Loader Side) |
1750 (200) | 600 | -10°/+50° | ±120° |
| 7.62 mm M73 | ||||
|---|---|---|---|---|
| Mount | Capacity (Belt) | Fire rate | Vertical | Horizontal |
| Coaxial | ___ (___) | ___ | __° | __° |
Usage in battles
The Magach 6 plays as the same as the M60, with a slight modifications for the Israeli. If you played the M60 before, then you will feel at home playing the Magach 6
Playing the Magach 6, try not to be at the frontlines of the battle too often and instead, stay a bit farther back, supporting your friendlies that are on the frontlines or provide flanking cover, where the enemy will least expect you to be. Make sure to stay cover to cover if possible, and hide behind hills to reduce the likelihood of being shot. The Magach 6 is quite a tall tank and can be easily spotted moving across terrain. Equipped with the M68 105mm cannon, the Magach 6 can make work of any tank. Usually your main shell will be APDS, as it offers the best overall performance, though HEAT-FS does offer more penetration but has its own set of disadvantages.
If on a map with close quarters battles/urban environments, such as Poland, try to go around and stay outside of the city, and on the flanks to find a position where ambushing enemies are possible. Be aware that most light tanks and certain medium tanks/MBTs can get to a position before you as they have better mobility than you. If you prefer being near the center of the battle, or a map such as Breslau, hang back a bit and support your teammates from the rear, and guard their flanks if needed. Armor at very close range is usually negated, and while you can shrug off a few AP rounds, medium and heavy tanks can still aim at your weak spots and render you out of combat. Try to have a battle buddy if aiming for an objective to reduce the chances of you being surprised/flank. Be aware of lighty armored vehicles such as BMPs or the R3 T106, as the Magach 6 does not have a 50. Caliber HMG unlike its American brother to gun them down, and will require you to time your shot correctly, if they start rushing you, but most likely they will try to play smart as at a quick glance at the Magach 6 will make the players think you are in an M60, where most American vehicles have 50. Caliber HMG on their medium tanks.
With the Magach 6 lacking a 50. Caliber HMG, it will be harder to shoot down air targets without the 50. cal and only having 3 7.62mm machine guns, though it's still better than nothing. With light tanks mentioned above, your main cannon is the only option to kill light tanks. HEAT-FS or HESH would be the best to knock out these light tanks, especially with HESH being able to overpressure tanks.
Pros and cons
Pros:
- Great protection from the front hull against most solid AP rounds.
- Good mobility
- Great handling and turning maneuvers
- Good gun handling
- Great gun at its tier
- Slightly smaller cupola than the normal M60
- Keep in mind this is still a weak spot and APHE can KO your turret.
Cons:
- 12.7mm M85 HMG was removed
- Your 105mm cannon is the only option to kill lightly armored vehicles now, such as the R3 T106
- Air targets, will be much harder to kill, though they can still be damaged.
- Turret mantlet isn't heavily armored can be penned easily, even by late WW2 Vehicles.
- Turret ring is a noticeable weak spot
- Weak to HEAT-FS, APDS, and certain AP rounds (Maus, T-10M, IS-7 etc.)
History
Describe the history of the creation and combat usage of the vehicle in more detail than in the introduction. If the historical reference turns out to be too long, take it to a separate article, taking a link to the article about the vehicle and adding a block "/History" (example: https://wiki.warthunder.com/(Vehicle-name)/History) and add a link to it here using the main template. Be sure to reference text and sources by using <ref></ref>, as well as adding them at the end of the article with <references />. This section may also include the vehicle's dev blog entry (if applicable) and the in-game encyclopedia description (under === In-game description ===, also if applicable).
Media
Excellent additions to the article would be video guides, screenshots from the game, and photos.
See also
Links to the articles on the War Thunder Wiki that you think will be useful for the reader, for example:
- reference to the series of the vehicles;
- links to approximate analogues of other nations and research trees.
External links
Paste links to sources and external resources, such as:
- topic on the official game forum;
- other literature.
| Israeli Ordnance Corps (חיל החימוש) | |
|---|---|
| Medium Tanks | M-51 · M-51 (W) |
| MBTs | |
| Magach | Magach 1 · Magach 2 · Magach 3 · Magach 3 (ERA) · ▃Magach 3 (ERA) · Magach 5 |
| Magach 6 · Magach 6A · Magach 6B · Magach 6C · Magach 6R · Magach 6M · Gal Batash | |
| Sho't | Sho't · Sho't Kal Alef · Sho't Kal Gimel · Sho't Kal Dalet · ▄Sho't Kal Dalet |
| Tiran | Tiran 4 · Tiran 4S |
| Merkava | ▃Merkava Mk.1 · Merkava Mk.1B · Merkava Mk.2B · ▃Merkava Mk.2B · Merkava Mk.2D |
| Merkava Mk.3B · Merkava Mk.3C · ▃Merkava Mk.3D · Merkava Mk.4B · Merkava Mk.4M | |
| Tank destroyers | Zachlam Tager |
| See Also | Chrysler Defense · Department of Tank Design · Morozov Design Bureau |
| Israel medium tanks | |
|---|---|
| M-51 | M-51 · M-51 (W) |
| Magach | Magach 1 · Magach 2 · Magach 3 · Magach 3 (ERA) · Magach 5 · Magach 6 |
| Magach 6A · Magach 6B · Magach 6B Gal · Gal Batash · Magach 6C · Magach 6M · Magach 6R · Magach Hydra · Magach 7C | |
| Tiran | Tiran 4 · Tiran 4S · Tiran 6 |
| Sho't | Sho't · Sho't Kal Alef · Sho't Kal Gimel · Sho't Kal Dalet |
| Merkava | Merkava Mk.1B · Merkava Mk.2B · Merkava Mk.2D · Merkava Mk.3B · Merkava Mk.3C · Ra'am Sagol |
| Merkava Mk.4B · Merkava Mk.4M · Merkava Mk.4 LIC | |
