Difference between revisions of "Vickers Mk.3"
(→Description) |
(→Pros and cons) (Tag: Visual edit) |
||
| (16 intermediate revisions by 9 users not shown) | |||
| Line 1: | Line 1: | ||
| − | |||
| − | |||
| − | |||
| − | |||
| − | |||
{{Specs-Card | {{Specs-Card | ||
|code=uk_vickers_mbt_mk_3 | |code=uk_vickers_mbt_mk_3 | ||
| − | |images={{Specs-Card-Image|GarageImage_{{PAGENAME}}.jpg | + | |images={{Specs-Card-Image|GarageImage_{{PAGENAME}}.jpg}} |
}} | }} | ||
== Description == | == Description == | ||
<!-- ''In the description, the first part should be about the history of the creation and combat usage of the vehicle, as well as its key features. In the second part, tell the reader about the ground vehicle in the game. Insert a screenshot of the vehicle, so that if the novice player does not remember the vehicle by name, he will immediately understand what kind of vehicle the article is talking about.'' The text within these arrows are not to be deleted --> | <!-- ''In the description, the first part should be about the history of the creation and combat usage of the vehicle, as well as its key features. In the second part, tell the reader about the ground vehicle in the game. Insert a screenshot of the vehicle, so that if the novice player does not remember the vehicle by name, he will immediately understand what kind of vehicle the article is talking about.'' The text within these arrows are not to be deleted --> | ||
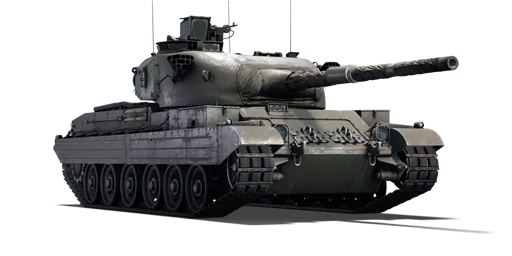
| − | The '''{{Specs|name}}''' | + | The '''{{Specs|name}}''' is a rank {{Specs|rank}} British medium tank {{Battle-rating}}. It was introduced in [[Update "Direct Hit"]]. |
| − | |||
| − | |||
== General info == | == General info == | ||
| Line 19: | Line 12: | ||
{{Specs-Tank-Armour}} | {{Specs-Tank-Armour}} | ||
<!-- ''Describe armour protection. Note the most well protected and key weak areas. Appreciate the layout of modules as well as the number and location of crew members. Is the level of armour protection sufficient, is the placement of modules helpful for survival in combat? If necessary use a visual template to indicate the most secure and weak zones of the armour.'' The text within these arrows are not to be deleted --> | <!-- ''Describe armour protection. Note the most well protected and key weak areas. Appreciate the layout of modules as well as the number and location of crew members. Is the level of armour protection sufficient, is the placement of modules helpful for survival in combat? If necessary use a visual template to indicate the most secure and weak zones of the armour.'' The text within these arrows are not to be deleted --> | ||
| − | + | ''Describe armour protection. Note the most well protected and key weak areas. Appreciate the layout of modules as well as the number and location of crew members. Is the level of armour protection sufficient, is the placement of modules helpful for survival in combat? If necessary use a visual template to indicate the most secure and weak zones of the armour.'' | |
'''Armour type:''' <!-- The types of armour present on the vehicle and their general locations --> | '''Armour type:''' <!-- The types of armour present on the vehicle and their general locations --> | ||
| Line 43: | Line 36: | ||
{{Specs-Tank-Mobility}} | {{Specs-Tank-Mobility}} | ||
<!-- ''Write about the mobility of the ground vehicle. Estimate the specific power and manoeuvrability, as well as the maximum speed forwards and backwards.'' The text within these arrows are not to be deleted --> | <!-- ''Write about the mobility of the ground vehicle. Estimate the specific power and manoeuvrability, as well as the maximum speed forwards and backwards.'' The text within these arrows are not to be deleted --> | ||
| + | ''Write about the mobility of the ground vehicle. Estimate the specific power and manoeuvrability, as well as the maximum speed forwards and backwards.'' | ||
{{tankMobility|abMinHp=1,116|rbMinHp=637}} | {{tankMobility|abMinHp=1,116|rbMinHp=637}} | ||
| Line 73: | Line 67: | ||
==== Ammunition ==== | ==== Ammunition ==== | ||
| − | {{: | + | {| class="wikitable sortable" style="text-align:center" width="100%" |
| + | ! colspan="8" | Penetration statistics | ||
| + | |- | ||
| + | ! rowspan="2" data-sort-type="text" | Ammunition | ||
| + | ! rowspan="2" | Type of<br>warhead | ||
| + | ! colspan="6" | Penetration @ 0° Angle of Attack (mm) | ||
| + | |- | ||
| + | ! 10 m !! 100 m !! 500 m !! 1,000 m !! 1,500 m !! 2,000 m | ||
| + | |- | ||
| + | | M728 || APDS || 260 || 258 || 250 || 240 || 231 || 222 | ||
| + | |- | ||
| + | | Shell L35 || HESH || 127 || 127 || 127 || 127 || 127 || 127 | ||
| + | |- | ||
| + | | M456 || HEATFS || 400 || 400 || 400 || 400 || 400 || 400 | ||
| + | |- | ||
| + | |} | ||
| + | {| class="wikitable sortable" style="text-align:center" width="100%" | ||
| + | ! colspan="10" | Shell details | ||
| + | |- | ||
| + | ! rowspan="2" data-sort-type="text" | Ammunition | ||
| + | ! rowspan="2" | Type of<br>warhead | ||
| + | ! rowspan="2" | Velocity<br>(m/s) | ||
| + | ! rowspan="2" | Projectile<br>Mass (kg) | ||
| + | ! rowspan="2" | Fuse delay<br>(m) | ||
| + | ! rowspan="2" | Fuse sensitivity<br>(mm) | ||
| + | ! rowspan="2" | Explosive Mass<br>(TNT equivalent) (g) | ||
| + | ! colspan="3" | Ricochet | ||
| + | |- | ||
| + | ! 0% !! 50% !! 100% | ||
| + | |- | ||
| + | | M728 || APDS || 1,426 || 4.65 || N/A || N/A || N/A || 75° || 78° || 80° | ||
| + | |- | ||
| + | | Shell L35 || HESH || 730 || 11.4 || 0.05 || 0.1 || 3,150 || 73° || 77° || 80° | ||
| + | |- | ||
| + | | M456 || HEATFS || 1,173 || 10.5 || 0.05 || 0.1 || 1,270 || 65° || 72° || 77° | ||
| + | |- | ||
| + | |} | ||
==== [[Ammo racks]] ==== | ==== [[Ammo racks]] ==== | ||
| Line 140: | Line 170: | ||
== Usage in battles == | == Usage in battles == | ||
<!-- ''Describe the tactics of playing in the vehicle, the features of using vehicles in the team and advice on tactics. Refrain from creating a "guide" - do not impose a single point of view but instead give the reader food for thought. Describe the most dangerous enemies and give recommendations on fighting them. If necessary, note the specifics of the game in different modes (AB, RB, SB).'' The text within these arrows are not to be deleted --> | <!-- ''Describe the tactics of playing in the vehicle, the features of using vehicles in the team and advice on tactics. Refrain from creating a "guide" - do not impose a single point of view but instead give the reader food for thought. Describe the most dangerous enemies and give recommendations on fighting them. If necessary, note the specifics of the game in different modes (AB, RB, SB).'' The text within these arrows are not to be deleted --> | ||
| − | + | ''Describe the tactics of playing in the vehicle, the features of using vehicles in the team and advice on tactics. Refrain from creating a "guide" - do not impose a single point of view but instead give the reader food for thought. Describe the most dangerous enemies and give recommendations on fighting them. If necessary, note the specifics of the game in different modes (AB, RB, SB).'' | |
| − | |||
| − | |||
| − | |||
| − | |||
| − | |||
| − | |||
| − | |||
| − | |||
| − | |||
| − | |||
| − | |||
| − | |||
| − | |||
| − | |||
| − | |||
| − | |||
=== Pros and cons === | === Pros and cons === | ||
<!-- ''Summarise and briefly evaluate the vehicle in terms of its characteristics and combat effectiveness. Mark its pros and cons in a bulleted list. Try not to use more than 6 points for each of the characteristics. Avoid using categorical definitions such as "bad", "good" and the like - use substitutions with softer forms such as "inadequate" and "effective".'' The text within these arrows are not to be deleted --> | <!-- ''Summarise and briefly evaluate the vehicle in terms of its characteristics and combat effectiveness. Mark its pros and cons in a bulleted list. Try not to use more than 6 points for each of the characteristics. Avoid using categorical definitions such as "bad", "good" and the like - use substitutions with softer forms such as "inadequate" and "effective".'' The text within these arrows are not to be deleted --> | ||
| + | ''Summarise and briefly evaluate the vehicle in terms of its characteristics and combat effectiveness. Mark its pros and cons in a bulleted list. Try not to use more than 6 points for each of the characteristics. Avoid using categorical definitions such as "bad", "good" and the like - use substitutions with softer forms such as "inadequate" and "effective".'' | ||
'''Pros:''' | '''Pros:''' | ||
| − | * | + | * Access to a HEAT-FS shell which is a rarity among British tanks |
| − | * | + | * One of the first tanks in the British tree to get the laser rangefinder |
| − | * Gun depression | + | * Stock APDS shell trades flat penetration for better angled pen |
| − | * | + | * Gun depression of 10 degrees, unlike Vickers Mk.1 |
| − | + | * Mobility on par with Mk.1, including better-than-average reverse speed for a British tank | |
| − | * | + | * 10x zoom is also above average... |
| + | |||
| + | * | ||
'''Cons:''' | '''Cons:''' | ||
| − | * | + | * ...but it's the only option available which can be inconvenient while aiming at closer targets |
| − | + | * Even after the turret upgrade the armour of Vickers Mk.3 is poor and can usually stop fire only from smaller caliber autocannons | |
* The large ammo rack in the front is still present | * The large ammo rack in the front is still present | ||
| − | * | + | * Lower caliber machine guns don't offer much penetration and [[L21A1 (12.7 mm)|12.7mm rangefinder MG]] fires only incendiary bullets that have even lower pen |
| + | * Early grind can be underwhelming, before acquiring essential modules Vickers Mk.3 is basically just the Mk.1 and better gun depression | ||
| + | |||
| + | * | ||
== History == | == History == | ||
| Line 183: | Line 203: | ||
== Media == | == Media == | ||
<!-- ''Excellent additions to the article would be video guides, screenshots from the game, and photos.'' --> | <!-- ''Excellent additions to the article would be video guides, screenshots from the game, and photos.'' --> | ||
| − | + | ''Excellent additions to the article would be video guides, screenshots from the game, and photos.'' | |
| − | |||
| − | |||
| − | |||
== See also == | == See also == | ||
| Line 201: | Line 218: | ||
* ''topic on the official game forum;'' | * ''topic on the official game forum;'' | ||
* ''other literature.'' --> | * ''other literature.'' --> | ||
| + | ''Paste links to sources and external resources, such as:'' | ||
| − | * | + | * ''topic on the official game forum;'' |
| + | * ''other literature.'' | ||
| − | |||
{{Britain medium tanks}} | {{Britain medium tanks}} | ||
Revision as of 17:43, 25 September 2021

Contents
Description
The Vickers Battle Tank Mk.3 is a rank British medium tank with a battle rating of (AB), (RB), and (SB). It was introduced in Update "Direct Hit".
General info
Survivability and armour
Describe armour protection. Note the most well protected and key weak areas. Appreciate the layout of modules as well as the number and location of crew members. Is the level of armour protection sufficient, is the placement of modules helpful for survival in combat? If necessary use a visual template to indicate the most secure and weak zones of the armour.
Armour type:
| Armour | Front (Slope angle) | Sides | Rear | Roof |
|---|---|---|---|---|
| Hull | ___ mm | ___ mm Top ___ mm Bottom |
___ mm | ___ - ___ mm |
| Turret | ___ - ___ mm Turret front ___ mm Gun mantlet |
___ - ___ mm | ___ - ___ mm | ___ - ___ mm |
| Cupola | ___ mm | ___ mm | ___ mm | ___ mm |
Notes:
Mobility
Write about the mobility of the ground vehicle. Estimate the specific power and manoeuvrability, as well as the maximum speed forwards and backwards.
| Game Mode | Max Speed (km/h) | Weight (tons) | Engine power (horsepower) | Power-to-weight ratio (hp/ton) | |||
|---|---|---|---|---|---|---|---|
| Forward | Reverse | Stock | Upgraded | Stock | Upgraded | ||
| Arcade | Expression error: Unexpected * operator. | 1,116 | Expression error: Unexpected round operator. | __.__ | |||
| Realistic | 637 | Expression error: Unexpected round operator. | __.__ | ||||
Modifications and economy
Armaments
Main armament
| 105 mm Royal Ordnance L7A1 | Turret rotation speed (°/s) | Reloading rate (seconds) | |||||||||||
|---|---|---|---|---|---|---|---|---|---|---|---|---|---|
| Mode | Capacity | Vertical | Horizontal | Stabilizer | Stock | Upgraded | Full | Expert | Aced | Stock | Full | Expert | Aced |
| Arcade | 50 | -10°/+20° | ±180° | Two-plane | 26.4 | 36.5 | 44.3 | 49.0 | 52.1 | 8.71 | 7.70 | 7.10 | 6.70 |
| Realistic | 16.5 | 19.4 | 23.5 | 26.0 | 27.7 | ||||||||
Ammunition
| Penetration statistics | |||||||
|---|---|---|---|---|---|---|---|
| Ammunition | Type of warhead |
Penetration @ 0° Angle of Attack (mm) | |||||
| 10 m | 100 m | 500 m | 1,000 m | 1,500 m | 2,000 m | ||
| M728 | APDS | 260 | 258 | 250 | 240 | 231 | 222 |
| Shell L35 | HESH | 127 | 127 | 127 | 127 | 127 | 127 |
| M456 | HEATFS | 400 | 400 | 400 | 400 | 400 | 400 |
| Shell details | |||||||||
|---|---|---|---|---|---|---|---|---|---|
| Ammunition | Type of warhead |
Velocity (m/s) |
Projectile Mass (kg) |
Fuse delay (m) |
Fuse sensitivity (mm) |
Explosive Mass (TNT equivalent) (g) |
Ricochet | ||
| 0% | 50% | 100% | |||||||
| M728 | APDS | 1,426 | 4.65 | N/A | N/A | N/A | 75° | 78° | 80° |
| Shell L35 | HESH | 730 | 11.4 | 0.05 | 0.1 | 3,150 | 73° | 77° | 80° |
| M456 | HEATFS | 1,173 | 10.5 | 0.05 | 0.1 | 1,270 | 65° | 72° | 77° |
Ammo racks

| Full ammo |
1st rack empty |
2nd rack empty |
3rd rack empty |
4th rack empty |
Visual discrepancy |
|---|---|---|---|---|---|
| 50 | 39 (+11) | 35 (+15) | 10 (+40) | 1 (+49) | No |
Notes:
- Shells are modeled individually and disappear after having been shot or loaded.
- Racks 1 and 2 deplete from left to right.
- Rack 4 is a first stage ammo rack. It totals 9 shells and gets filled first when loading up the tank.
- This rack is also emptied early: the rack depletion order at full capacity is: 4 - 1 - 2 - 3.
- Simply not firing when the gun is loaded will move ammo from racks 1-3 into rack 4. Firing will interrupt the restocking of the ready racks.
Additional armament
| 12.7 mm L21A1 | ||||
|---|---|---|---|---|
| Mount | Capacity (Belt) | Fire rate | Vertical | Horizontal |
| Coaxial | 1,000 (3) | 300 | N/A | N/A |
Machine guns
| 7.62 mm FN MAG 60-40 | ||||
|---|---|---|---|---|
| Mount | Capacity (Belt) | Fire rate | Vertical | Horizontal |
| Pintle | 2,000 (200) | 600 | -10°/+50° | ±120° |
| 7.62 mm L3A1 | ||||
|---|---|---|---|---|
| Mount | Capacity (Belt) | Fire rate | Vertical | Horizontal |
| Coaxial | 3,000 (250) | 500 | N/A | N/A |
Usage in battles
Describe the tactics of playing in the vehicle, the features of using vehicles in the team and advice on tactics. Refrain from creating a "guide" - do not impose a single point of view but instead give the reader food for thought. Describe the most dangerous enemies and give recommendations on fighting them. If necessary, note the specifics of the game in different modes (AB, RB, SB).
Pros and cons
Summarise and briefly evaluate the vehicle in terms of its characteristics and combat effectiveness. Mark its pros and cons in a bulleted list. Try not to use more than 6 points for each of the characteristics. Avoid using categorical definitions such as "bad", "good" and the like - use substitutions with softer forms such as "inadequate" and "effective".
Pros:
- Access to a HEAT-FS shell which is a rarity among British tanks
- One of the first tanks in the British tree to get the laser rangefinder
- Stock APDS shell trades flat penetration for better angled pen
- Gun depression of 10 degrees, unlike Vickers Mk.1
- Mobility on par with Mk.1, including better-than-average reverse speed for a British tank
- 10x zoom is also above average...
Cons:
- ...but it's the only option available which can be inconvenient while aiming at closer targets
- Even after the turret upgrade the armour of Vickers Mk.3 is poor and can usually stop fire only from smaller caliber autocannons
- The large ammo rack in the front is still present
- Lower caliber machine guns don't offer much penetration and 12.7mm rangefinder MG fires only incendiary bullets that have even lower pen
- Early grind can be underwhelming, before acquiring essential modules Vickers Mk.3 is basically just the Mk.1 and better gun depression
History
Describe the history of the creation and combat usage of the vehicle in more detail than in the introduction. If the historical reference turns out to be too long, take it to a separate article, taking a link to the article about the vehicle and adding a block "/History" (example: https://wiki.warthunder.com/(Vehicle-name)/History) and add a link to it here using the main template. Be sure to reference text and sources by using <ref></ref>, as well as adding them at the end of the article with <references />. This section may also include the vehicle's dev blog entry (if applicable) and the in-game encyclopedia description (under === In-game description ===, also if applicable).
Media
Excellent additions to the article would be video guides, screenshots from the game, and photos.
See also
Links to the articles on the War Thunder Wiki that you think will be useful for the reader, for example:
- reference to the series of the vehicles;
- links to approximate analogues of other nations and research trees.
External links
Paste links to sources and external resources, such as:
- topic on the official game forum;
- other literature.
| Britain medium tanks | |
|---|---|
| Valentine | Valentine I · Valentine IX · Valentine XI |
| Cromwell | Cromwell I · Cromwell V · Cromwell V (RP-3) |
| Cromwell derivatives | Challenger · Avenger · Comet I · Comet I "Iron Duke IV" · Charioteer Mk VII |
| Centurion | Centurion Mk 1 · Centurion Mk.2 · Centurion Mk 3 · Centurion Mk.5 AVRE · Centurion Mk 10 · Centurion Action X · FV4202 |
| Vickers MBT | Vickers Mk.1 · Vickers Mk.3 · Vickers Mk.7 |
| Chieftain | Chieftain Mk 3 · Chieftain Mk 5 · Chieftain Mk 10 |
| Challenger 1 | Challenger Mk.2 · Challenger Mk.3 · Challenger DS |
| Challenger 2 | Challenger 2 · Challenger 2 (2F) · Challenger 2 TES · Challenger 2 OES · Challenger 2E · Challenger 2 Black Night |
| Challenger 3 | Challenger 3 TD |
| Australia | A.C.I · A.C.IV · Centurion Mk.5/1 |
| South Africa | Olifant Mk.1A · Olifant Mk.2 · TTD |
| India | Vijayanta · Bhishma TWMP |
| Israel | ▄Sho't Kal Dalet |
| Jordan | Khalid |
| Sweden | ▄Strv 81 (RB 52) |
| USA | Grant I · Sherman II · Sherman Firefly · Sherman IC "Trzyniec" |
