Karelia
| Game Modes | ||||
|---|---|---|---|---|
Contents
Overview
Karelia is a ground forces map available in all modes. It was the first ever ground forces map, appearing in the first ground forces announcement on the 13th November 2013, and as the sole map in the first ground forces Closed Beta Test (CBT) on the 4th December 2013. It was released with the ground forces Open Beta Test (OBT) in Update 1.41.
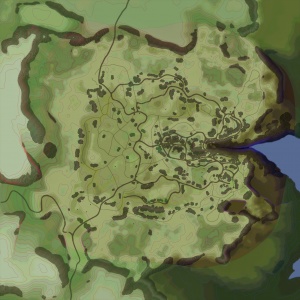
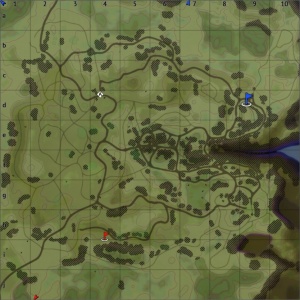
The map is set in a rocky mountainous area, with reasonably uneven terrain; the difference in elevation between parts of the map is larger than in most other locations. Engagements can occur at all ranges, although medium and short ranges are most common, as there are limited areas open enough to provide a clear shot at long range. Frequent bumps and rocks in the terrain provide cover, and the option of going hull-down.
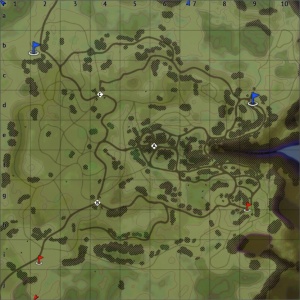
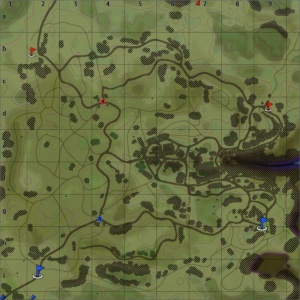
The map is split into three distinct areas, each with their own playstyle. The east of the map is based around a large, deep, canyon that cuts through the map separating the spawns of the two teams. Anyone that falls into the canyon, if not killed instantly, will find it impossible to get back out. Spawn points are located on each side of the canyon, separated from the combat area. Teams try to kill enemy tanks on the other side of the canyon; this can lead to a stalemate where both teams dig in behind cover and exchange shots, with little effect. Players can climb the steep rocky hills on each side of the canyon to get shots into enemy tanks, in what would usually be safe positions, and engage enemy tanks with similar ideas on the opposing hill. Doing this however leaves the player much more exposed to enemy fire, so it is recommended to shoot and immediately retreat back into cover while you reload. At the west end of the canyon, where it meets the centre hill, there is a small passage allowing tanks to cross the canyon. Control of this point is significant as once an enemy tank has crossed the canyon they can shoot at any tanks hiding behind cover, on the canyon edge, or advance into the enemy spawn. Alternatively players can engage enemy tanks on the centre hill from a direction they would not be expecting. Players will usually try and advance along the canyon edge, using rocks as cover, with the aim of reaching the crossing, or centre capture point.
The middle of the map is taken up by a large rocky hill, the top of which often acts as a capture point. The area provides a good location for short range, close quarters fighting, around the rocks on the top of the hill. The western edge of the hill provides a good vantage point to shoot down on players in the low lying west of the map. Additionally on the east of the hill there is a location that allows players to shoot down onto the road, which runs along the north of the canyon. The hill can be reached from the roads that run along sides the east canyon, or from roads running up the north and south faces of the hill. There is also a road running straight down the western face, which although in some situations the most direct route, leaves players very exposed to fire from the west of the map, while climbing the hill.
The west of the map is more open and lower lying, than the other areas. The terrain is uneven and lightly forested, with small hills and rocks to provide cover. Spawn points are on rocky hills in the north and south, with roads leading down into the western area. There are two concrete paved areas, flanked with pillboxes and rocks, in the north and south of the western area which are used as capture points. In the very west of the map there is a low road, separated from the rest of a map by a tree covered hill, which allows tanks to rapidly move across the map; and set up ambush positions near the enemy spawn.
The tank battles area is 1.3km x 1.3km and the air battles map is 16km x 16km, making it the smallest aircraft map in the game (excluding the island air race map).
Game Description
Soviet and German armies ran into a fight for possession of a coastal area in the north of the country.
Historical Background
The map takes place in a fictional location, based (as the name suggests) in Karelia, a region in Northern Europe, located on the border of modern day Russia and Finland. For more historical information about the conflicts between Finland and the Soviet Union during WW2 see the Finland map article (the Finland map is located in the Karelian Isthmus, a small distance southwest of the Republic of Karelia).
Notable Landmarks
Map configuration
Domination
There are three Capture Points. Point A is on the centre hill, B is in the southern capture area, and C is in the northern capture area.
Conquest
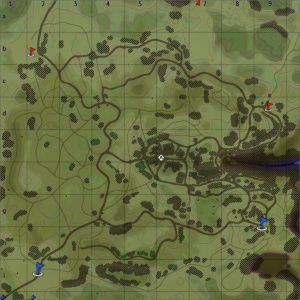
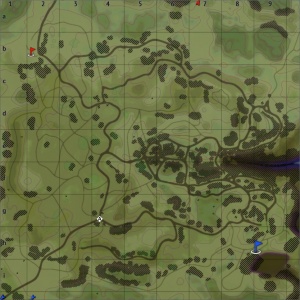
There is are three configurations of the conquest mode, each with one Capture Point. The point will be in one of the locations that appear in domination mode.
Battle
There are two capture points, each owned by one of the teams. The points are in the northwestern and southwestern capture areas.
Strategy
Describe what focus a team should have when spawning into the map
Media
- Videos
See also
Links to the articles on the War Thunder Wiki that you think will be useful for the reader, for example:
- reference to related locations


