Spj fm/43-44
Contents
Description
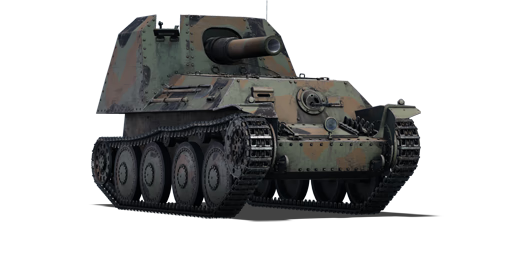
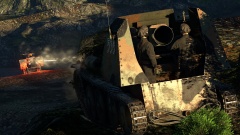
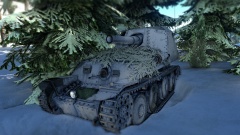
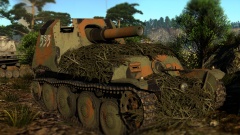
The Stormpjäs fm/43-44 (shortened Spj fm/43-44) is a rank Swedish tank destroyer with a battle rating of (AB), (RB), and (SB). It was introduced in Update 1.97 "Viking Fury".
General info
Survivability and armour
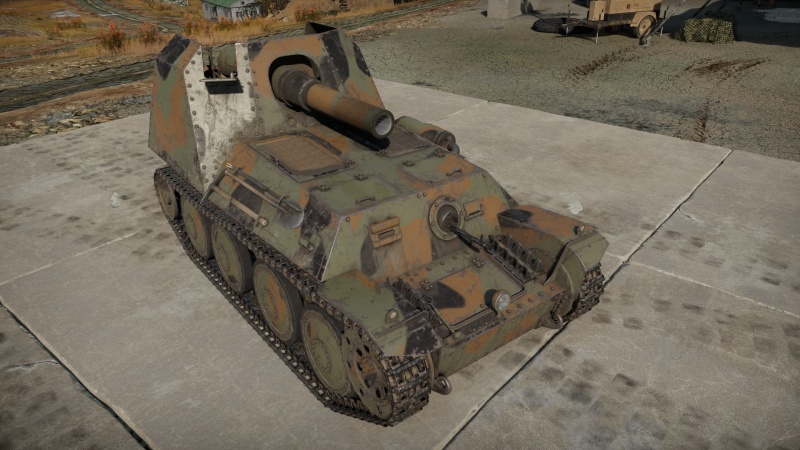
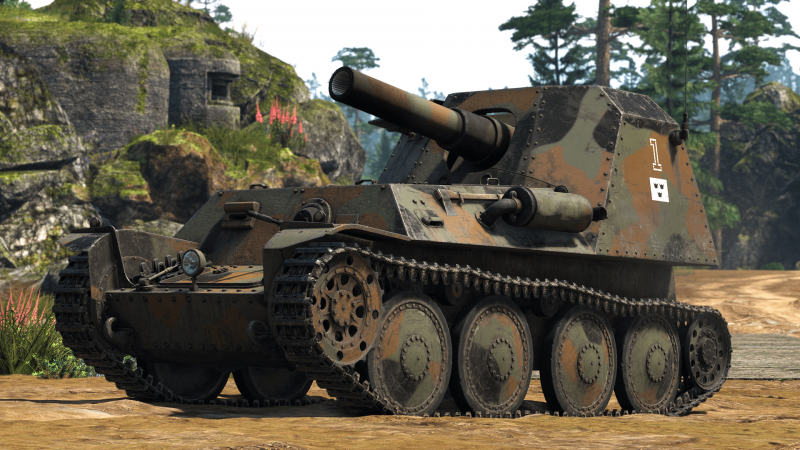
The fm/43-44 is a deceptively survivable vehicle from the front. Open-topped high-calibre tank destroyers and SPGs are seldom very well armoured, but this example is the exception, with 50 mm of armour covering the upper and lower plate as well as the turret face, with the tapering sides being 30 mm. The only frontal weak point of this vehicle is the shield directly protecting the breech, which is only 15 mm.
It's also manned by 5 crew members, two in the hull and three in the back, which really helps its survivability. Most of the cannons you'll be encountering around this battle rating are quite low calibre, meaning it will take a fair few rounds penetrating this vehicle to knock out all the crew. Additionally, it's nearly impossible to knock out this vehicle without detonating the ammo, as the crew in the front and back are completely separate from each other, so a shot entering one compartment won't cause any damage to the other, so after taking a shot you'll still either be able to fire the gun, or drive away, which is a huge advantage. A drawback of this vehicle though is in regards to its protection from the air, the crew operating the cannon have no armour protecting them from incoming air strafing, so even aircraft with weak machine guns can slowly chip away at this vehicle, additionally its also very vulnerable to artillery.
Armour type:
- Rolled homogeneous armour
| Armour | Front (Slope angle) | Sides | Rear | Roof |
|---|---|---|---|---|
| Hull | 50(16°)mm lower Plate
15(74°)mm middle Plate 50(24°)mm upper Plate |
15(41°) mm Top 15 mm Bottom |
10-15(14°) mm | 5-8 mm |
| Turret | 30-50(27-24°) mm Turret front 15 mm Gun shield |
15(43°) mm Upper
15(9°) mm Lower |
N/A | N/A |
Notes:
- Tracks, suspension bogies and wheels are all 15 mm thick.
- Belly armour is 15 mm thick.
Mobility
| Game Mode | Max Speed (km/h) | Weight (tons) | Engine power (horsepower) | Power-to-weight ratio (hp/ton) | |||
|---|---|---|---|---|---|---|---|
| Forward | Reverse | Stock | Upgraded | Stock | Upgraded | ||
| Arcade | Expression error: Unexpected * operator. | 227 | Expression error: Unexpected round operator. | __.__ | |||
| Realistic | 142 | Expression error: Unexpected round operator. | __.__ | ||||
The mobility of this vehicle as well is deceptively effective. It can reach a max speed off-road of 42 km/h in RB modes, and 46 km/h in AB modes. It won't outpace many light vehicles, but it certainly isn't slow, and can easily cruise faster than most contemporary tank destroyers and medium tanks. Once upgraded, its hull traverse as well is effective, it can turn from stationary to re-position the gun and change direction easily, which is important for a turretless vehicle like this one. Its reverse speed is about average at 5 km/h, which will be enough to back out of sight into cover, but it won't save you if you're out in the open, so the lack of a fast reverse gear should play into where you choose to position.
Modifications and economy
Armaments
Main armament
This vehicle is equipped with a 150 mm recoilless rifle with a small ammo pool of only 10 rounds. It's only equipped with a single ammo type, a standard HE round which sports huge damage potential if it connects with an enemy vehicle, in most engagements with conventional tanks you will only need to connect the round to the vehicle to knock them out in a single shot, which eliminates the tedium spent aiming for particular weak points, which isn't very easy for this vehicle as the muzzle velocity is quite slow at only 285 m/s, meaning that ranging in the gun can be quite tricky. Another slight drawback is the gun depression, at only -4°, this does somewhat limit the locations you can play effectively, as this vehicle can't use many hills or ridge lines to shoot over.
As well as this, the reload is fairly long at 19.5 seconds stock, so if you miss a shot this vehicle will be quite vulnerable, especially considering that the average reload of small calibre guns around this battle rating is around 4 seconds, so an enemy could potentially fire on you 5 times before you reload.
Because of this, it's recommended that you use the rangefinder when engaging enemies that aren't aware of you, this way you can almost guarantee the round connects, although it's not wise to spend the time rangefinding if an enemy is aware of you, as in the time you spend sitting and waiting for the range to come in, your enemy will likely be firing at you and knocking out your crew. Ultimately this round won't have any trouble knocking out the vast majority of vehicles you can meet around the battle rating, the only challenging vehicle will be the French B1 Bis, if you engaging one of these tanks it's recommended to aim your shot for just beneath the turret, as this will cripple the tank, avoid hitting the front plate as this likely will result in no damage.
| 150 mm fsthaub m/02 | Turret rotation speed (°/s) | Reloading rate (seconds) | |||||||||||
|---|---|---|---|---|---|---|---|---|---|---|---|---|---|
| Mode | Capacity | Vertical | Horizontal | Stabilizer | Stock | Upgraded | Full | Expert | Aced | Stock | Full | Expert | Aced |
| Arcade | 10 | -4°/+10° | ±12° | N/A | 7.0 | 9.8 | 11.8 | 13.1 | 13.9 | 19.50 | 17.25 | 15.90 | 15.00 |
| Realistic | 4.8 | 5.6 | 6.8 | 7.5 | 8.0 | ||||||||
Ammunition
| Penetration statistics | |||||||
|---|---|---|---|---|---|---|---|
| Ammunition | Type of warhead |
Penetration @ 0° Angle of Attack (mm) | |||||
| 10 m | 100 m | 500 m | 1,000 m | 1,500 m | 2,000 m | ||
| sgr m/38 | HE | 48 | 48 | 48 | 48 | 48 | 48 |
| Shell details | ||||||||||||
|---|---|---|---|---|---|---|---|---|---|---|---|---|
| Ammunition | Type of warhead |
Velocity (m/s) |
Projectile mass (kg) |
Fuse delay (m) |
Fuse sensitivity (mm) |
Explosive mass (TNT equivalent) (kg) |
Ricochet | |||||
| 0% | 50% | 100% | ||||||||||
| sgr m/38 | HE | 285 | 37 | 0 | 0.1 | 5.8 | 79° | 80° | 81° | |||
Ammo racks
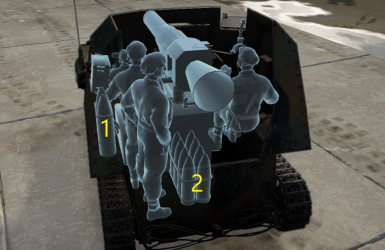
| Full ammo |
1st rack empty |
2nd rack empty |
Visual discrepancy |
|---|---|---|---|
| 10 | 9 (+1) | 1 (+9) | No |
Machine guns
The fm/43-44 is also equipped with a hull mounted 8 mm ksp m/36 machine gun, it has no viability against armoured targets but can knock out exposed crew members of enemy vehicles. It's recommended to select it directly when using it however as aiming it accurately by eye isn't very easy.
| 8 mm ksp m/36 | ||||
|---|---|---|---|---|
| Mount | Capacity (Belt) | Fire rate | Vertical | Horizontal |
| Hull | 2,000 (250) | 648 | ±10° | ±10° |
Usage in battles
The main trick to doing well in the fm/43-44 is to stay around cover, and to not advance too far into the map on your own. Due to the reload you can't afford to get caught out at close range as if you're unable to fire, an enemy can quite easily flank and disable you. To stay in the fight it's imperative you stay around some form of hard cover to retreat behind to reload, as this is the only time that you're really vulnerable.
Another choice to make is at what range you're going to engage at, and there are notable drawbacks and advantages for each distance. At close range the cannon is very very easy to aim which will land you a lot of easy kills, however it is much too easy to get caught out here, if you miss a shot an enemy has plenty of time to rush and flank you, as well as this even if you do land a shot and knock an enemy out, enemy enemies that are aware of you in the surrounding area will know they safely have at least 15 seconds to rush you while you're on reload. At long range your armour will be very effective, the weak spots are very hard to hit here and some enemies might not even be able to get through the casemate itself, but as the muzzle velocity on the round is so low, hitting targets at this distance is very tricky, and considering as you only have 10 rounds, you can't really afford to miss very much, as each shot fired takes up 10% of your ammunition effectively.
At long range you're much more survivable but much less effective at taking out enemies, and at close range it's much the reverse, able to engage enemies easily at the detriment of being much more vulnerable. The Goldilocks principle in this situation is as the analogy goes- 'in the middle', where you have the best of both worlds, in essence all you really need to do is position yourself in a location around hard cover, and far enough away that an enemy can't rush you on your reload cycle, this is the ideal spot to be to maximise your survivability and combat effectiveness, if you are in this sort of position and watching a corner or sight-line, it's a good idea to rangefind that corner or sight-line as when an enemy appears you'll already have the perfect range, this really is the idea spot for consistency, there are a few smaller caveats to consider however. As this vehicle is so vulnerable from the air it's a good idea to position yourself around some form of lateral cover, some buildings, a hill, some trees etc- just to give you a slight advantage when hiding from enemies. Another spot in the map to position yourself around would be a friendly capture point, if you're running out of ammunition you can simply drive onto one to replenish your stores, which won't always be necessary but if you start to notice you only have a few rounds left it'd be a good idea to make your way towards one.
If you're confident with your map knowledge or playing with some friends you can use this vehicle to be a bit more aggressive, as the armour is still very effective and if you have support from friends watching your flanks you can really be a battering ram for the team as no enemy vehicle is safe from your cannon, if this way of playing does sound appealing in any case try to stick around some friendly tanks, as they will be able to help you if you get caught out.
Pros and cons
Pros:
- Incredibly high damage output from the main gun
- Effective even when up-tiered
- Decent mobility
- Effective armour against low-tier vehicles; frontal armour sufficient against light autocannons and .50 cal machine guns
- Five crew members spread out within the vehicle, offering protection against being knocked out by a single shot
- High survivability against solid-shot munitions
Cons:
- Vulnerable to artillery strikes and strafing aircraft
- Long reload time
- Low ammo count (10 rounds)
- Poor gun depression at only -4°
- Slow muzzle velocity
History
After the experimental Stormartilleripjäs fm/43 project, the Swedish army procurement division, known as the KAFT, asked Scania-Vabis on 11 November 1943, to design and build a prototype for a self-propelled gun with a rear-mounted superstructure. It was to be based off of the Spj fm/43 but with the engine moved forward and the fighting compartment moved to the rear; it retained the open-topped superstructure from earlier designs. The Stormartilleripjäs fm/43-44 (shortened to Spj fm/43-44) gained the nickname 'Trätoffelvagnen', meaning 'clog wagen' in English.
The Spj fm/43-44 was armed with a 150 mm recoilless rifle called the fsthaub m/02, a longer version of the gun mounted on the Spj fm/43. It weighed 10 tons and had a crew of five men: two loaders, a gunner/commander, a driver, and a machine gunner. The driver and machine gunner were located in front of the engine in the hull, while the rest of the crew was situated in the open superstructure at the rear of the vehicle.
The prototype was completed in August 1944, and it test fired seventeen rounds on 18 August, achieving a fire rate of four rounds per minute (15 seconds of reload). The vehicle later went on to mount different guns before the project ended in 1945, resulting in its use as a training vehicle.
Media
- Skins
- Images
See also
- Vehicles equipped with the same chassis
- Related development
- Other vehicles of similar configuration and role
External links
Paste links to sources and external resources, such as:
- topic on the official game forum;
- other literature.
| AB Scania-Vabis | |
|---|---|
| Light Tanks | |
| Strv m/41 | Strv m/41 S-I · Strv m/41 S-II |
| Tank Destroyers | |
| Strv m/41 | Spj fm/43-44 |
| Sav m/43 | Sav m/43 (1944) · Sav m/43 (1946) |
| Sweden tank destroyers | |
|---|---|
| Strv m/41 derivatives | Spj fm/43-44 · Sav m/43 (1944) · Sav m/43 (1946) · Pvkv II · Pvkv III |
| Ikv 72/103 | Ikv 72 · Ikv 103 |
| Pvkv m/43 | Pvkv m/43 (1946) · Pvkv m/43 (1963) |
| ATGM | UDES 33 · Pbv 302 (BILL) · Pvrbv 551 |
| Other | SAV 20.12.48 · Bkan 1C |
| Norway | VIDAR |


